> ## Documentation Index
> Fetch the complete documentation index at: https://docs.alvys.com/llms.txt
> Use this file to discover all available pages before exploring further.
# How to Create a Load
> Keeping track of all the info can be a daunting task. Luckily, we are here to make it easy to enter the information and keep it in one place
Creating a new load in Alvys sets up the shipment record, assigns the customer, and defines all pickup and delivery stops. Also called a shipment, order, or freight order.
## Overview
A load is the core record in Alvys. It captures the customer, billing details, stop schedule, and equipment requirements for a single shipment. Every dispatched trip, invoice, and driver settlement traces back to a load. You can create a revenue load (billed to a customer) or a non-revenue load (an internal or deadhead move with no customer invoice).
This article walks through creating a load from start to finish using the New Load form. Synonyms: add a load, build a load, new shipment, create an order, enter freight.
## Watch the walkthrough
If a screen in the video looks different, follow the written steps below.
[Open the recording](https://www.loom.com/share/a44e26ead29242079b913ee9d9481f46)
To create a load from a customer rate confirmation instead of typing the form, see [How to create a load using automated data entry](/en/help/loads-trips/how-to-create-a-load-using-automated-data-entry).
## Before You Start
All authenticated Alvys users can create a load; no additional permission is required.
Before beginning, confirm you have the following information on hand:
* The customer name (or be ready to create a new customer record)
* An order number (the customer's reference number for this shipment)
* Equipment type required for the load
* Pickup location, date, and time
* Delivery location, date, and time
For non-revenue loads, a customer is not required, but you still need at least one pickup stop and one delivery stop.
## Steps
### 1. Open the New Load form
In the left navigation, find the plus icon and click **New Load**.
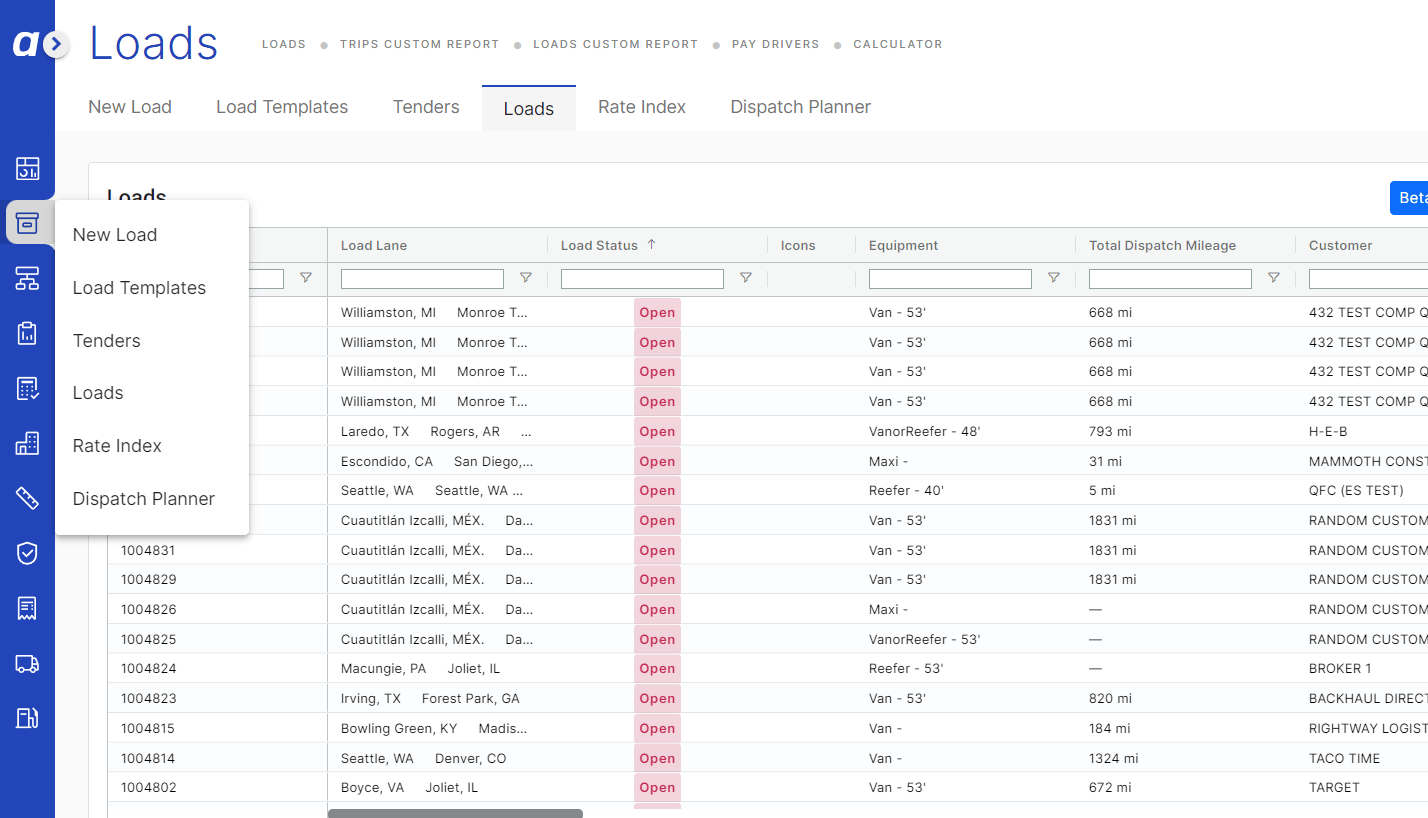 *Left navigation expanded and "New Load" option highlighted*
### 2. Select the load entry method
1. **Select the creation method (top left):**
* **New Load** — Standard single-load manual entry form.
* **Bulk Upload** — Opens the file import tool (`.xlsx` format, up to **50 MB**; template download included).
* **From Template** — Opens saved templates to quickly duplicate recurring loads.
2. **Set special parameters (top right):**
* Check **Save as Template** if you want to store this load's setup for recurring routes.
* Toggle **Non-Revenue Load** if this is an unbilled driver movement.
3. **Choose the data entry style (main screen):**
* **AI Extraction (left side):** Upload your Rate Confirmation file (max **4 MB**) — Alvys AI parses the document and fills in the details automatically.
* **Manual Entry (right side):** Enter all trip and rate parameters manually.
*Left navigation expanded and "New Load" option highlighted*
### 2. Select the load entry method
1. **Select the creation method (top left):**
* **New Load** — Standard single-load manual entry form.
* **Bulk Upload** — Opens the file import tool (`.xlsx` format, up to **50 MB**; template download included).
* **From Template** — Opens saved templates to quickly duplicate recurring loads.
2. **Set special parameters (top right):**
* Check **Save as Template** if you want to store this load's setup for recurring routes.
* Toggle **Non-Revenue Load** if this is an unbilled driver movement.
3. **Choose the data entry style (main screen):**
* **AI Extraction (left side):** Upload your Rate Confirmation file (max **4 MB**) — Alvys AI parses the document and fills in the details automatically.
* **Manual Entry (right side):** Enter all trip and rate parameters manually.
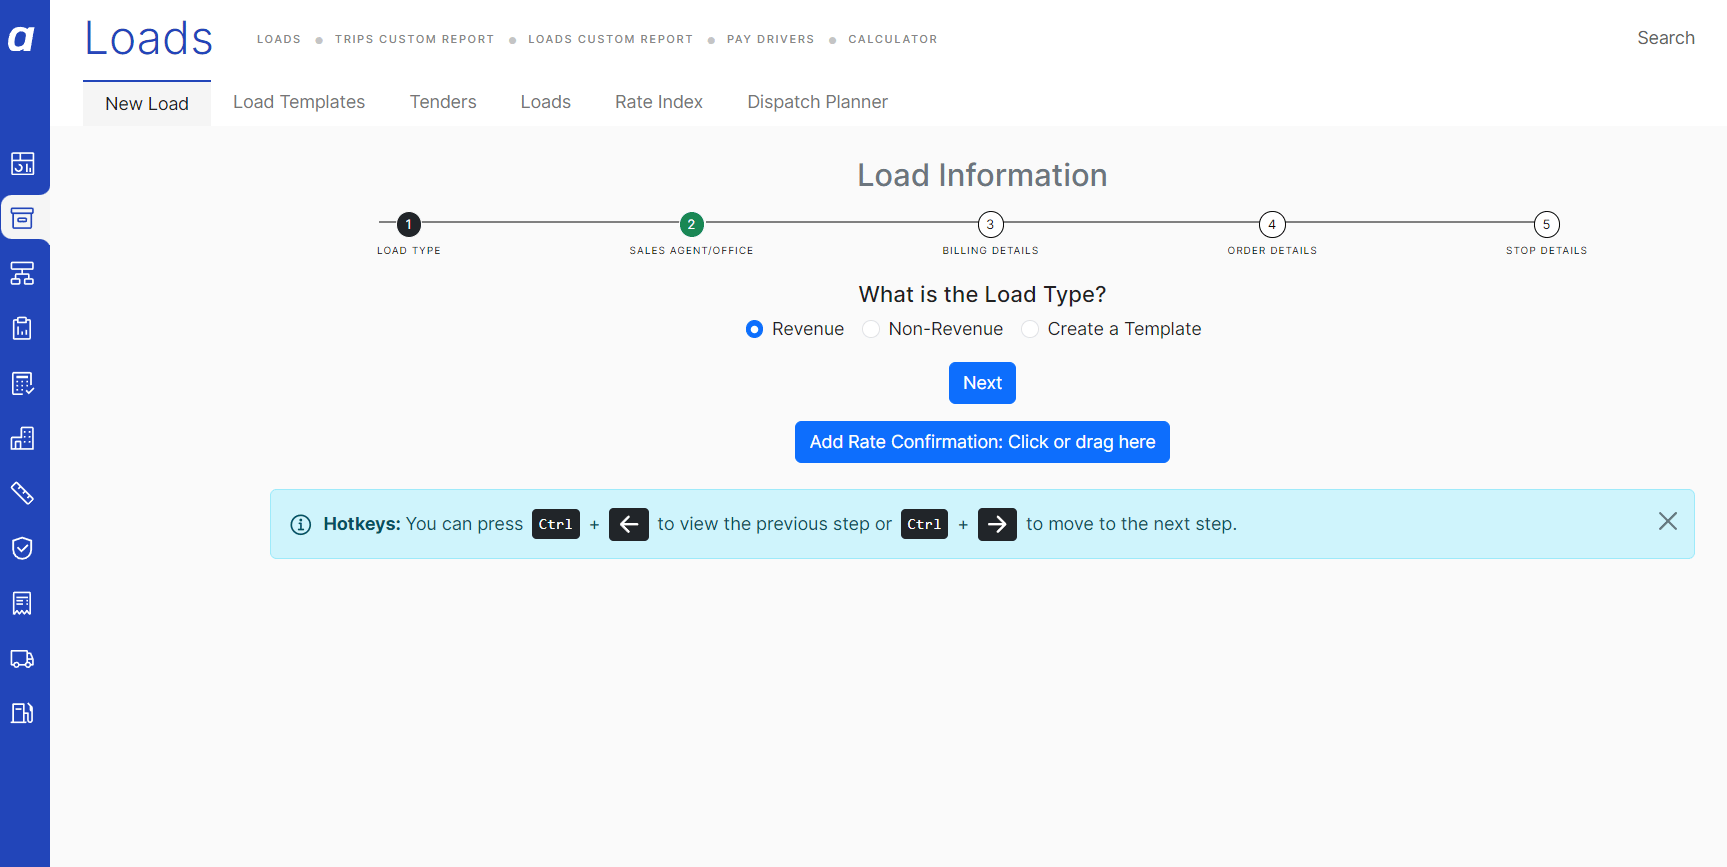 *New Load form header showing the load entry parameters, including the Non-Revenue toggle*
### 3. Complete the Customer section under General details
1. In the **Customer** field, type the customer name and select it from the dropdown. If the customer does not exist yet, click **Add new customer** in the dropdown to create a new customer record without leaving the form.
2. In the **Invoice As** field, select the subsidiary that will invoice this customer. This field auto-populates the **Tender As** field to match. For non-revenue loads, the **Invoice As** field label changes to **Subsidiary**.
3. In the **Billing Rate** field, enter the agreed rate. Billing rate is optional; you can create the load without one and add it later.
4. In the **Order Number** field, enter the customer's reference number for this shipment. If the order number you enter already exists on another load, Alvys displays a duplicate load warning. Review the warning before continuing.
5. Optionally, click **Show more fields** to add optional parameters, including Customer Contact, Purchase Order (PO) Number, Commodity Description & Units, and Custom Customer References.
*New Load form header showing the load entry parameters, including the Non-Revenue toggle*
### 3. Complete the Customer section under General details
1. In the **Customer** field, type the customer name and select it from the dropdown. If the customer does not exist yet, click **Add new customer** in the dropdown to create a new customer record without leaving the form.
2. In the **Invoice As** field, select the subsidiary that will invoice this customer. This field auto-populates the **Tender As** field to match. For non-revenue loads, the **Invoice As** field label changes to **Subsidiary**.
3. In the **Billing Rate** field, enter the agreed rate. Billing rate is optional; you can create the load without one and add it later.
4. In the **Order Number** field, enter the customer's reference number for this shipment. If the order number you enter already exists on another load, Alvys displays a duplicate load warning. Review the warning before continuing.
5. Optionally, click **Show more fields** to add optional parameters, including Customer Contact, Purchase Order (PO) Number, Commodity Description & Units, and Custom Customer References.
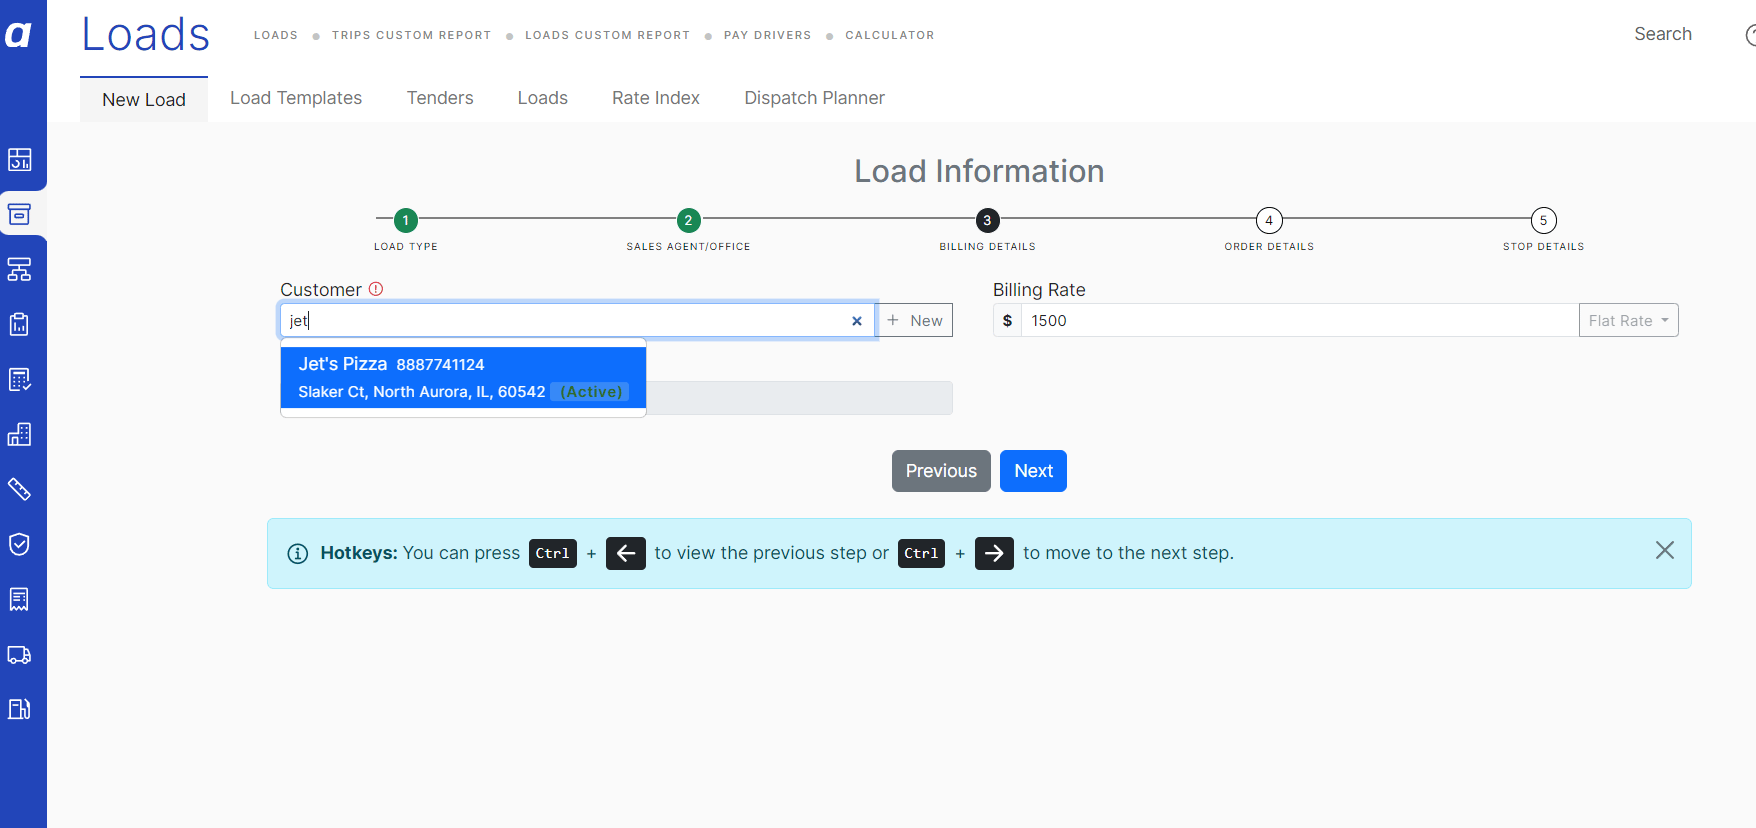 *Customer Form: the section under General Details*
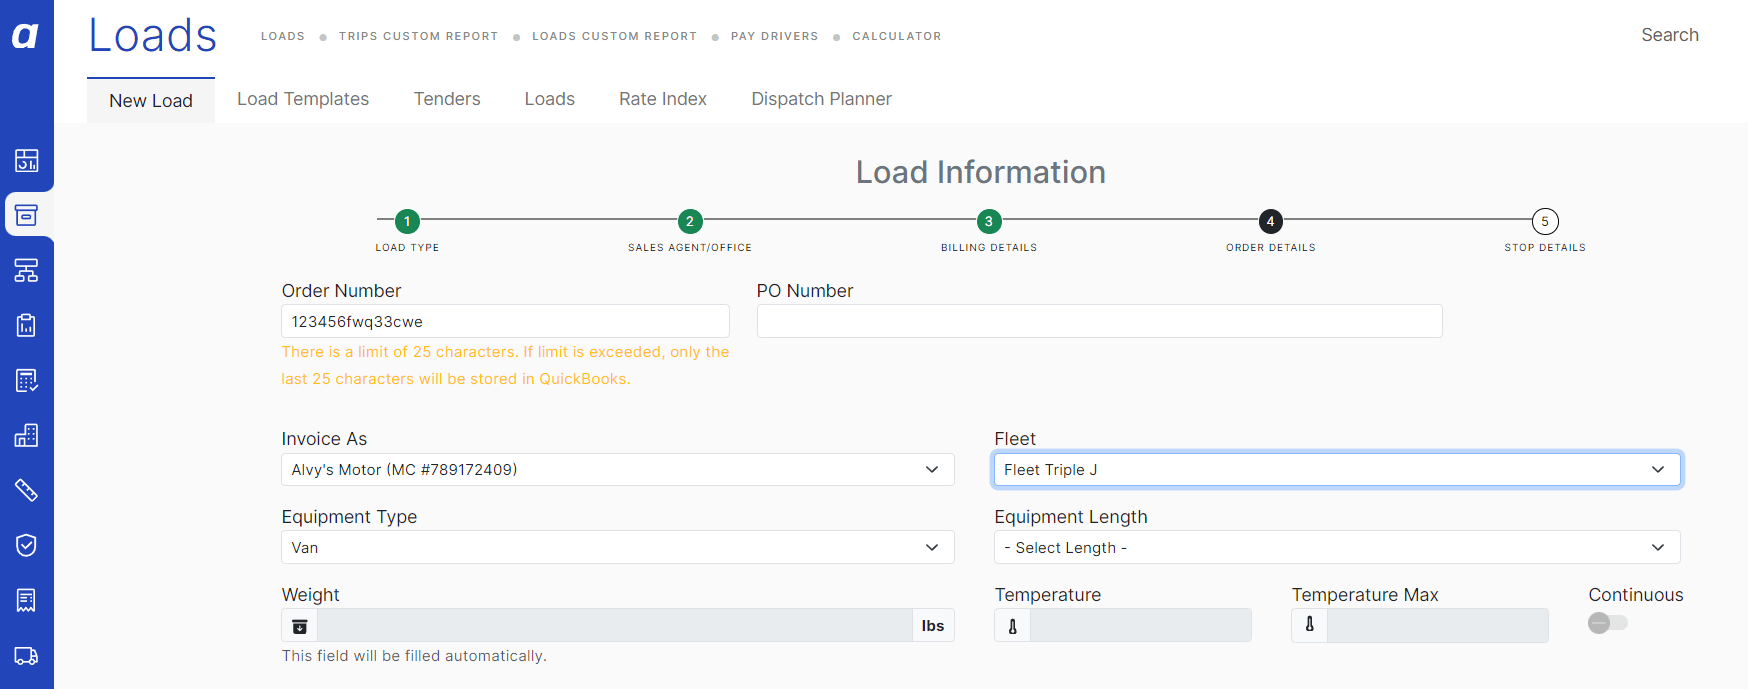 *Order Number field with the duplicate load warning visible*
### 4. Complete the Tender section under General details
1. **Tender As:** Auto-populates based on your **Invoice As** selection.
2. **Fleet:** Select the appropriate fleet from the dropdown. This field is mandatory if fleets are configured in your system.
3. **Office:** Select the branch or representative office managing this load. For non-revenue loads, the Office field is optional and can be left blank.
4. **Equipment Type:** Select the trailer or equipment required for the shipment (for example, Dry Van, Reefer, Flatbed).
5. Optionally, click **Show more fields** to add optional parameters, including Customer Instructions, Customer Sales Agent, and Equipment Length.
*Order Number field with the duplicate load warning visible*
### 4. Complete the Tender section under General details
1. **Tender As:** Auto-populates based on your **Invoice As** selection.
2. **Fleet:** Select the appropriate fleet from the dropdown. This field is mandatory if fleets are configured in your system.
3. **Office:** Select the branch or representative office managing this load. For non-revenue loads, the Office field is optional and can be left blank.
4. **Equipment Type:** Select the trailer or equipment required for the shipment (for example, Dry Van, Reefer, Flatbed).
5. Optionally, click **Show more fields** to add optional parameters, including Customer Instructions, Customer Sales Agent, and Equipment Length.
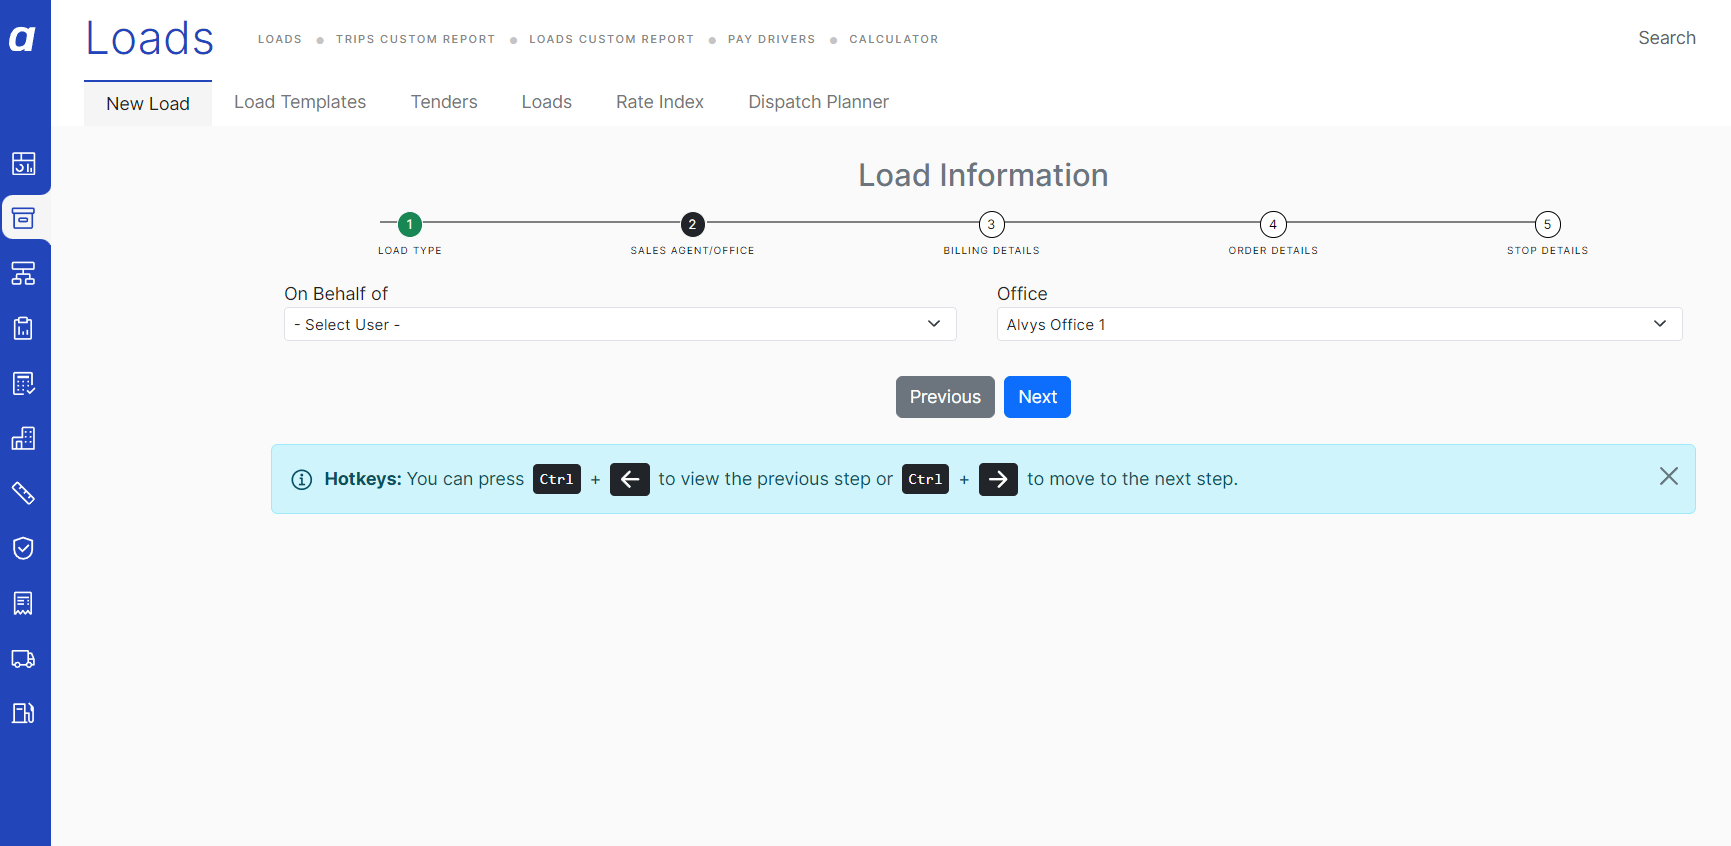 *Tender Form: the section under General Details*
### 5. Add the pickup stop
1. In the Stops section, click **Add Pickup**.
2. Fill in the pickup stop fields:
* **Appointment Date:** Required. Enter the pickup date and time.
* **Company:** Required. Enter or search for the pickup location. Select **Customer** to use the customer's physical address on file.
3. Fill in any additional stop details (reference numbers, notes) as needed.
4. Click **Add Stop**.
*Tender Form: the section under General Details*
### 5. Add the pickup stop
1. In the Stops section, click **Add Pickup**.
2. Fill in the pickup stop fields:
* **Appointment Date:** Required. Enter the pickup date and time.
* **Company:** Required. Enter or search for the pickup location. Select **Customer** to use the customer's physical address on file.
3. Fill in any additional stop details (reference numbers, notes) as needed.
4. Click **Add Stop**.
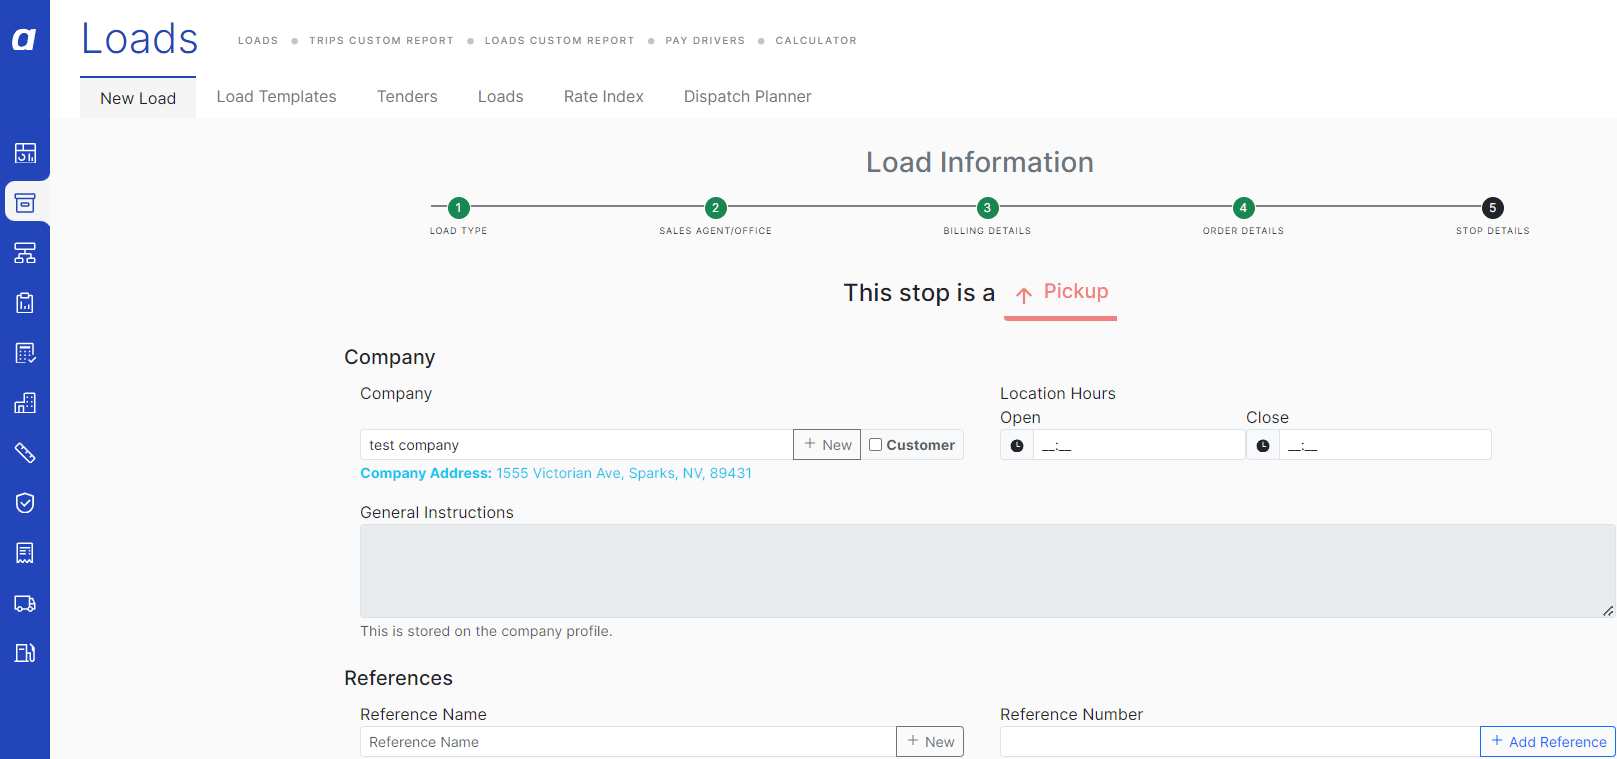 *Expanded Pickup Stop Panel: showing populated facility address and pickup date*
### 6. Add the delivery stop
1. In the Stops section, click **Add Delivery**.
2. Fill in the delivery stop fields:
* **Appointment Date:** Required. Enter the delivery date and time. The delivery date must be on or after the pickup date.
* **Company:** Required. Enter or search for the delivery location.
3. Fill in any additional stop details as needed.
4. Click **Add Stop**.
*Expanded Pickup Stop Panel: showing populated facility address and pickup date*
### 6. Add the delivery stop
1. In the Stops section, click **Add Delivery**.
2. Fill in the delivery stop fields:
* **Appointment Date:** Required. Enter the delivery date and time. The delivery date must be on or after the pickup date.
* **Company:** Required. Enter or search for the delivery location.
3. Fill in any additional stop details as needed.
4. Click **Add Stop**.
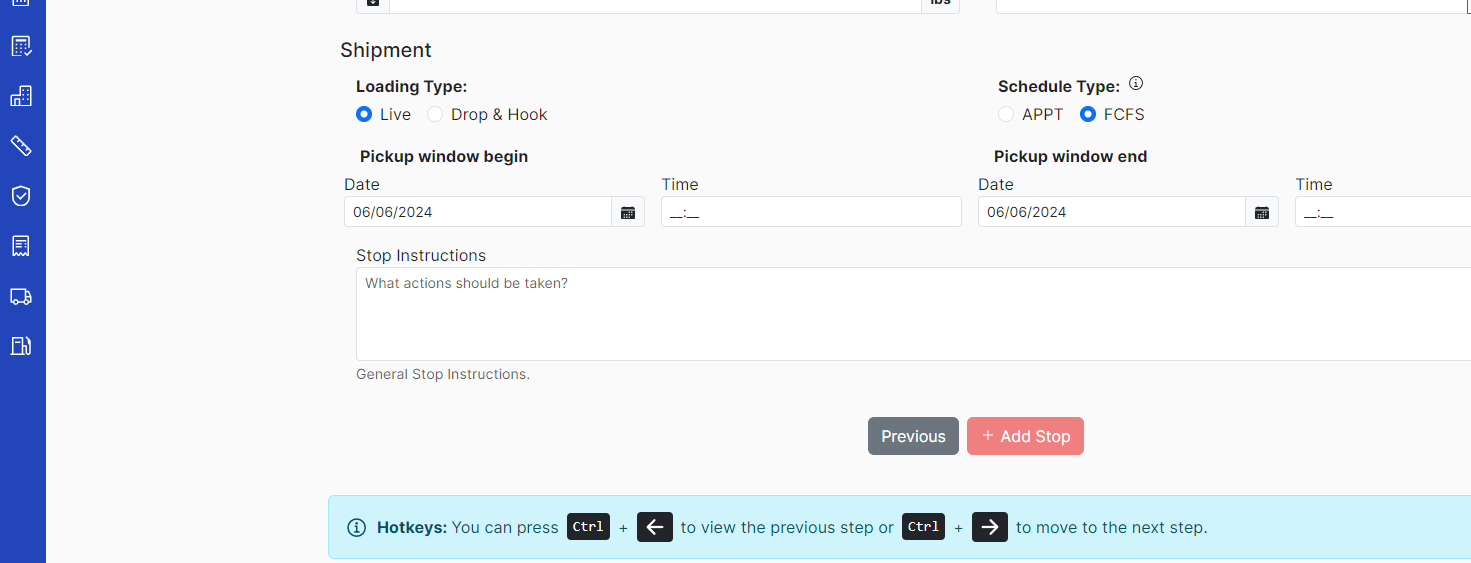 *Expanded Delivery Stop Panel: showing populated facility address, delivery date and time window*
### 7. Create the load
1. **Editing stops:** Click any stop card to modify location, dates, or contact information.
2. **Adding and changing stop types:** Add additional stops as needed, or adjust a stop's type using the selector in the top-right corner of the stop card.
3. **Reordering stops:** Drag stop cards up or down to adjust multiple stops of the same type.
4. **Saving the load:** Click **Create Load** in the top-right corner. If the button cannot be selected, check the screen for red error flags or missing required fields.
Sequenced stops must remain in valid chronological order.
*Expanded Delivery Stop Panel: showing populated facility address, delivery date and time window*
### 7. Create the load
1. **Editing stops:** Click any stop card to modify location, dates, or contact information.
2. **Adding and changing stop types:** Add additional stops as needed, or adjust a stop's type using the selector in the top-right corner of the stop card.
3. **Reordering stops:** Drag stop cards up or down to adjust multiple stops of the same type.
4. **Saving the load:** Click **Create Load** in the top-right corner. If the button cannot be selected, check the screen for red error flags or missing required fields.
Sequenced stops must remain in valid chronological order.
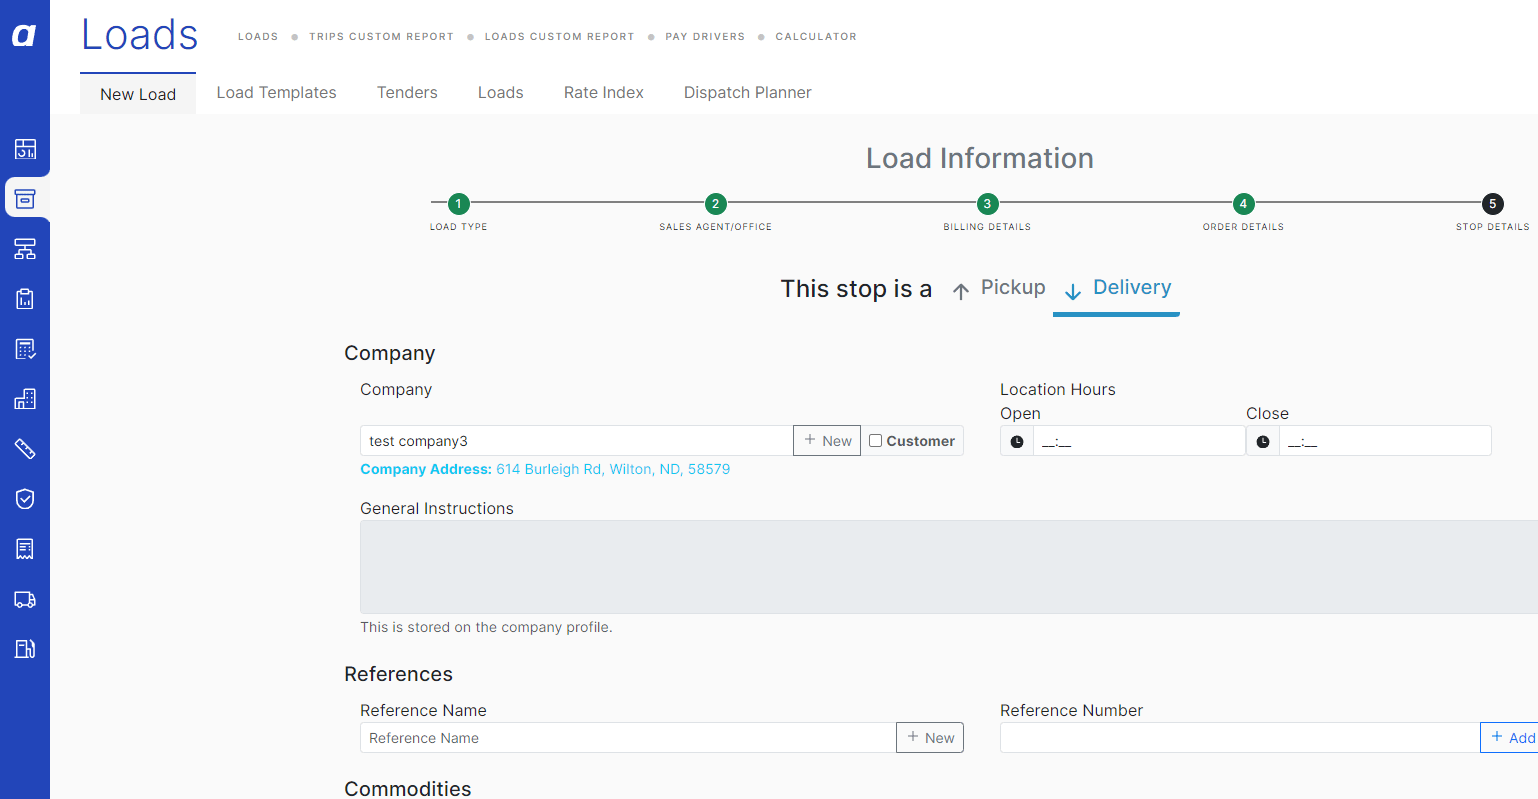 *Stops section with an intermediate stop added between pickup and delivery*
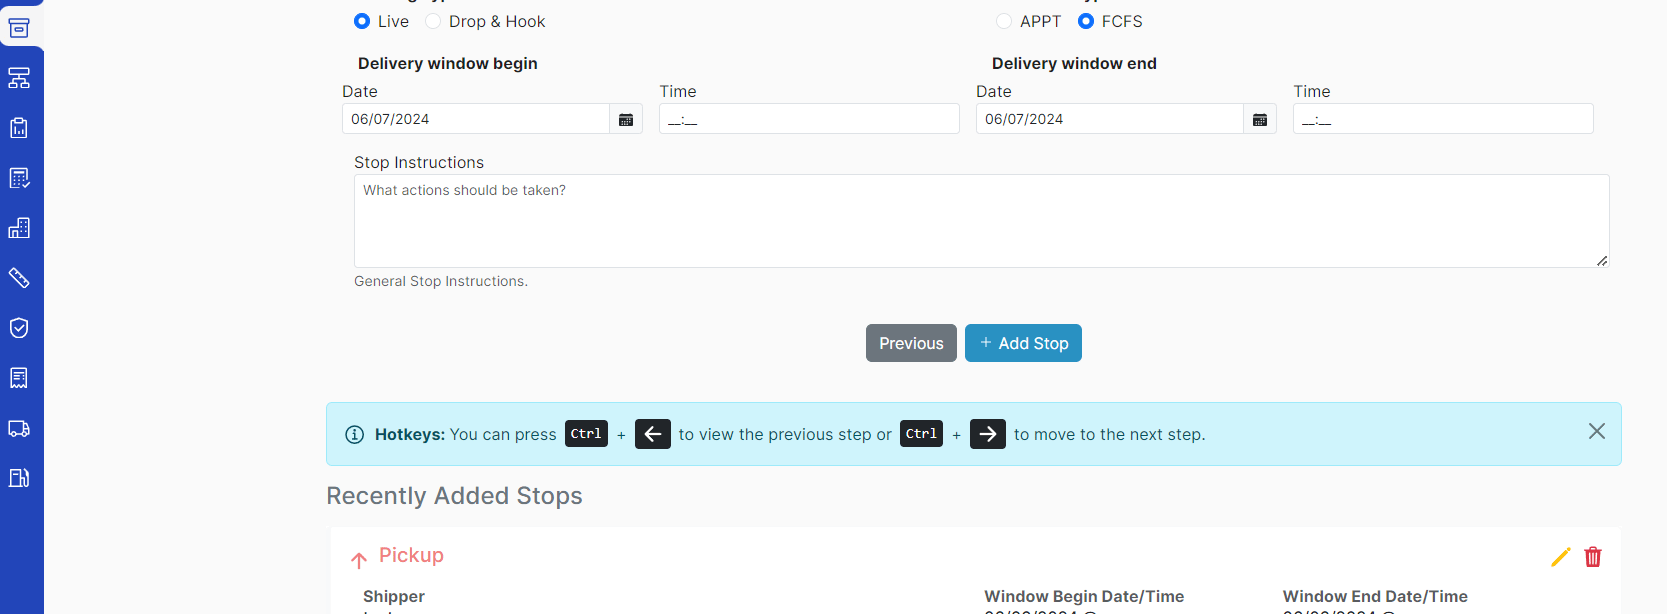 *Completed Load Form: all required fields are filled out, enabling the Create Load button in the top-right corner*
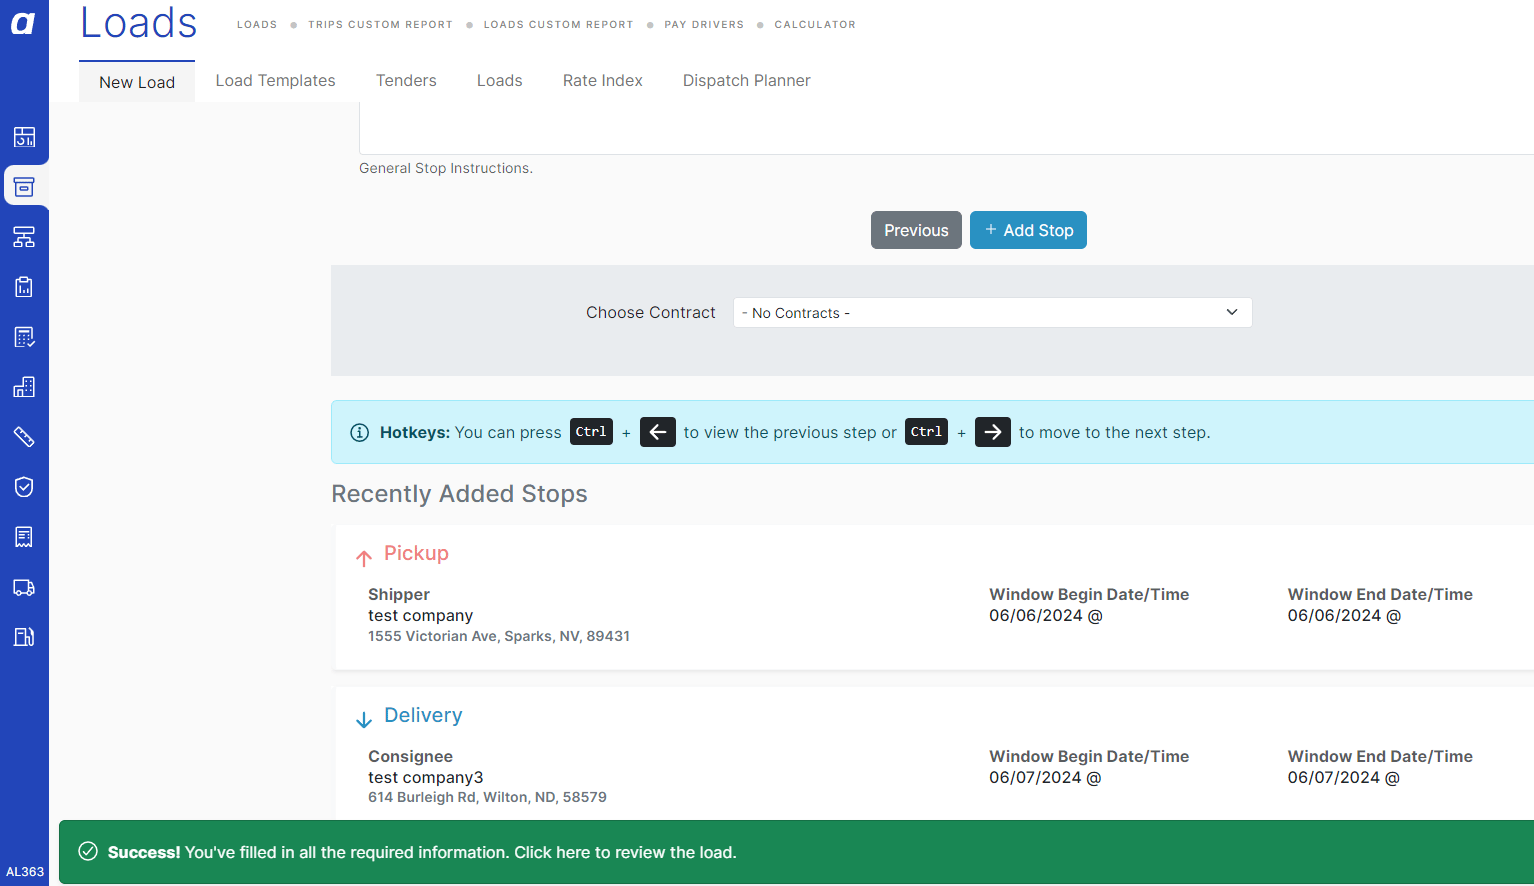 *Newly created load in Open status, showing the load record page after creation*
## Result
The load is created and saved in **Open** status. You can now assign a carrier, add documents, build a trip, and dispatch the load.
*Newly created load in Open status, showing the load record page after creation*
## Result
The load is created and saved in **Open** status. You can now assign a carrier, add documents, build a trip, and dispatch the load.
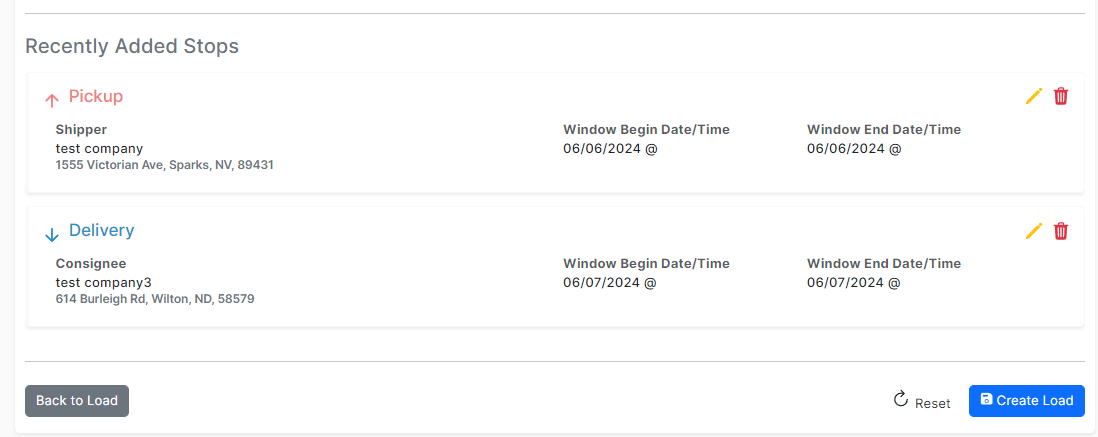 *Newly created load in Open status, showing the load record page after creation*
## Variations
### Non-revenue load
A non-revenue load does not generate a customer invoice. To create one:
1. Turn on the **Non-Revenue** toggle at the top of the New Load form before clicking Next.
2. The **Customer** field is not required and may be left blank.
3. The **Office** field is optional for non-revenue loads.
4. The **Invoice As** field label changes to **Subsidiary** when Non-Revenue is on. Select the appropriate subsidiary if applicable.
5. Complete at least one pickup stop and one delivery stop, then click **Create Load**.
### Creating a new customer during load creation
If the customer does not yet exist in Alvys:
1. Type the new customer name in the **Customer** field.
2. Click **Add new customer** in the dropdown.
3. Complete the new customer form without leaving the New Load page.
4. The new customer populates the Customer field automatically after creation.
## Troubleshooting
### Create Load button remains inactive (greyed out)
The **Create Load** button does not become active until all required fields are complete. Confirm a **Customer** is selected (revenue loads only) and that the **Invoice As** field (or **Subsidiary** for non-revenue loads) has a selection. Confirm the **Office** field is filled in (required for revenue loads; optional for non-revenue loads), the **Order Number** field is not empty and does not contain only spaces, and an **Equipment Type** is selected. Confirm a pickup stop is present with both an **Appointment Date** and a **Company** filled in, and that a delivery stop is present with the same. Confirm the delivery date is on or after the pickup date, stops are in chronological order, and the first stop is a pickup type while the last stop is a delivery type. If all of these are complete and the button is still inactive, contact Alvys support.
### Duplicate load warning appears on the order number
The order number you entered already exists on another load in the system. Either confirm you intend to create a second load with the same order number, or go back and enter the correct order number before creating the load. If a duplicate load is created by mistake, use the in-app **Cancel** option to remove it. Duplicates can also occur from rate confirmation uploads, not just manual entry. For assistance with cancellation, contact Alvys support.
## FAQs
**Q: Do I need special permission to create a load?**
**A:** No. All authenticated Alvys users can create a load. No additional role or permission is required.
**Q: Can I save a load as a draft before it is complete?**
**A:** No. The New Load form does not have a draft or save-as-draft option. Either complete all required fields and click **Create Load**, or discard the form and start over.
**Q: What is the order number?**
**A:** The order number is the customer's reference number for this shipment; it is also called a customer reference number or customer PO number. It must not be blank and must contain at least one non-space character.
**Q: Can I create a load without a billing rate?**
**A:** Yes. The billing rate field is optional. You can create the load and add the billing rate later by editing the load.
**Q: What if I selected the wrong customer?**
**A:** After the load is created, open the load, click **Edit**, and update the Customer field. You cannot change the customer from within the New Load form after clicking **Create Load**.
**Q: What does the Non-Revenue toggle do?**
**A:** Turning on the Non-Revenue toggle marks the load as an internal or non-billable move. No customer invoice is generated. The Customer and Office fields become optional, and the Invoice As field label changes to **Subsidiary**.
**Q: Can I edit load details after the load is created?**
**A:** Most fields can be updated by opening the load and clicking **Edit**. Some fields become locked once the load advances to **Delivered** or later statuses — for example, stop locations cannot be changed after delivery. To change the customer on a **Released** load, see [How to Switch the Customer on a Released Load](/en/help/loads-trips/how-to-switch-the-customer-on-a-released-load). For stop changes after delivery, contact Alvys support.
**Q: Is there a way to save a load as a template for reuse?**
**A:** Yes — use **Clone Load**. Cloning a completed load creates a new load with the same customer, route, and equipment type, so you can reuse a common lane without re-entering all the details. See [How to clone a load](/en/help/loads-trips/how-to-clone-a-load) for steps. You can also check **Save as Template** on the New Load form and reuse it later via **From Template**.
**Q: What should I do if I accidentally created a duplicate load?**
**A:** If a duplicate load is created by mistake, use the in-app **Cancel** option to remove it. Deletion is generally restricted to training scenarios, but exceptions may be made in special cases. Contact Alvys support for further assistance if needed.
## Go Deeper
* [How to clone a load](/en/help/loads-trips/how-to-clone-a-load)
* [How to Create and Use Load Templates](/en/help/loads-trips/how-to-create-and-use-load-templates)
* [Managing a Load](/en/help/loads-trips/managing-a-load) — action buttons and Manage menu available after the load is created
*Newly created load in Open status, showing the load record page after creation*
## Variations
### Non-revenue load
A non-revenue load does not generate a customer invoice. To create one:
1. Turn on the **Non-Revenue** toggle at the top of the New Load form before clicking Next.
2. The **Customer** field is not required and may be left blank.
3. The **Office** field is optional for non-revenue loads.
4. The **Invoice As** field label changes to **Subsidiary** when Non-Revenue is on. Select the appropriate subsidiary if applicable.
5. Complete at least one pickup stop and one delivery stop, then click **Create Load**.
### Creating a new customer during load creation
If the customer does not yet exist in Alvys:
1. Type the new customer name in the **Customer** field.
2. Click **Add new customer** in the dropdown.
3. Complete the new customer form without leaving the New Load page.
4. The new customer populates the Customer field automatically after creation.
## Troubleshooting
### Create Load button remains inactive (greyed out)
The **Create Load** button does not become active until all required fields are complete. Confirm a **Customer** is selected (revenue loads only) and that the **Invoice As** field (or **Subsidiary** for non-revenue loads) has a selection. Confirm the **Office** field is filled in (required for revenue loads; optional for non-revenue loads), the **Order Number** field is not empty and does not contain only spaces, and an **Equipment Type** is selected. Confirm a pickup stop is present with both an **Appointment Date** and a **Company** filled in, and that a delivery stop is present with the same. Confirm the delivery date is on or after the pickup date, stops are in chronological order, and the first stop is a pickup type while the last stop is a delivery type. If all of these are complete and the button is still inactive, contact Alvys support.
### Duplicate load warning appears on the order number
The order number you entered already exists on another load in the system. Either confirm you intend to create a second load with the same order number, or go back and enter the correct order number before creating the load. If a duplicate load is created by mistake, use the in-app **Cancel** option to remove it. Duplicates can also occur from rate confirmation uploads, not just manual entry. For assistance with cancellation, contact Alvys support.
## FAQs
**Q: Do I need special permission to create a load?**
**A:** No. All authenticated Alvys users can create a load. No additional role or permission is required.
**Q: Can I save a load as a draft before it is complete?**
**A:** No. The New Load form does not have a draft or save-as-draft option. Either complete all required fields and click **Create Load**, or discard the form and start over.
**Q: What is the order number?**
**A:** The order number is the customer's reference number for this shipment; it is also called a customer reference number or customer PO number. It must not be blank and must contain at least one non-space character.
**Q: Can I create a load without a billing rate?**
**A:** Yes. The billing rate field is optional. You can create the load and add the billing rate later by editing the load.
**Q: What if I selected the wrong customer?**
**A:** After the load is created, open the load, click **Edit**, and update the Customer field. You cannot change the customer from within the New Load form after clicking **Create Load**.
**Q: What does the Non-Revenue toggle do?**
**A:** Turning on the Non-Revenue toggle marks the load as an internal or non-billable move. No customer invoice is generated. The Customer and Office fields become optional, and the Invoice As field label changes to **Subsidiary**.
**Q: Can I edit load details after the load is created?**
**A:** Most fields can be updated by opening the load and clicking **Edit**. Some fields become locked once the load advances to **Delivered** or later statuses — for example, stop locations cannot be changed after delivery. To change the customer on a **Released** load, see [How to Switch the Customer on a Released Load](/en/help/loads-trips/how-to-switch-the-customer-on-a-released-load). For stop changes after delivery, contact Alvys support.
**Q: Is there a way to save a load as a template for reuse?**
**A:** Yes — use **Clone Load**. Cloning a completed load creates a new load with the same customer, route, and equipment type, so you can reuse a common lane without re-entering all the details. See [How to clone a load](/en/help/loads-trips/how-to-clone-a-load) for steps. You can also check **Save as Template** on the New Load form and reuse it later via **From Template**.
**Q: What should I do if I accidentally created a duplicate load?**
**A:** If a duplicate load is created by mistake, use the in-app **Cancel** option to remove it. Deletion is generally restricted to training scenarios, but exceptions may be made in special cases. Contact Alvys support for further assistance if needed.
## Go Deeper
* [How to clone a load](/en/help/loads-trips/how-to-clone-a-load)
* [How to Create and Use Load Templates](/en/help/loads-trips/how-to-create-and-use-load-templates)
* [Managing a Load](/en/help/loads-trips/managing-a-load) — action buttons and Manage menu available after the load is created