> ## Documentation Index
> Fetch the complete documentation index at: https://docs.alvys.com/llms.txt
> Use this file to discover all available pages before exploring further.
# Apex Capital Factoring Integration
> This guide will help you integrate Apex Capital with Alvys. Follow the steps below to set up your NOA and configure the Apex integration.
Apex Capital connects to Alvys via OAuth (Apex Connect API) to automate invoice submission and report processing for factoring clients. Also known as Apex Connect, Apex Capital factoring, invoice factoring.
## What This Integration Does
Alvys connects to Apex Capital using the Apex Connect API with OAuth authentication. When a factoring batch is submitted in Alvys, the integration sends invoice data directly to Apex Capital and automatically uploads the invoice document for each load in the batch to Apex Capital. Users then log in to the Apex Capital portal to download Purchase Reports and Payment Reports as CSV files, which are uploaded back into Alvys to update load records.
The integration supports two report types: Purchase Reports (confirm which invoices Apex Capital has purchased and at what advance amount) and Payment Reports (record payments received from Apex Capital against factored invoices).
Status updates in Alvys depend on report uploads; there is no automated nightly sync.
## Prerequisites
* Active account with Apex Capital
* Notice of Assignment text provided by Apex Capital
* Admin, Partner Admin, or Support role to access Management > Integrations and complete the OAuth setup
* **"Billing"** permission to submit batches and upload Purchase Reports and Payment Reports
## Connect / Authenticate
Setup requires two parts: configuring your Notice of Assignment in Company Profile, then activating the Apex Capital integration in Management > Integrations.
### Part 1: Configure Your Notice of Assignment
1. Navigate to Management > Company Profile.
2. Select the subsidiary that will use the Apex Capital integration. In the Document Configuration section, click the blue **(+)** button. The Manage Important Info window opens.
3. In the drop-down menu, select **Notice of Assignment**. Copy and paste the Notice of Assignment text provided by Apex Capital into the text box.
4. Click the blue **Save** button.
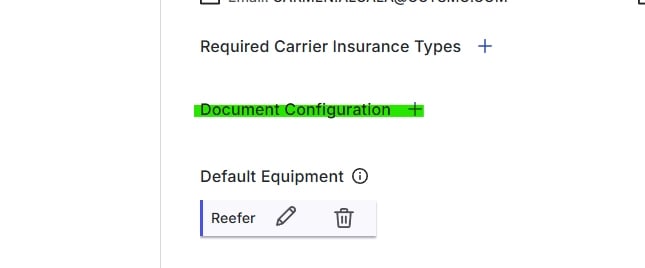 *Document Configuration section of Company Profile with the Manage Important Info window for adding the Notice of Assignment*
### Part 2: Configure the Apex Capital Integration
1. Navigate to Management > Integrations.
2. Expand the **Factoring** section. Click the “**Inactive**” button next to **Apex Capital**.
*Document Configuration section of Company Profile with the Manage Important Info window for adding the Notice of Assignment*
### Part 2: Configure the Apex Capital Integration
1. Navigate to Management > Integrations.
2. Expand the **Factoring** section. Click the “**Inactive**” button next to **Apex Capital**.
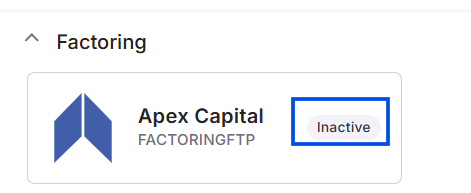 \*Integrations page with the Factoring section expanded and the Inactive button next to Apex Capital \*
1. Click the blue **Save** button. A message appears: "You will now be redirected to Apex to login in order to complete the integration."
2. Sign in using your Apex Capital credentials. The integration is active immediately after login.
Note: To configure additional subsidiaries, repeat Part 1 and Part 2 for each subsidiary.
## Field & Data Mapping
When a batch is submitted, Alvys sends the following invoice data to Apex Capital: load number, debtor, invoice amount, and advance amount. Alvys automatically uploads the invoice document for each load to Apex at the time of batch submission.
If a broker has no existing record in Apex Capital, Alvys automatically registers them using the MC number or company name.
⚠️ Waypoint stops are not supported for Apex Capital batches. Loads that include waypoint stops cannot be included in a batch.
**Purchase Report CSV columns:** Buy, Inv, Debtor, Amount, Advance, InvDate
**Payment Report CSV columns:** Check, PostDate, Debtor, Inv., Amount, Type
## Sync Behavior
Alvys submits invoice batches to Apex Capital through the API. Purchase Report and Payment Report data flows back into Alvys through manual CSV uploads from the Apex Capital portal. There is no automated nightly sync; load status updates in Alvys depend entirely on report uploads.
## Upload Your Purchase Report
1. Log in to the Apex Capital portal and navigate to the Purchase Schedule Report page at: [https://amp.apexcapitalcorp.com/m3clients/InvoiceQuery.do](https://amp.apexcapitalcorp.com/m3clients/InvoiceQuery.do)
2. Find the schedule number for your batch. To locate it, navigate to **Reports > Factoring** in Alvys and find the submitted batch.
\*Integrations page with the Factoring section expanded and the Inactive button next to Apex Capital \*
1. Click the blue **Save** button. A message appears: "You will now be redirected to Apex to login in order to complete the integration."
2. Sign in using your Apex Capital credentials. The integration is active immediately after login.
Note: To configure additional subsidiaries, repeat Part 1 and Part 2 for each subsidiary.
## Field & Data Mapping
When a batch is submitted, Alvys sends the following invoice data to Apex Capital: load number, debtor, invoice amount, and advance amount. Alvys automatically uploads the invoice document for each load to Apex at the time of batch submission.
If a broker has no existing record in Apex Capital, Alvys automatically registers them using the MC number or company name.
⚠️ Waypoint stops are not supported for Apex Capital batches. Loads that include waypoint stops cannot be included in a batch.
**Purchase Report CSV columns:** Buy, Inv, Debtor, Amount, Advance, InvDate
**Payment Report CSV columns:** Check, PostDate, Debtor, Inv., Amount, Type
## Sync Behavior
Alvys submits invoice batches to Apex Capital through the API. Purchase Report and Payment Report data flows back into Alvys through manual CSV uploads from the Apex Capital portal. There is no automated nightly sync; load status updates in Alvys depend entirely on report uploads.
## Upload Your Purchase Report
1. Log in to the Apex Capital portal and navigate to the Purchase Schedule Report page at: [https://amp.apexcapitalcorp.com/m3clients/InvoiceQuery.do](https://amp.apexcapitalcorp.com/m3clients/InvoiceQuery.do)
2. Find the schedule number for your batch. To locate it, navigate to **Reports > Factoring** in Alvys and find the submitted batch.
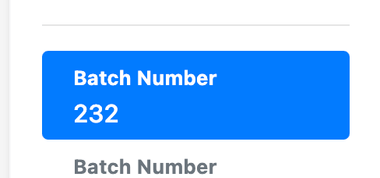 \*Alvys Reports > Factoring page showing the submitted batch and its schedule number \*
3. Enter that number in the Schedule Number field on the Apex Capital portal, select .csv as the export format and click Submit
\*Alvys Reports > Factoring page showing the submitted batch and its schedule number \*
\*Alvys Reports > Factoring page showing the submitted batch and its schedule number \*
3. Enter that number in the Schedule Number field on the Apex Capital portal, select .csv as the export format and click Submit
 *Apex Capital portal Purchase Schedule Report query with the Schedule Number field*
4. Select **.csv** as the export format. Click **Submit**. Download the file to your device.
5. In Alvys, navigate to **Reports > Factoring**. Select the batch. Click the blue **Upload Purchase Report** button located in the **bottom right corner** of the Factoring Reports page.
*Apex Capital portal Purchase Schedule Report query with the Schedule Number field*
*Apex Capital portal Purchase Schedule Report query with the Schedule Number field*
4. Select **.csv** as the export format. Click **Submit**. Download the file to your device.
5. In Alvys, navigate to **Reports > Factoring**. Select the batch. Click the blue **Upload Purchase Report** button located in the **bottom right corner** of the Factoring Reports page.
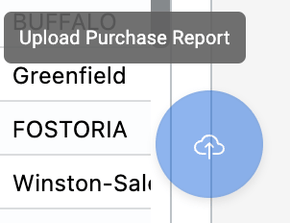 \*Alvys Factoring Reports page with the blue Upload Purchase Report button in the bottom right corner \*
6. Drag and drop the CSV file into the upload area, or click to select it from your device.
\*Alvys Factoring Reports page with the blue Upload Purchase Report button in the bottom right corner \*
\*Alvys Factoring Reports page with the blue Upload Purchase Report button in the bottom right corner \*
6. Drag and drop the CSV file into the upload area, or click to select it from your device.
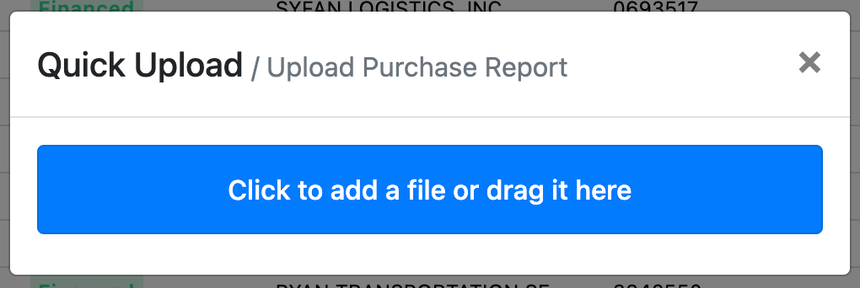 \*File drag-and-drop upload area on the Upload Purchase Report dialog \*
7. Click **Upload**.
\*File drag-and-drop upload area on the Upload Purchase Report dialog \*
\*File drag-and-drop upload area on the Upload Purchase Report dialog \*
7. Click **Upload**.
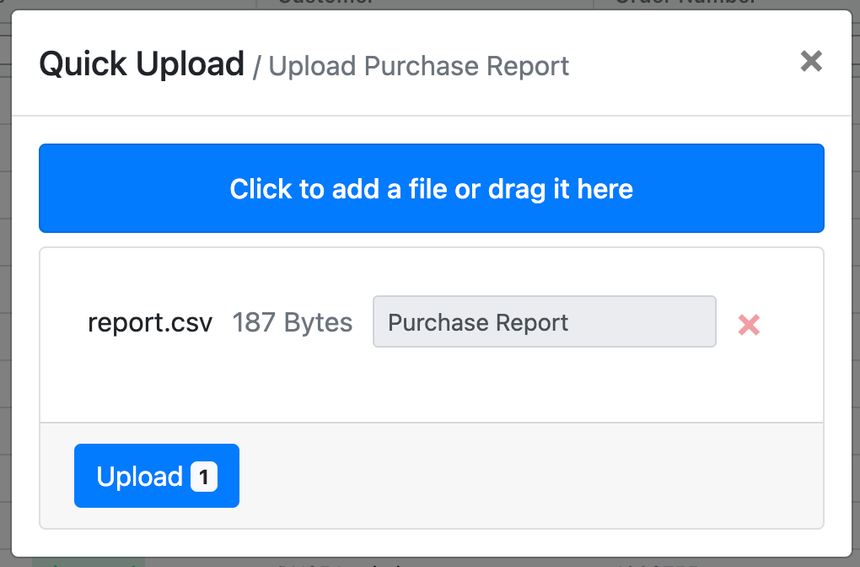 *Upload button on the Purchase Report upload dialog*
## Upload Your Payment Report
1. Log in to the Apex Capital portal and navigate to the Payment Report page at: [https://amp.apexcapitalcorp.com/m3clients/PaymentQuery.do](https://amp.apexcapitalcorp.com/m3clients/PaymentQuery.do)
2. Enter the payment period. Select **.csv** as the report type. Click **Submit**. Download the file to your device.
*Upload button on the Purchase Report upload dialog*
## Upload Your Payment Report
1. Log in to the Apex Capital portal and navigate to the Payment Report page at: [https://amp.apexcapitalcorp.com/m3clients/PaymentQuery.do](https://amp.apexcapitalcorp.com/m3clients/PaymentQuery.do)
2. Enter the payment period. Select **.csv** as the report type. Click **Submit**. Download the file to your device.
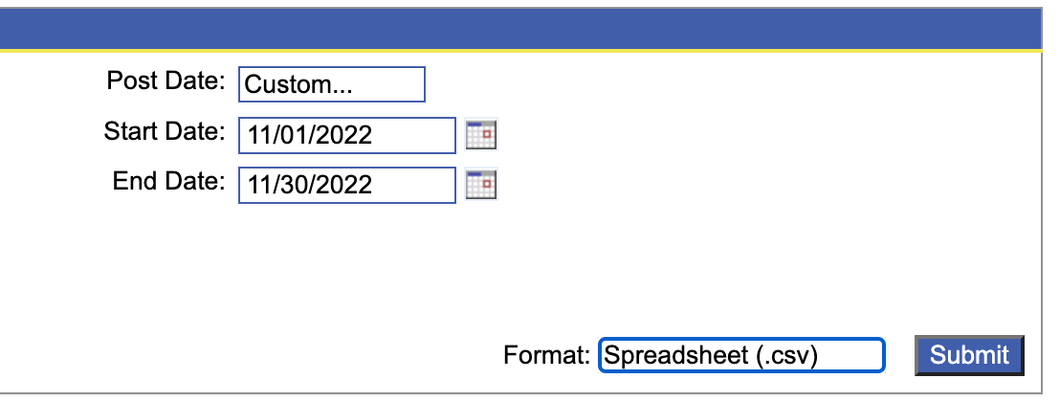 *Apex Capital portal Payment Report query showing the payment period and .csv report type*
3. In Alvys, navigate to **Reports > Factoring**. Select the batch. Click the **Upload Report** button.
*Apex Capital portal Payment Report query showing the payment period and .csv report type*
*Apex Capital portal Payment Report query showing the payment period and .csv report type*
3. In Alvys, navigate to **Reports > Factoring**. Select the batch. Click the **Upload Report** button.
 *Alvys Factoring Reports page showing the Upload Report button*
4. Drag and drop the CSV file into the upload area, or click to select it from your device.
*Alvys Factoring Reports page showing the Upload Report button*
*Alvys Factoring Reports page showing the Upload Report button*
4. Drag and drop the CSV file into the upload area, or click to select it from your device.
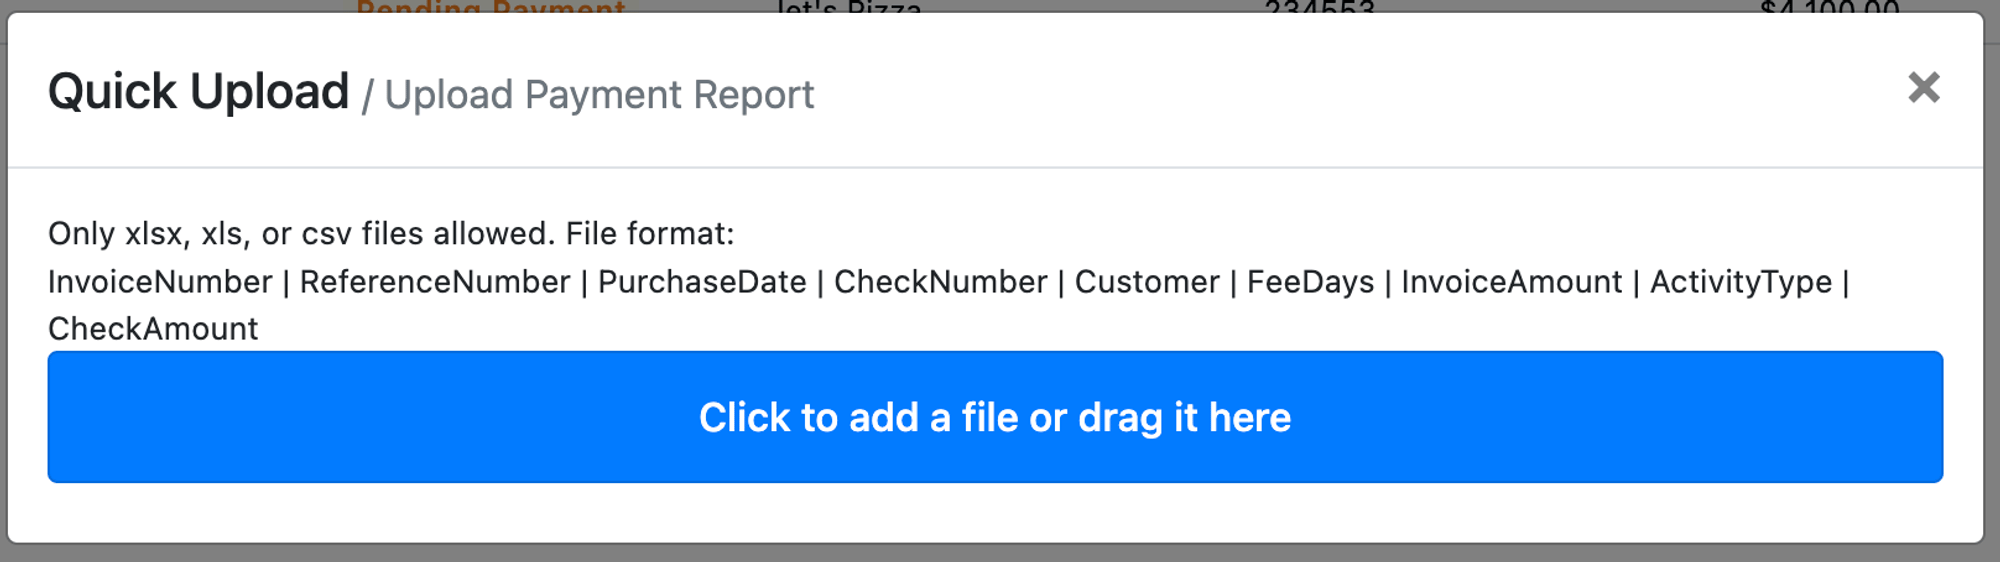 *File drag-and-drop upload area on the Upload Report dialog*
5. Click **Upload**.
*File drag-and-drop upload area on the Upload Report dialog*
*File drag-and-drop upload area on the Upload Report dialog*
5. Click **Upload**.
 \*Upload button on the Payment Report upload dialog \*
6. Do not close this page until the report has finished processing. Depending on file size, this can take from a few seconds to a few minutes.
\*Upload button on the Payment Report upload dialog \*
\*Upload button on the Payment Report upload dialog \*
6. Do not close this page until the report has finished processing. Depending on file size, this can take from a few seconds to a few minutes.
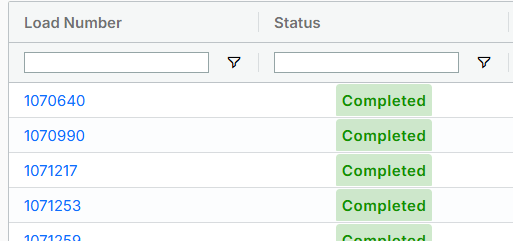 *Factoring Reports page after payment report processing completes, showing updated load records*
## Verify It's Working
After submitting a batch, log in to the Apex Capital portal and confirm the batch appears in the Purchase Schedule Report at [https://amp.apexcapitalcorp.com/m3clients/InvoiceQuery.do](https://amp.apexcapitalcorp.com/m3clients/InvoiceQuery.do).
After uploading a Purchase Report, verify in Reports > Factoring in Alvys that the invoice amounts and advance amounts on the batch match the values in the uploaded file.
After uploading a Payment Report, verify that the relevant load records in Alvys reflect updated payment status as expected.
## Troubleshooting
### Batch submission fails
1. Confirm the broker record has either an MC number or a registered company name. Alvys looks up the broker in Apex Capital by MC number first, then by company name. If neither is present on the broker record, the batch cannot proceed.
2. Confirm the load does not include waypoint stops. Waypoint stops are not supported for Apex Capital batches and will prevent submission.
3. Confirm the subsidiary is connected to Apex Capital with valid OAuth credentials. Navigate to Management > Integrations, expand the Factoring section, and verify that Apex Capital shows an active connection. If the connection is not active, complete the OAuth login described in Connect / Authenticate above.
### Upload Purchase Report or Upload Report button is not visible
1. Confirm your account has the **"Billing"** permission. Without this permission, the upload buttons are not displayed.
2. Navigate to Reports > Factoring and confirm the batch appears in the list. If the batch is not visible, confirm it was submitted successfully in Accounting > Factoring Upload.
3. If the batch was submitted successfully but does not appear in Reports > Factoring, contact Alvys support.
### Integration does not appear as active after setup
1. Confirm that you completed the redirect to Apex Capital and signed in with your Apex Capital credentials. The integration is not active until the OAuth login step is completed. Return to Management > Integrations, click the pencil icon next to Apex Capital, and repeat the login step.
2. Contact Alvys support if the integration still does not appear as active after completing the login step.
## Limits / Unsupported
Waypoint stops are not supported. Loads that include waypoint stops cannot be included in an Apex Capital factoring batch.
Purchase Report and Payment Report data is not synced automatically; both require manual CSV download from the Apex Capital portal and upload into Alvys.
The integration must be configured separately for each subsidiary that will use Apex Capital factoring.
## FAQs
**Q: What is a Notice of Assignment?**
**A:** A Notice of Assignment is a document that informs your customers that their receivables have been assigned to a factoring company. Apex Capital provides the text, which you copy into Management > Company Profile during setup.
**Q: How long does it take for the integration to start working after setup?**
**A:** The integration is active immediately after you sign in with your Apex Capital credentials during the OAuth step.
**Q: Can I use the Apex Capital integration with multiple subsidiaries?**
**A:** Yes. Repeat the full setup in both Management > Company Profile and Management > Integrations for each subsidiary that will use the integration.
**Q: What happens if a broker is not already registered in Apex Capital?**
**A:** Alvys automatically registers the broker in Apex Capital using the MC number on the broker record. If no MC number is present, Alvys uses the company name instead.
**Q: Where do I find the schedule number for a submitted batch?**
**A:** Navigate to Reports > Factoring in Alvys. The schedule number is displayed on the batch record.
*Factoring Reports page after payment report processing completes, showing updated load records*
## Verify It's Working
After submitting a batch, log in to the Apex Capital portal and confirm the batch appears in the Purchase Schedule Report at [https://amp.apexcapitalcorp.com/m3clients/InvoiceQuery.do](https://amp.apexcapitalcorp.com/m3clients/InvoiceQuery.do).
After uploading a Purchase Report, verify in Reports > Factoring in Alvys that the invoice amounts and advance amounts on the batch match the values in the uploaded file.
After uploading a Payment Report, verify that the relevant load records in Alvys reflect updated payment status as expected.
## Troubleshooting
### Batch submission fails
1. Confirm the broker record has either an MC number or a registered company name. Alvys looks up the broker in Apex Capital by MC number first, then by company name. If neither is present on the broker record, the batch cannot proceed.
2. Confirm the load does not include waypoint stops. Waypoint stops are not supported for Apex Capital batches and will prevent submission.
3. Confirm the subsidiary is connected to Apex Capital with valid OAuth credentials. Navigate to Management > Integrations, expand the Factoring section, and verify that Apex Capital shows an active connection. If the connection is not active, complete the OAuth login described in Connect / Authenticate above.
### Upload Purchase Report or Upload Report button is not visible
1. Confirm your account has the **"Billing"** permission. Without this permission, the upload buttons are not displayed.
2. Navigate to Reports > Factoring and confirm the batch appears in the list. If the batch is not visible, confirm it was submitted successfully in Accounting > Factoring Upload.
3. If the batch was submitted successfully but does not appear in Reports > Factoring, contact Alvys support.
### Integration does not appear as active after setup
1. Confirm that you completed the redirect to Apex Capital and signed in with your Apex Capital credentials. The integration is not active until the OAuth login step is completed. Return to Management > Integrations, click the pencil icon next to Apex Capital, and repeat the login step.
2. Contact Alvys support if the integration still does not appear as active after completing the login step.
## Limits / Unsupported
Waypoint stops are not supported. Loads that include waypoint stops cannot be included in an Apex Capital factoring batch.
Purchase Report and Payment Report data is not synced automatically; both require manual CSV download from the Apex Capital portal and upload into Alvys.
The integration must be configured separately for each subsidiary that will use Apex Capital factoring.
## FAQs
**Q: What is a Notice of Assignment?**
**A:** A Notice of Assignment is a document that informs your customers that their receivables have been assigned to a factoring company. Apex Capital provides the text, which you copy into Management > Company Profile during setup.
**Q: How long does it take for the integration to start working after setup?**
**A:** The integration is active immediately after you sign in with your Apex Capital credentials during the OAuth step.
**Q: Can I use the Apex Capital integration with multiple subsidiaries?**
**A:** Yes. Repeat the full setup in both Management > Company Profile and Management > Integrations for each subsidiary that will use the integration.
**Q: What happens if a broker is not already registered in Apex Capital?**
**A:** Alvys automatically registers the broker in Apex Capital using the MC number on the broker record. If no MC number is present, Alvys uses the company name instead.
**Q: Where do I find the schedule number for a submitted batch?**
**A:** Navigate to Reports > Factoring in Alvys. The schedule number is displayed on the batch record.