> ## Documentation Index
> Fetch the complete documentation index at: https://docs.alvys.com/llms.txt
> Use this file to discover all available pages before exploring further.
# Capital Depot Factoring Integration
> Use the manual Capital Depot factoring workflow in Alvys: generate a batch invoice file, submit it to Capital Depot, then upload purchase and payment reports.
 *Company Profile page showing subsidiary selection*
Capital Depot is a manual, non-API factoring integration. Alvys generates a batch invoice file that you download and send to Capital Depot manually. Capital Depot returns Purchase and Payment reports, which you upload into Alvys to update load statuses.
## What This Integration Does
Capital Depot is a manual, non-API factoring integration (also called Capital Depot factoring or manual invoice factoring). Alvys generates a batch invoice file that you download and send to Capital Depot manually. Capital Depot then provides Purchase and Payment reports, which you upload into Alvys to update load statuses. No data transfers automatically between Alvys and Capital Depot. Synonyms: invoice factoring, accounts receivable financing.
## Prerequisites
* Active account with Capital Depot
* Notice of Assignment text provided by Capital Depot
* Admin, Partner Admin, or Support access to configure the Notice of Assignment
* **"Billing"** permission to submit batches and upload reports
## Connect / Authenticate
### Configure Your Notice of Assignment
1. Navigate to Management > Company Profile. Select the subsidiary that will use the Capital Depot integration.
2. In the **Document Configuration** section, click the blue **(+)** button. The Manage Important Info window opens.
*Company Profile page showing subsidiary selection*
Capital Depot is a manual, non-API factoring integration. Alvys generates a batch invoice file that you download and send to Capital Depot manually. Capital Depot returns Purchase and Payment reports, which you upload into Alvys to update load statuses.
## What This Integration Does
Capital Depot is a manual, non-API factoring integration (also called Capital Depot factoring or manual invoice factoring). Alvys generates a batch invoice file that you download and send to Capital Depot manually. Capital Depot then provides Purchase and Payment reports, which you upload into Alvys to update load statuses. No data transfers automatically between Alvys and Capital Depot. Synonyms: invoice factoring, accounts receivable financing.
## Prerequisites
* Active account with Capital Depot
* Notice of Assignment text provided by Capital Depot
* Admin, Partner Admin, or Support access to configure the Notice of Assignment
* **"Billing"** permission to submit batches and upload reports
## Connect / Authenticate
### Configure Your Notice of Assignment
1. Navigate to Management > Company Profile. Select the subsidiary that will use the Capital Depot integration.
2. In the **Document Configuration** section, click the blue **(+)** button. The Manage Important Info window opens.
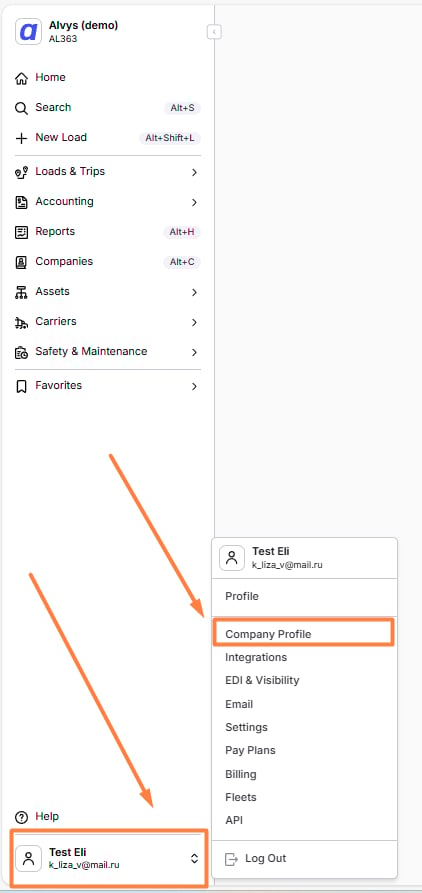 *Document Configuration section showing the blue (+) button*
3. In the drop-down menu, select **Notice of Assignment**. Copy and paste the Notice of Assignment text provided by Capital Depot.
4. Click the blue **Save** button.
## Field & Data Mapping
Alvys generates a batch file containing invoice data for the selected loads. You download this file from Alvys and send it to Capital Depot. Capital Depot provides CSV templates for the Purchase Report and Payment Report. The templates are available as downloads from the Alvys help article for Capital Depot.
**Purchase Report template file:** Purchase\_Report.csv
**Payment Report template file:** Payments\_Report.csv
## Sync Behavior
All data exchange with Capital Depot is manual. Load statuses update as follows:
* After batch submission in Alvys: loads move to **Invoiced**
* After Purchase Report upload: loads move to **Financed**
* After Payment Report upload: loads move to **Completed**
## Submit and Download a Batch
1. Navigate to **Accounting > Factoring Upload**. All loads must have a **Queued** status with invoicing method set to factoring.
2. Select the correct subsidiary.
3. Select the loads to include in the batch.
*Document Configuration section showing the blue (+) button*
3. In the drop-down menu, select **Notice of Assignment**. Copy and paste the Notice of Assignment text provided by Capital Depot.
4. Click the blue **Save** button.
## Field & Data Mapping
Alvys generates a batch file containing invoice data for the selected loads. You download this file from Alvys and send it to Capital Depot. Capital Depot provides CSV templates for the Purchase Report and Payment Report. The templates are available as downloads from the Alvys help article for Capital Depot.
**Purchase Report template file:** Purchase\_Report.csv
**Payment Report template file:** Payments\_Report.csv
## Sync Behavior
All data exchange with Capital Depot is manual. Load statuses update as follows:
* After batch submission in Alvys: loads move to **Invoiced**
* After Purchase Report upload: loads move to **Financed**
* After Payment Report upload: loads move to **Completed**
## Submit and Download a Batch
1. Navigate to **Accounting > Factoring Upload**. All loads must have a **Queued** status with invoicing method set to factoring.
2. Select the correct subsidiary.
3. Select the loads to include in the batch.
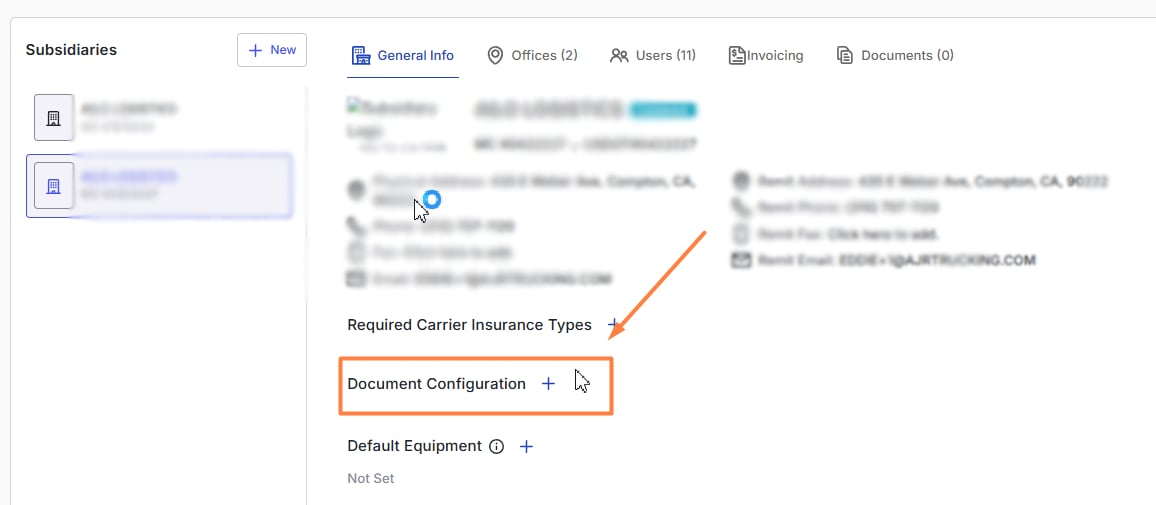 *Load selection screen on the Factoring Upload page*
4. Click **Submit Batch**. Wait until the submission completes. Do not close this page or navigate away during submission; doing so may disrupt the process. Loads automatically move to **Invoiced** status when submission is complete.
5. Navigate to **Reports > Factoring**. Find the submitted batch and click the download button to download the batch file.
*Load selection screen on the Factoring Upload page*
4. Click **Submit Batch**. Wait until the submission completes. Do not close this page or navigate away during submission; doing so may disrupt the process. Loads automatically move to **Invoiced** status when submission is complete.
5. Navigate to **Reports > Factoring**. Find the submitted batch and click the download button to download the batch file.
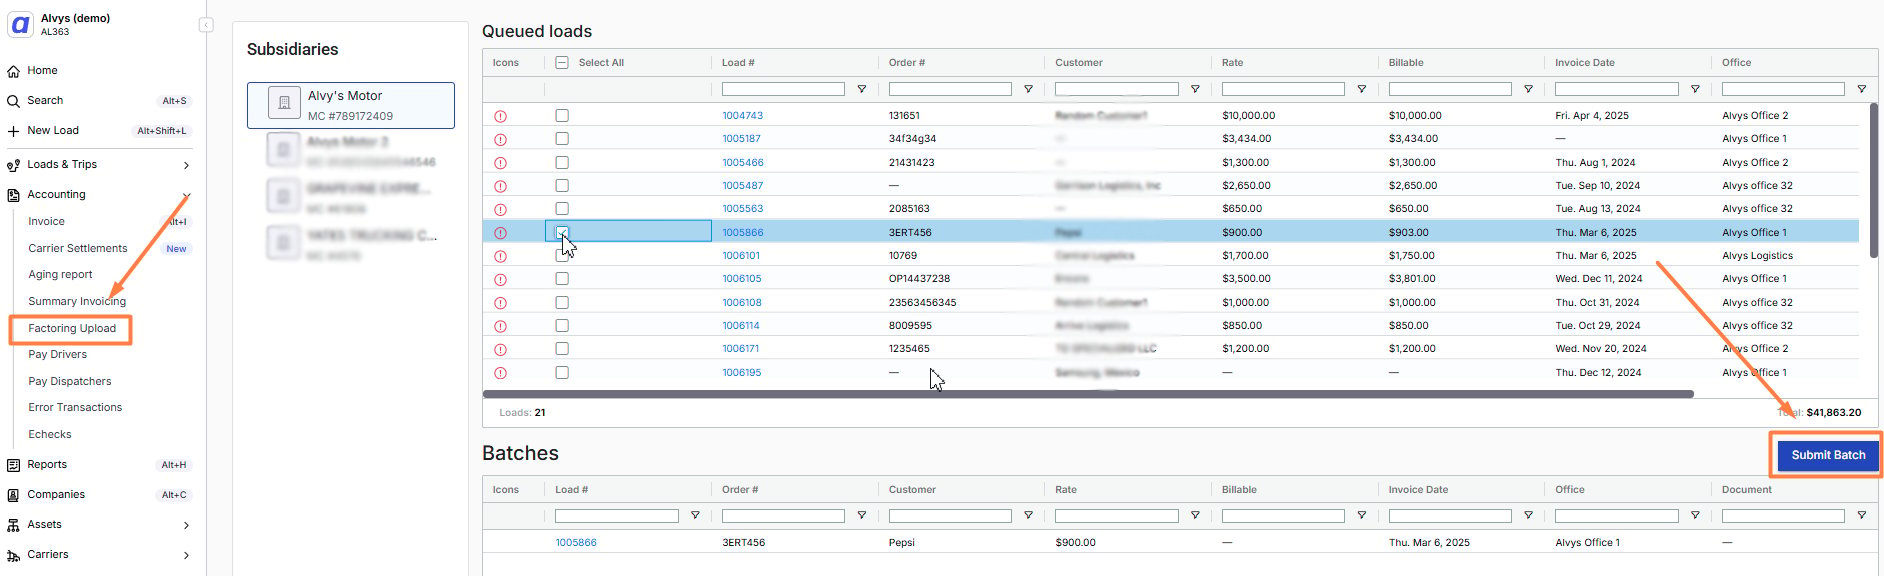 *Reports > Factoring page showing the submitted batch with the download button*
6. Send the downloaded batch file to Capital Depot.
## Upload Your Purchase Report
1. Obtain the completed Purchase Report from Capital Depot. Complete the **Purchase\_Report.csv** template using the data provided by Capital Depot. Ensure the report includes all invoices in the batch.
2. Navigate to **Reports > Factoring**. Select the batch.
3. Click the **Upload Purchase Report** button. Upload the completed file.
*Reports > Factoring page showing the submitted batch with the download button*
6. Send the downloaded batch file to Capital Depot.
## Upload Your Purchase Report
1. Obtain the completed Purchase Report from Capital Depot. Complete the **Purchase\_Report.csv** template using the data provided by Capital Depot. Ensure the report includes all invoices in the batch.
2. Navigate to **Reports > Factoring**. Select the batch.
3. Click the **Upload Purchase Report** button. Upload the completed file.
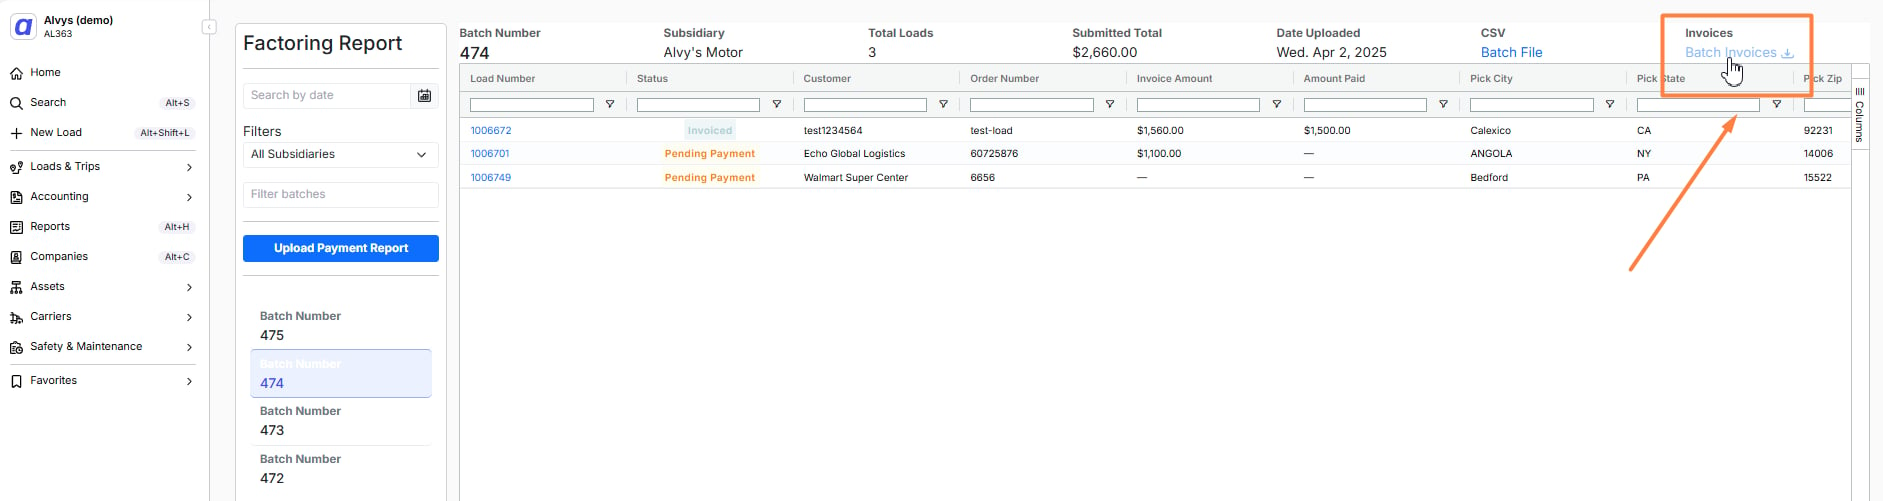 *Reports > Factoring page with the Upload Purchase Report button visible*
4. After upload, loads move to **Financed** status. This indicates that Capital Depot has received payment for the invoices.
## Upload Your Payment Report
1. Obtain the completed Payment Report from Capital Depot. Complete the **Payments\_Report.csv** template using the data provided by Capital Depot.
2. Navigate to **Reports > Factoring**. Select the batch.
3. Click the **Upload Payment Report** button. Upload the completed file.
*Reports > Factoring page with the Upload Purchase Report button visible*
4. After upload, loads move to **Financed** status. This indicates that Capital Depot has received payment for the invoices.
## Upload Your Payment Report
1. Obtain the completed Payment Report from Capital Depot. Complete the **Payments\_Report.csv** template using the data provided by Capital Depot.
2. Navigate to **Reports > Factoring**. Select the batch.
3. Click the **Upload Payment Report** button. Upload the completed file.
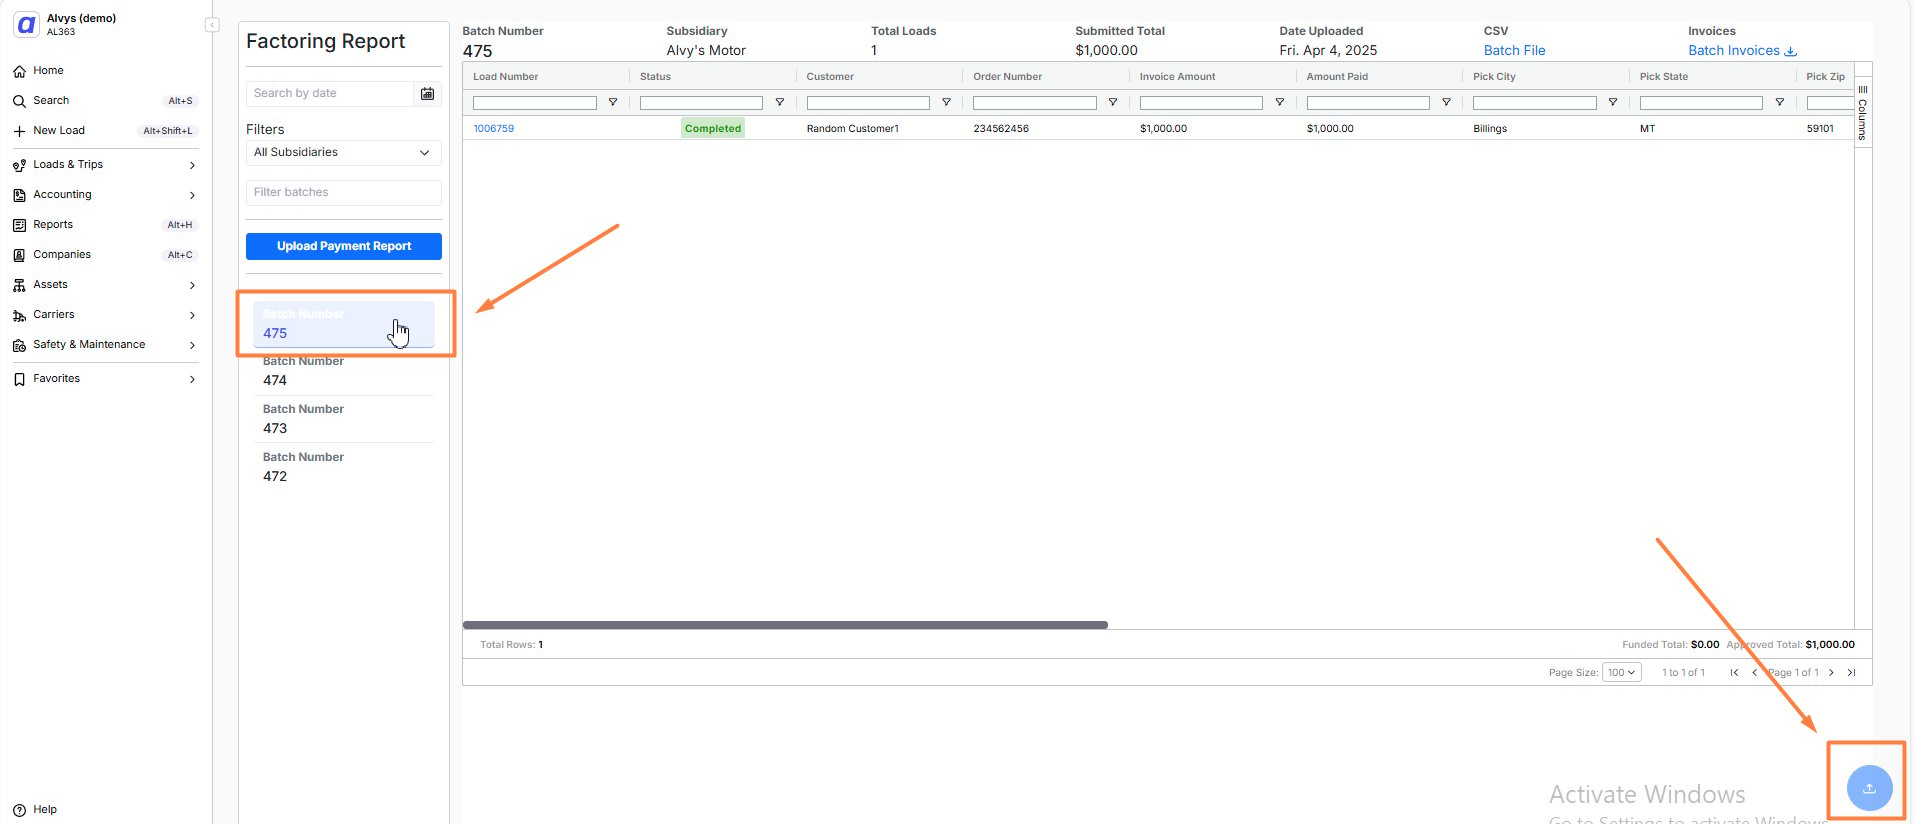 *Reports > Factoring page with the Upload Payment Report button visible*
4. After upload, loads move to **Completed** status. Customer payment is applied to the load.
## Verify It's Working
After submitting a batch, confirm that the selected loads have moved from **Queued** to **Invoiced** status in Alvys. After uploading the Purchase Report, confirm loads show **Financed**. After uploading the Payment Report, confirm loads show **Completed**.
## Troubleshooting
### Loads did not move to Invoiced after batch submission
1. Confirm you did not navigate away from Accounting > Factoring Upload before the submission completed. If the loads still show **Queued**, return to Accounting > Factoring Upload and resubmit the batch.
2. Confirm the loads had **Queued** status and invoicing method set to factoring before submission. Only loads meeting both conditions appear in the batch list.
3. Contact Alvys support if loads remain in **Queued** after resubmitting.
### Upload Purchase Report or Upload Payment Report button is not visible
1. Confirm you have the **"Billing"** permission in Alvys.
2. Navigate to **Reports > Factoring** and confirm the batch appears in the list. If the batch is not visible, confirm the batch was submitted from **Accounting > Factoring Upload**.
3. Contact Alvys support if the batch was submitted but does not appear in **Reports > Factoring**.
## Limits / Unsupported
Capital Depot does not support automated data transfer. All batch submissions and report uploads require manual action. There is no API connection between Alvys and Capital Depot.
## FAQs
**Q: Where do I get the CSV templates for the Purchase and Payment reports?**
**A:** Alvys provides both templates (Purchase\_Report.csv and Payments\_Report.csv). Download them from the Alvys help article for Capital Depot.
**Q: What happens to load statuses after each step?**
**A:** Loads move to **Invoiced** after you submit the batch, to **Financed** after you upload the Purchase Report, and to **Completed** after you upload the Payment Report.
**Q: Do I need to send the batch file to Capital Depot, or does Alvys do that automatically?**
**A:** You must download the batch file from **Reports > Factoring** and send it to Capital Depot manually. Capital Depot does not have a direct API connection to Alvys.
*Reports > Factoring page with the Upload Payment Report button visible*
4. After upload, loads move to **Completed** status. Customer payment is applied to the load.
## Verify It's Working
After submitting a batch, confirm that the selected loads have moved from **Queued** to **Invoiced** status in Alvys. After uploading the Purchase Report, confirm loads show **Financed**. After uploading the Payment Report, confirm loads show **Completed**.
## Troubleshooting
### Loads did not move to Invoiced after batch submission
1. Confirm you did not navigate away from Accounting > Factoring Upload before the submission completed. If the loads still show **Queued**, return to Accounting > Factoring Upload and resubmit the batch.
2. Confirm the loads had **Queued** status and invoicing method set to factoring before submission. Only loads meeting both conditions appear in the batch list.
3. Contact Alvys support if loads remain in **Queued** after resubmitting.
### Upload Purchase Report or Upload Payment Report button is not visible
1. Confirm you have the **"Billing"** permission in Alvys.
2. Navigate to **Reports > Factoring** and confirm the batch appears in the list. If the batch is not visible, confirm the batch was submitted from **Accounting > Factoring Upload**.
3. Contact Alvys support if the batch was submitted but does not appear in **Reports > Factoring**.
## Limits / Unsupported
Capital Depot does not support automated data transfer. All batch submissions and report uploads require manual action. There is no API connection between Alvys and Capital Depot.
## FAQs
**Q: Where do I get the CSV templates for the Purchase and Payment reports?**
**A:** Alvys provides both templates (Purchase\_Report.csv and Payments\_Report.csv). Download them from the Alvys help article for Capital Depot.
**Q: What happens to load statuses after each step?**
**A:** Loads move to **Invoiced** after you submit the batch, to **Financed** after you upload the Purchase Report, and to **Completed** after you upload the Payment Report.
**Q: Do I need to send the batch file to Capital Depot, or does Alvys do that automatically?**
**A:** You must download the batch file from **Reports > Factoring** and send it to Capital Depot manually. Capital Depot does not have a direct API connection to Alvys.
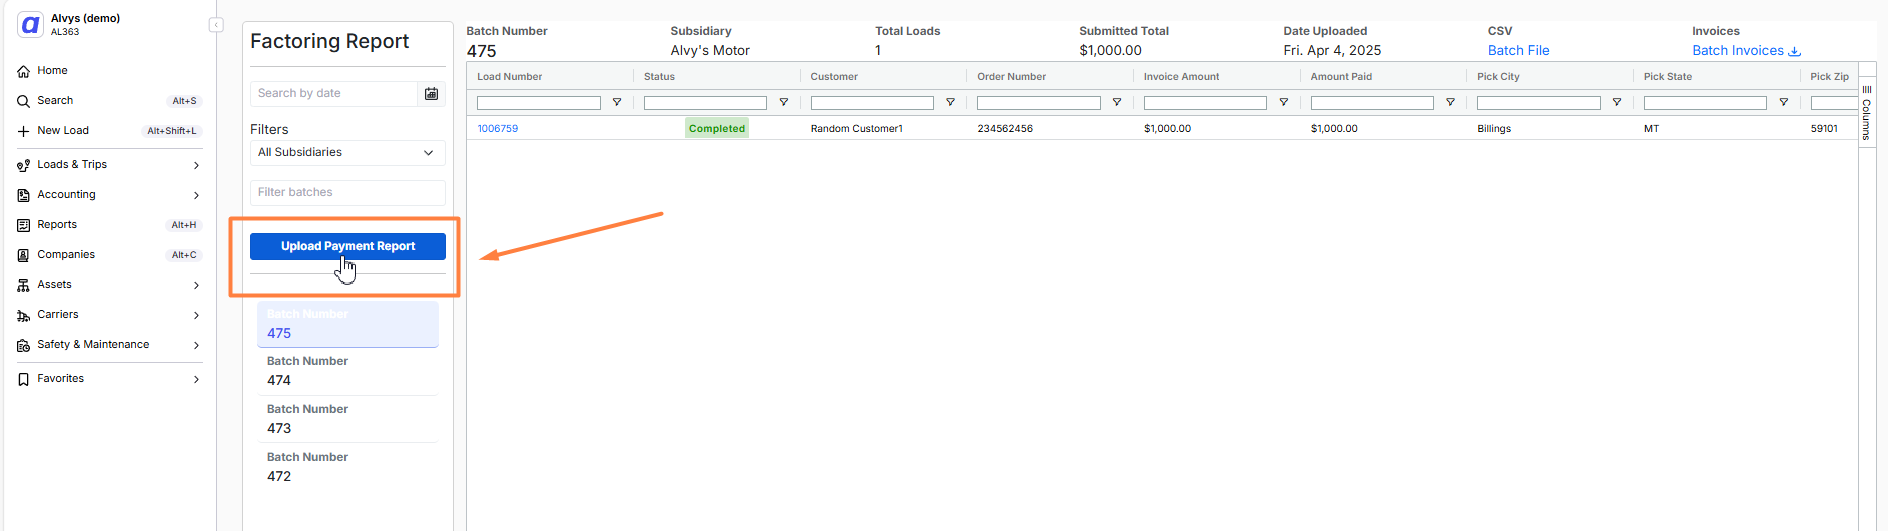 *Load status progression showing Queued, Invoiced, Financed, and Completed statuses*