> ## Documentation Index
> Fetch the complete documentation index at: https://docs.alvys.com/llms.txt
> Use this file to discover all available pages before exploring further.
# How to Create a Load
> Keeping track of all the info can be a daunting task. Luckily, we are here to make it easy to enter the information and keep it in one place
Creating a new load in Alvys sets up the shipment record, assigns the customer, and defines all pickup and delivery stops. Also called a shipment, order, or freight order.
## Overview
A load is the core record in Alvys. It captures the customer, billing details, stop schedule, and equipment requirements for a single shipment. Every dispatched trip, invoice, and driver settlement traces back to a load. You can create a revenue load (billed to a customer) or a non-revenue load (an internal or deadhead move with no customer invoice).
This article walks through creating a load from start to finish using the New Load form. Synonyms: add a load, build a load, new shipment, create an order, enter freight.
## Watch the walkthrough
If a screen in the video looks different, follow the written steps below.
[Open the recording](https://www.loom.com/share/a44e26ead29242079b913ee9d9481f46)
To create a load from a customer rate confirmation instead of typing the form, see [How to create a load using automated data entry](/help/loads-trips/how-to-create-a-load-using-automated-data-entry).
## Before You Start
All authenticated Alvys users can create a load; no additional permission is required.
Before beginning, confirm you have the following information on hand:
* The customer name (or be ready to create a new customer record)
* An order number (the customer's reference number for this shipment)
* Equipment type required for the load
* Pickup location, date, and time
* Delivery location, date, and time
For non-revenue loads, a customer is not required, but you still need at least one pickup stop and one delivery stop.
## Steps
### 1. Open the New Load form
1. In the left navigation, click **Loads and Trips**.
2. In the dropdown, click **New Load**.
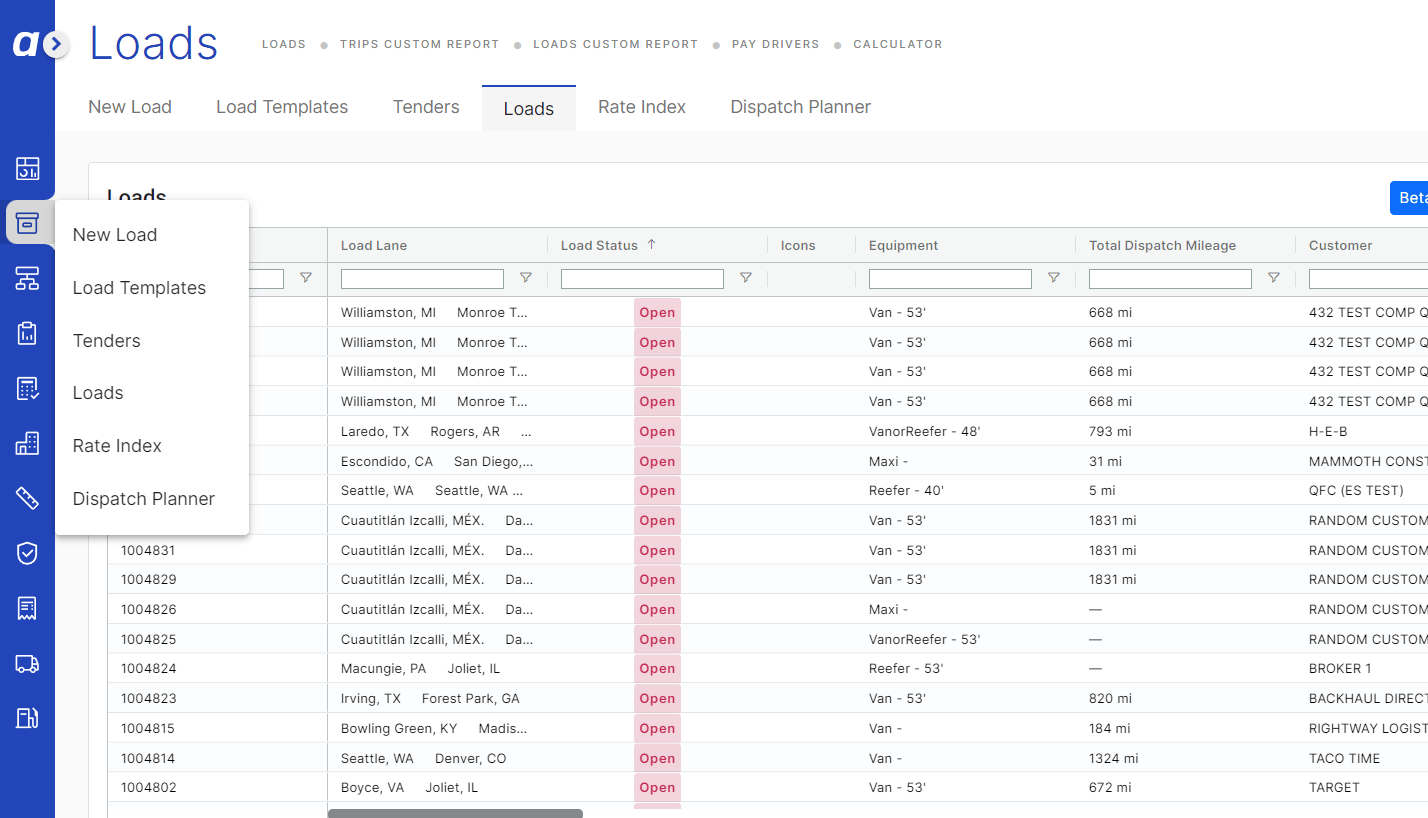 *Left navigation with "Loads and Trips" expanded and "New Load" option highlighted*
### 2. Choose the load type
1. At the top of the form, review the **Non-Revenue** toggle.
2. If this is a standard billable shipment, leave the toggle off (default).
3. If this is a non-revenue move (deadhead, repositioning, or internal), turn the **Non-Revenue** toggle on.
4. Click **Next** to continue.
*Left navigation with "Loads and Trips" expanded and "New Load" option highlighted*
### 2. Choose the load type
1. At the top of the form, review the **Non-Revenue** toggle.
2. If this is a standard billable shipment, leave the toggle off (default).
3. If this is a non-revenue move (deadhead, repositioning, or internal), turn the **Non-Revenue** toggle on.
4. Click **Next** to continue.
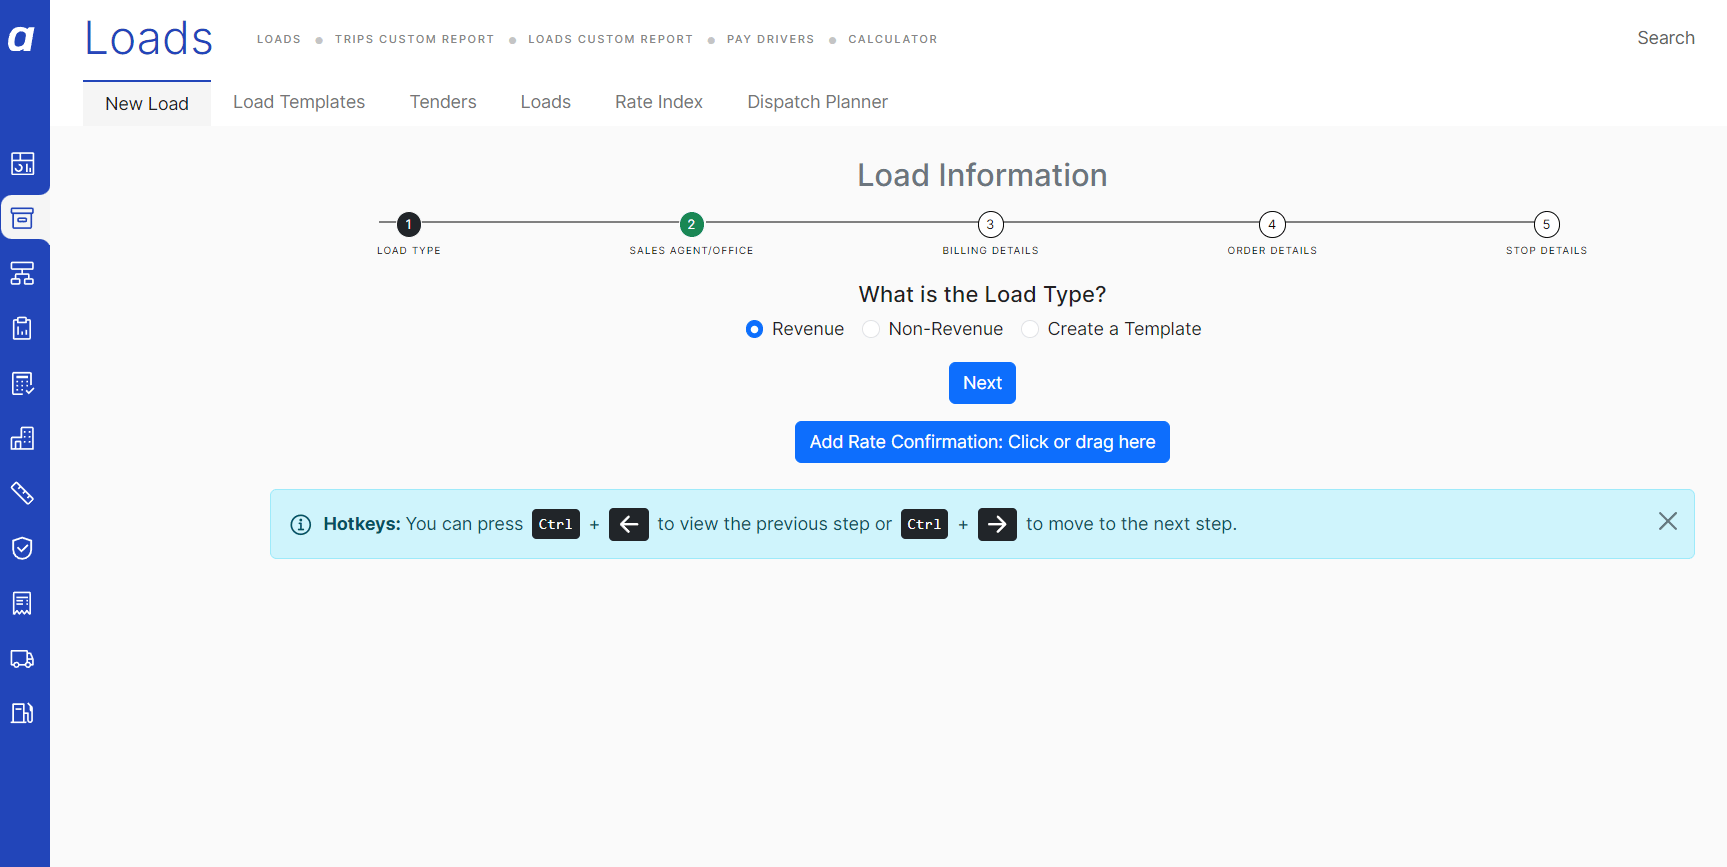 *New Load form header showing the Non-Revenue toggle*
### 3. Select the office and agent
1. In the **Office** field, select the representative office responsible for this load.
2. Optionally, click **Show More** to expand additional fields. Under **Show More**, you can assign a **Sales Agent** (optional).
For non-revenue loads, the Office field is optional and can be left blank.
*New Load form header showing the Non-Revenue toggle*
### 3. Select the office and agent
1. In the **Office** field, select the representative office responsible for this load.
2. Optionally, click **Show More** to expand additional fields. Under **Show More**, you can assign a **Sales Agent** (optional).
For non-revenue loads, the Office field is optional and can be left blank.
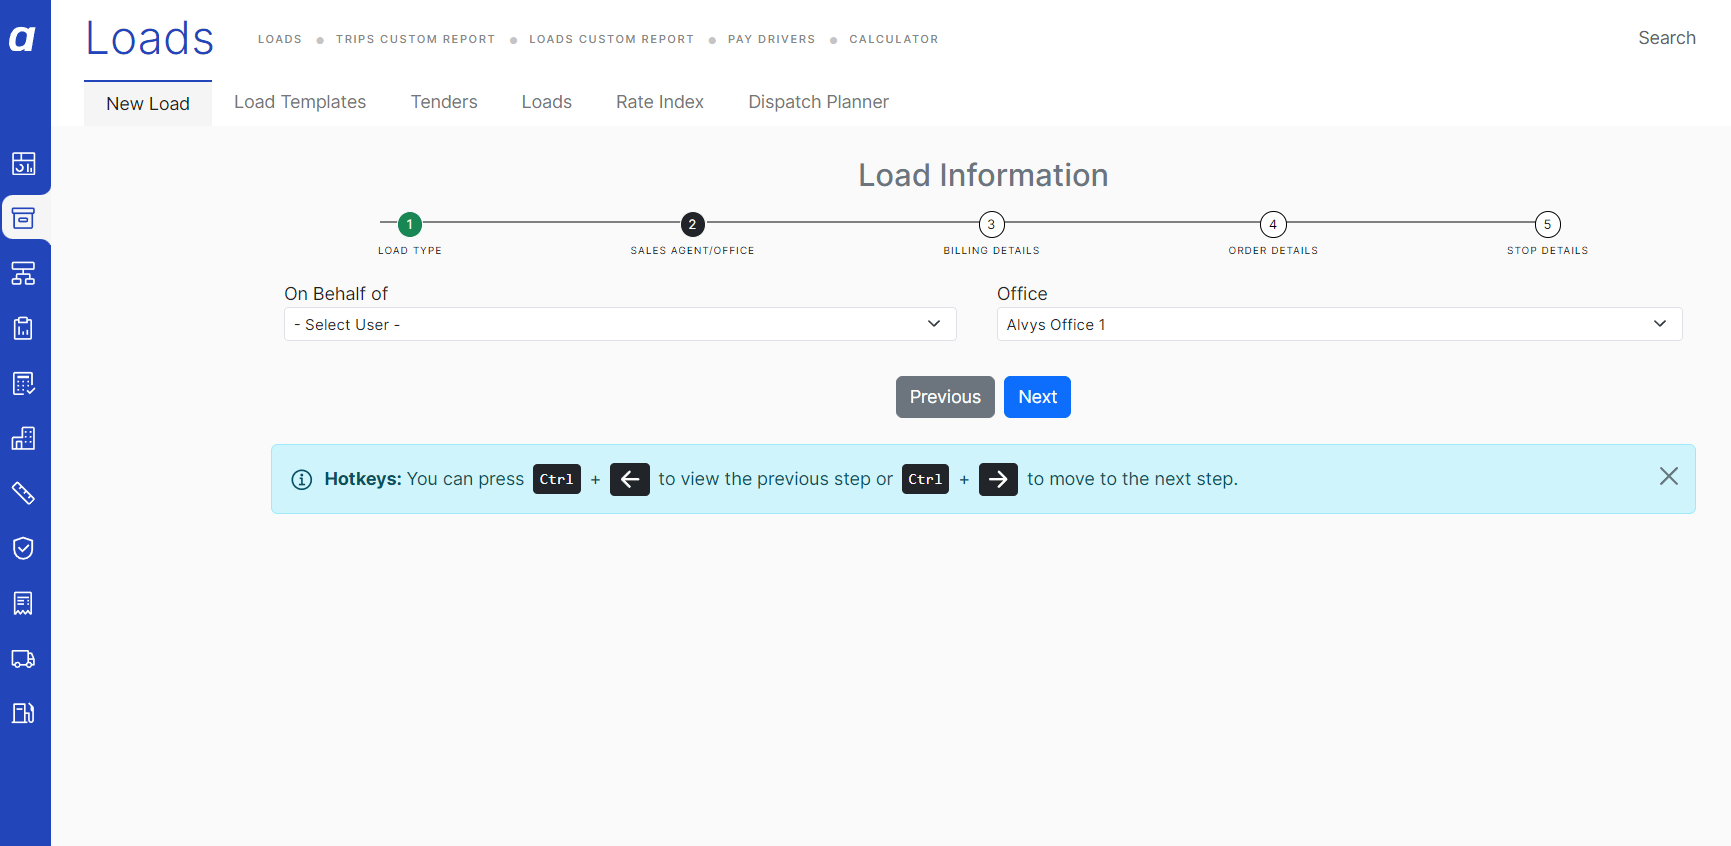 *General section showing the Office field and the Show More toggle expanded to reveal the Sales Agent field*
### 4. Enter customer and billing information
1. In the **Customer** field, type the customer name and select it from the dropdown. If the customer does not exist yet, click **Add new customer** in the dropdown to create a new customer record without leaving the form.
2. In the **Invoice As** field, select the subsidiary that will invoice this customer. This field auto-populates the **Tender As** field to match.
3. In the **Billing Rate** field, enter the agreed rate. Billing rate is optional; you can create the load without one and add it later.
For non-revenue loads, the **Invoice As** field label changes to **Subsidiary**.
*General section showing the Office field and the Show More toggle expanded to reveal the Sales Agent field*
### 4. Enter customer and billing information
1. In the **Customer** field, type the customer name and select it from the dropdown. If the customer does not exist yet, click **Add new customer** in the dropdown to create a new customer record without leaving the form.
2. In the **Invoice As** field, select the subsidiary that will invoice this customer. This field auto-populates the **Tender As** field to match.
3. In the **Billing Rate** field, enter the agreed rate. Billing rate is optional; you can create the load without one and add it later.
For non-revenue loads, the **Invoice As** field label changes to **Subsidiary**.
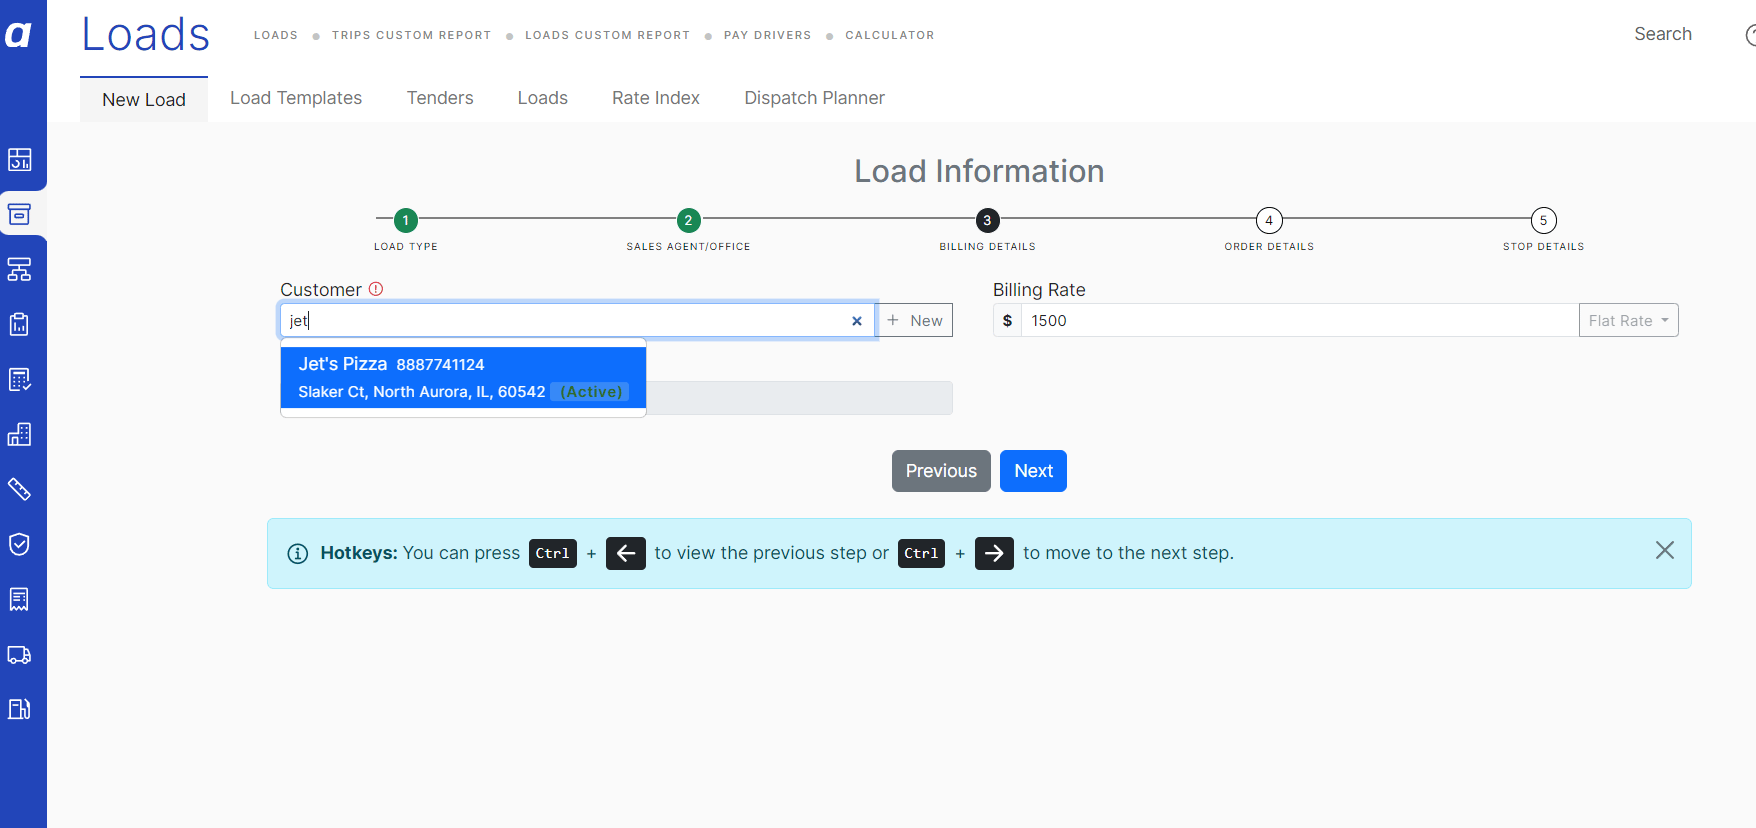 *General section showing the Customer field, Invoice As field, and Billing Rate field with the "Add new customer" option visible in the customer dropdown*
### 5. Enter the order number
1. In the **Order Number** field, enter the customer's reference number for this shipment. If the order number you enter already exists on another load, Alvys displays a duplicate load warning. Review the warning before continuing.
*General section showing the Customer field, Invoice As field, and Billing Rate field with the "Add new customer" option visible in the customer dropdown*
### 5. Enter the order number
1. In the **Order Number** field, enter the customer's reference number for this shipment. If the order number you enter already exists on another load, Alvys displays a duplicate load warning. Review the warning before continuing.
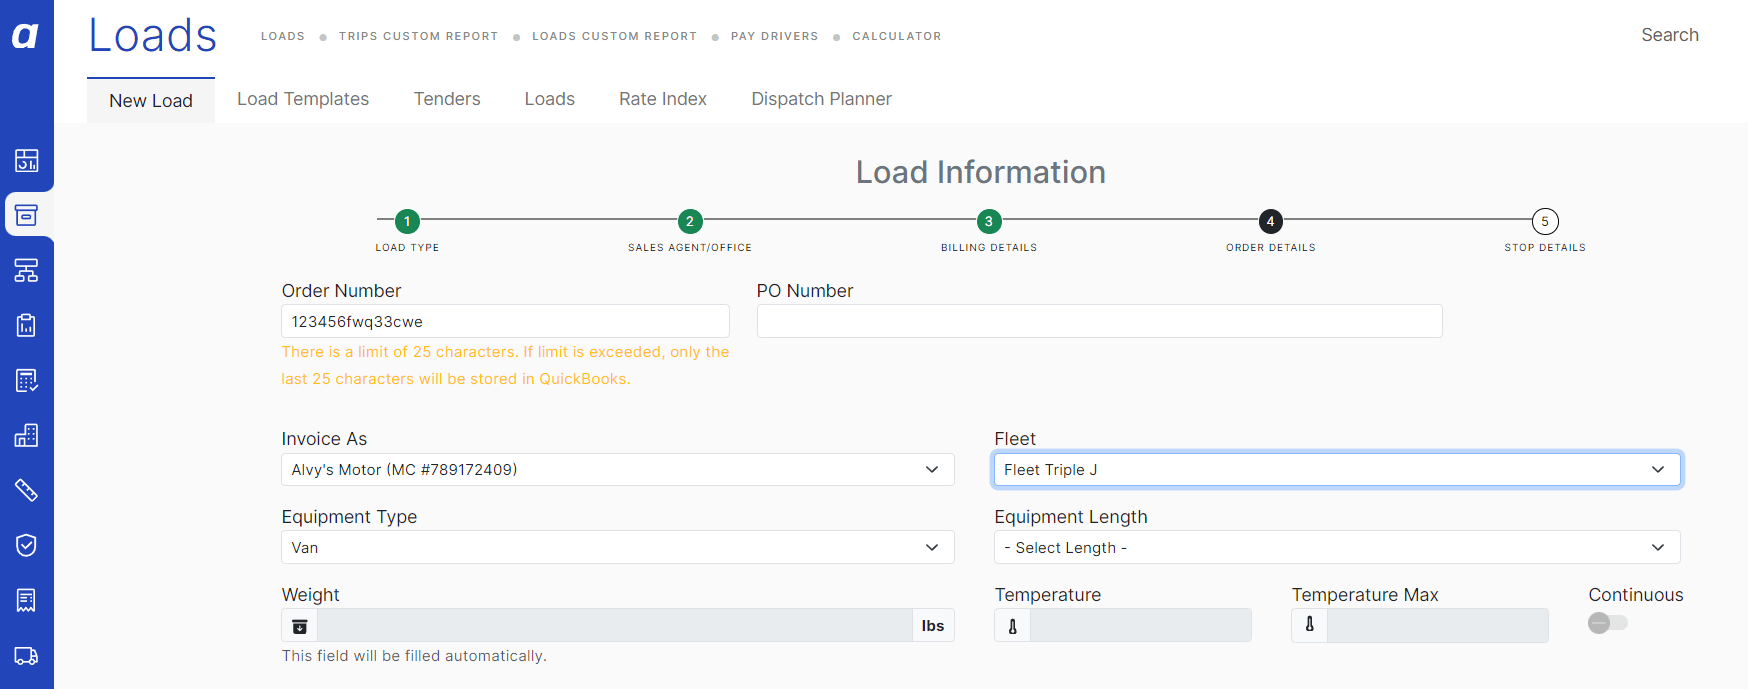 *Order Number field with the duplicate load warning visible*
### 6. Select the equipment type
1. In the **Equipment Type** field, select the trailer or equipment type required for this load.
Equipment type is a required field. The **Create Load** button will not become active until this field is filled in.
### 7. Add the pickup stop
1. In the Stops section, click **Add Pickup**.
2. Fill in the pickup stop fields:
* **Appointment Date:** Required. Enter the pickup date and time.
* **Company:** Required. Enter or search for the pickup location. Select **Customer** to use the customer's physical address on file.
3. Fill in any additional stop details (reference numbers, notes) as needed.
*Order Number field with the duplicate load warning visible*
### 6. Select the equipment type
1. In the **Equipment Type** field, select the trailer or equipment type required for this load.
Equipment type is a required field. The **Create Load** button will not become active until this field is filled in.
### 7. Add the pickup stop
1. In the Stops section, click **Add Pickup**.
2. Fill in the pickup stop fields:
* **Appointment Date:** Required. Enter the pickup date and time.
* **Company:** Required. Enter or search for the pickup location. Select **Customer** to use the customer's physical address on file.
3. Fill in any additional stop details (reference numbers, notes) as needed.
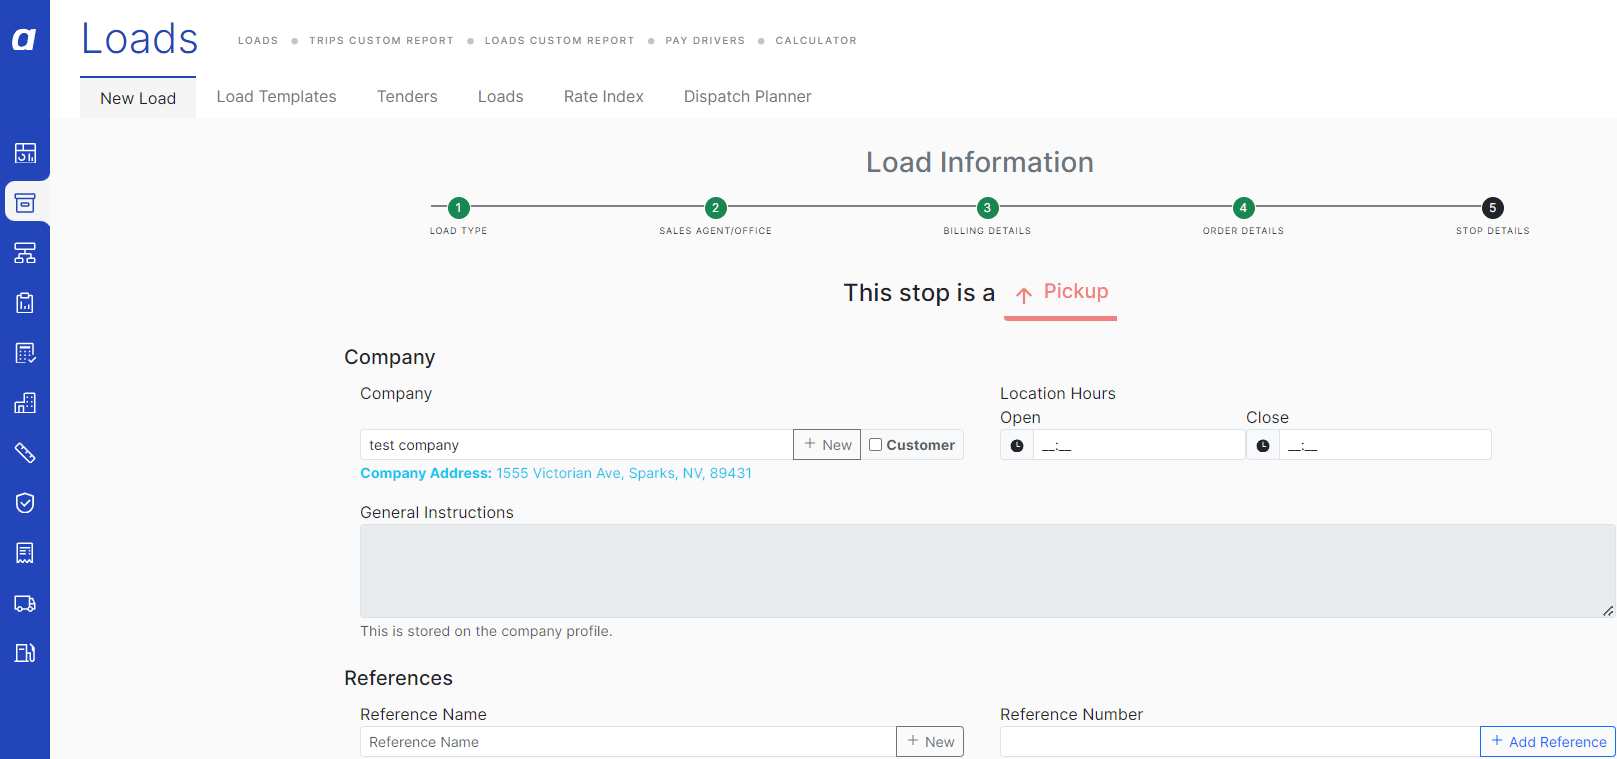 *Stops section with the Add Pickup button visible and the pickup stop form expanded*
### 8. Add the delivery stop
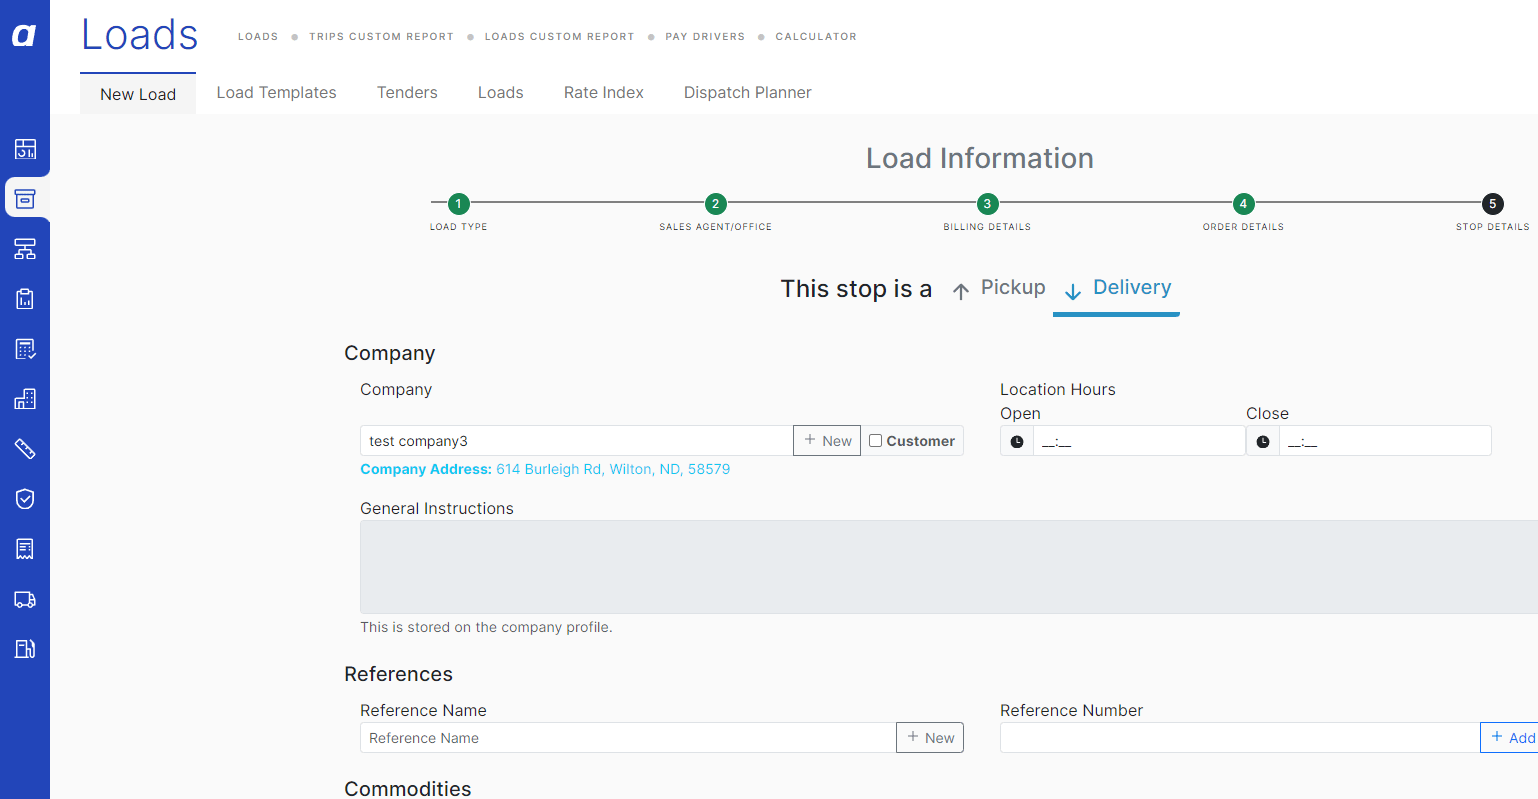
1. Click **Add Delivery** to add the delivery location.
2. Fill in the delivery stop fields:
* **Appointment Date:** Required. Enter the delivery date and time. The delivery date must be on or after the pickup date.
* **Company:** Required. Enter or search for the delivery location.
3. Fill in any additional stop details as needed.
*Stops section with the Add Pickup button visible and the pickup stop form expanded*
### 8. Add the delivery stop
1. Click **Add Delivery** to add the delivery location.
2. Fill in the delivery stop fields:
* **Appointment Date:** Required. Enter the delivery date and time. The delivery date must be on or after the pickup date.
* **Company:** Required. Enter or search for the delivery location.
3. Fill in any additional stop details as needed.
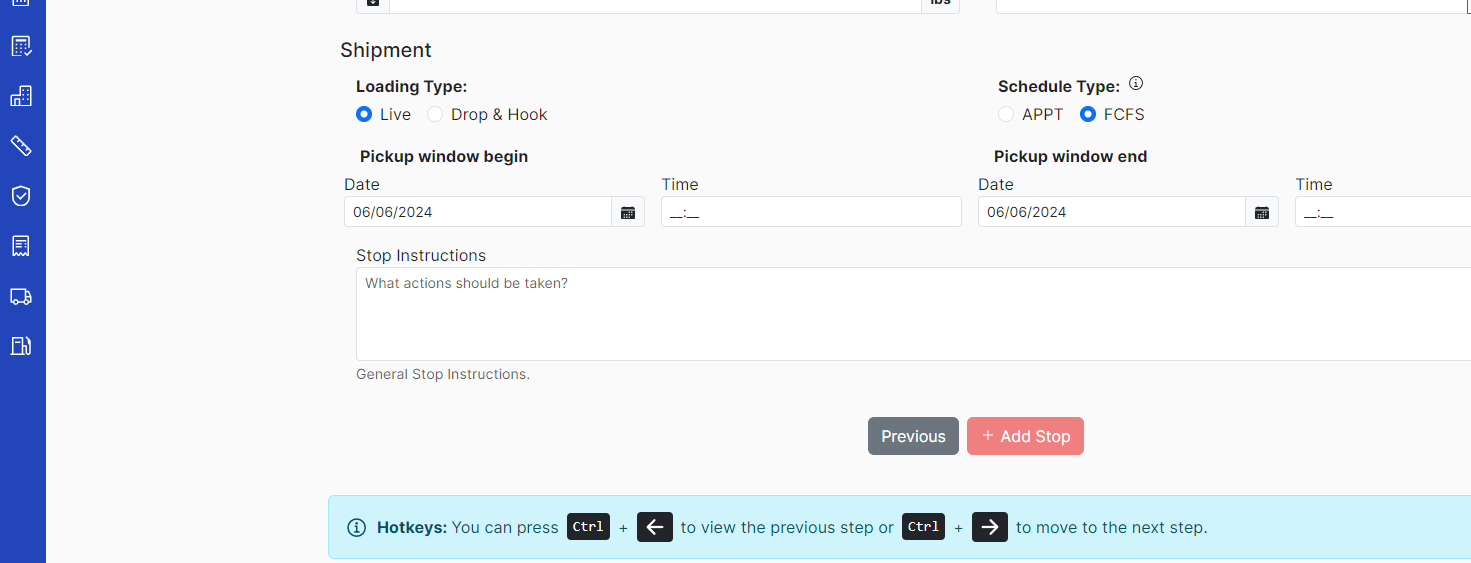 *Stops section with both pickup and delivery stops visible and the delivery stop form expanded*
### 9. Add any intermediate stops (if needed)
1. If the load has stops between pickup and delivery, click **Add stop** to insert an intermediate stop.
2. Fill in the required fields for each intermediate stop.
*Stops section with both pickup and delivery stops visible and the delivery stop form expanded*
### 9. Add any intermediate stops (if needed)
1. If the load has stops between pickup and delivery, click **Add stop** to insert an intermediate stop.
2. Fill in the required fields for each intermediate stop.
 *Stops section with an intermediate stop added between pickup and delivery, showing the "Add stop" button*
### 10. Confirm the Create Load button is active
1. Review all required fields. When every required field is complete, the **Create Load** button in the page header becomes active (it is no longer greyed out).
2. If the button is still greyed out, see the Troubleshooting section below for the required fields checklist.
The current form does not display a green bar at the bottom of the screen. That was a feature of a previous version of the form. In the current form, the **Create Load** button in the header activates when all required fields are complete.
*Stops section with an intermediate stop added between pickup and delivery, showing the "Add stop" button*
### 10. Confirm the Create Load button is active
1. Review all required fields. When every required field is complete, the **Create Load** button in the page header becomes active (it is no longer greyed out).
2. If the button is still greyed out, see the Troubleshooting section below for the required fields checklist.
The current form does not display a green bar at the bottom of the screen. That was a feature of a previous version of the form. In the current form, the **Create Load** button in the header activates when all required fields are complete.
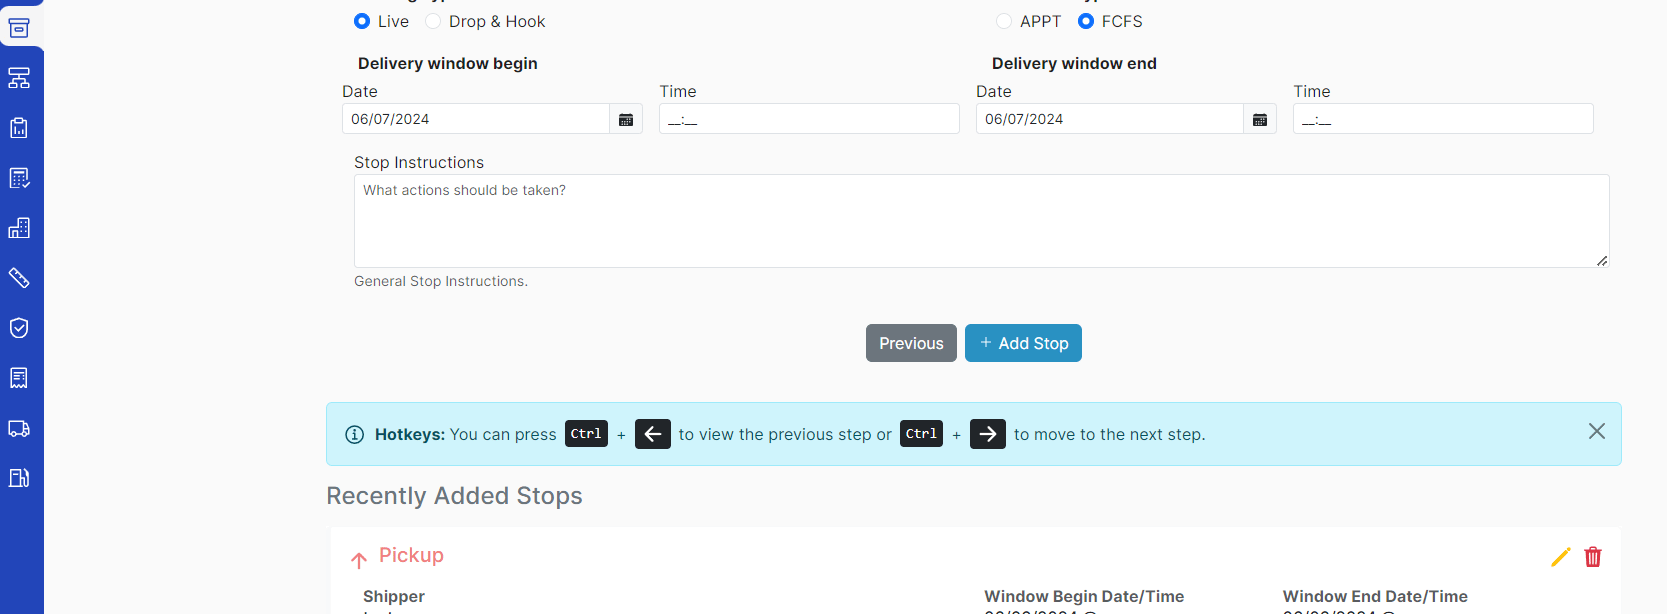 *New Load form header showing the Create Load button in its active (not greyed out) state*
### 11. Create the load
1. Click **Create Load**.
2. The load is saved and opens in **Open** status.
*New Load form header showing the Create Load button in its active (not greyed out) state*
### 11. Create the load
1. Click **Create Load**.
2. The load is saved and opens in **Open** status.
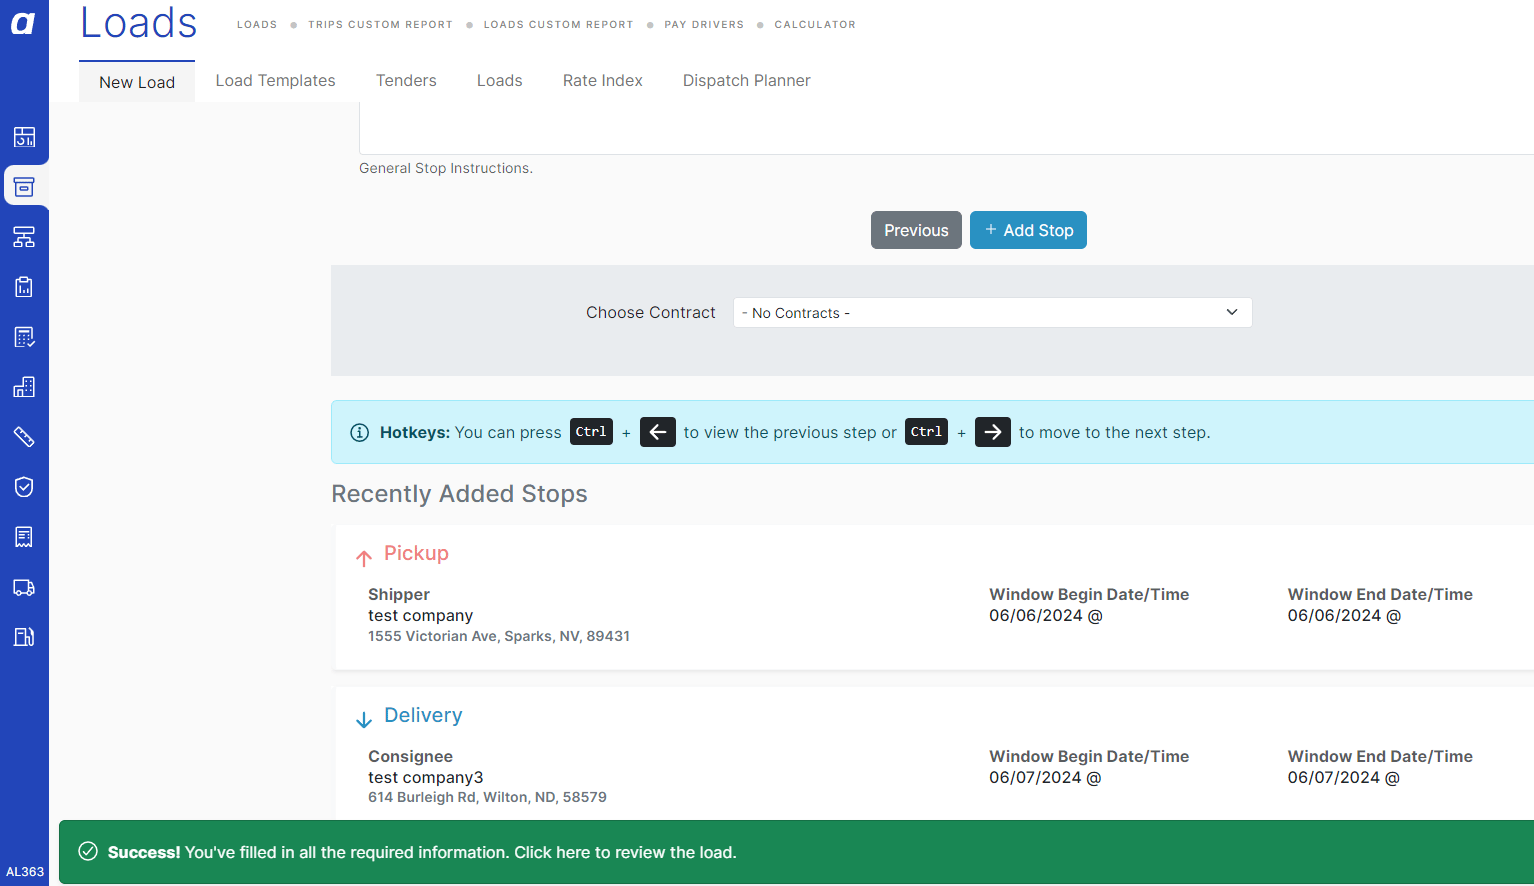 *Newly created load in Open status, showing the load record page after creation*
## Result
The load is created and saved in **Open** status. You can now assign a carrier, add documents, build a trip, and dispatch the load.
*Newly created load in Open status, showing the load record page after creation*
## Result
The load is created and saved in **Open** status. You can now assign a carrier, add documents, build a trip, and dispatch the load.
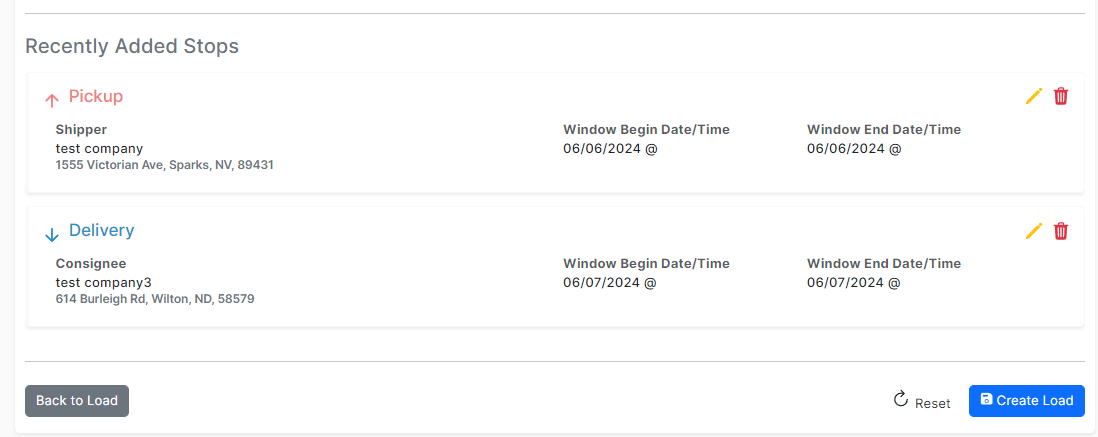 *Newly created load in Open status, showing the load record page after creation*
## Variations
### Non-revenue load
A non-revenue load does not generate a customer invoice. To create one:
1. Turn on the **Non-Revenue** toggle at the top of the New Load form before clicking Next.
2. The **Customer** field is not required and may be left blank.
3. The **Office** field is optional for non-revenue loads.
4. The **Invoice As** field label changes to **Subsidiary** when Non-Revenue is on. Select the appropriate subsidiary if applicable.
5. Complete at least one pickup stop and one delivery stop, then click **Create Load**.
### Creating a new customer during load creation
If the customer does not yet exist in Alvys:
1. Type the new customer name in the **Customer** field.
2. Click **Add new customer** in the dropdown.
3. Complete the new customer form without leaving the New Load page.
4. The new customer populates the Customer field automatically after creation.
## Troubleshooting
### Create Load button remains inactive (greyed out)
The **Create Load** button does not become active until all required fields are complete. Confirm a **Customer** is selected (revenue loads only) and that the **Invoice As** field (or **Subsidiary** for non-revenue loads) has a selection. Confirm the **Office** field is filled in (required for revenue loads; optional for non-revenue loads), the **Order Number** field is not empty and does not contain only spaces, and an **Equipment Type** is selected. Confirm a pickup stop is present with both an **Appointment Date** and a **Company** filled in, and that a delivery stop is present with the same. Confirm the delivery date is on or after the pickup date, stops are in chronological order, and the first stop is a pickup type while the last stop is a delivery type. If all of these are complete and the button is still inactive, contact Alvys support.
### Duplicate load warning appears on the order number
The order number you entered already exists on another load in the system. Either confirm you intend to create a second load with the same order number, or go back and enter the correct order number before creating the load.
## FAQs
**Q: Do I need special permission to create a load?**
**A:** No. All authenticated Alvys users can create a load. No additional role or permission is required.
**Q: Can I save a load as a draft before it is complete?**
**A:** No. The New Load form does not have a draft or save-as-draft option. Either complete all required fields and click **Create Load**, or discard the form and start over.
**Q: What is the order number?**
**A:** The order number is the customer's reference number for this shipment; it is also called a customer reference number or customer PO number. It must not be blank and must contain at least one non-space character.
**Q: Can I create a load without a billing rate?**
**A:** Yes. The billing rate field is optional. You can create the load and add the billing rate later by editing the load.
**Q: What if I selected the wrong customer?**
**A:** After the load is created, open the load, click **Edit**, and update the Customer field. You cannot change the customer from within the New Load form after clicking **Create Load**.
**Q: What does the Non-Revenue toggle do?**
**A:** Turning on the Non-Revenue toggle marks the load as an internal or non-billable move. No customer invoice is generated. The Customer and Office fields become optional, and the Invoice As field label changes to **Subsidiary**.
## Go Deeper
* [Cloning a Load](/help/loads-trips/how-to-clone-a-load)
*Newly created load in Open status, showing the load record page after creation*
## Variations
### Non-revenue load
A non-revenue load does not generate a customer invoice. To create one:
1. Turn on the **Non-Revenue** toggle at the top of the New Load form before clicking Next.
2. The **Customer** field is not required and may be left blank.
3. The **Office** field is optional for non-revenue loads.
4. The **Invoice As** field label changes to **Subsidiary** when Non-Revenue is on. Select the appropriate subsidiary if applicable.
5. Complete at least one pickup stop and one delivery stop, then click **Create Load**.
### Creating a new customer during load creation
If the customer does not yet exist in Alvys:
1. Type the new customer name in the **Customer** field.
2. Click **Add new customer** in the dropdown.
3. Complete the new customer form without leaving the New Load page.
4. The new customer populates the Customer field automatically after creation.
## Troubleshooting
### Create Load button remains inactive (greyed out)
The **Create Load** button does not become active until all required fields are complete. Confirm a **Customer** is selected (revenue loads only) and that the **Invoice As** field (or **Subsidiary** for non-revenue loads) has a selection. Confirm the **Office** field is filled in (required for revenue loads; optional for non-revenue loads), the **Order Number** field is not empty and does not contain only spaces, and an **Equipment Type** is selected. Confirm a pickup stop is present with both an **Appointment Date** and a **Company** filled in, and that a delivery stop is present with the same. Confirm the delivery date is on or after the pickup date, stops are in chronological order, and the first stop is a pickup type while the last stop is a delivery type. If all of these are complete and the button is still inactive, contact Alvys support.
### Duplicate load warning appears on the order number
The order number you entered already exists on another load in the system. Either confirm you intend to create a second load with the same order number, or go back and enter the correct order number before creating the load.
## FAQs
**Q: Do I need special permission to create a load?**
**A:** No. All authenticated Alvys users can create a load. No additional role or permission is required.
**Q: Can I save a load as a draft before it is complete?**
**A:** No. The New Load form does not have a draft or save-as-draft option. Either complete all required fields and click **Create Load**, or discard the form and start over.
**Q: What is the order number?**
**A:** The order number is the customer's reference number for this shipment; it is also called a customer reference number or customer PO number. It must not be blank and must contain at least one non-space character.
**Q: Can I create a load without a billing rate?**
**A:** Yes. The billing rate field is optional. You can create the load and add the billing rate later by editing the load.
**Q: What if I selected the wrong customer?**
**A:** After the load is created, open the load, click **Edit**, and update the Customer field. You cannot change the customer from within the New Load form after clicking **Create Load**.
**Q: What does the Non-Revenue toggle do?**
**A:** Turning on the Non-Revenue toggle marks the load as an internal or non-billable move. No customer invoice is generated. The Customer and Office fields become optional, and the Invoice As field label changes to **Subsidiary**.
## Go Deeper
* [Cloning a Load](/help/loads-trips/how-to-clone-a-load)