> ## Documentation Index
> Fetch the complete documentation index at: https://docs.alvys.com/llms.txt
> Use this file to discover all available pages before exploring further.
# How to Set Up Auto-Assign Fleets to Loads
> Enable auto-assign fleets so Alvys applies the correct fleet to each load based on driver, truck, or trailer, with a default for external carriers.
Configure Alvys to automatically assign the correct fleet to a load based on the truck, trailer, or driver on that load. Set a default fleet for loads covered by external carriers. This setting is configured once and runs automatically on every new load.
## Overview
The Auto-Assign Fleets feature removes the need to manually set a fleet on every load. When enabled, Alvys checks the fleet associated with the truck, trailer, or driver assigned to the load and applies that fleet to the load automatically. You can also designate a default fleet for loads covered by external carriers, ensuring all loads are attributed to a fleet for reporting purposes.
Synonyms: auto-assign fleet, automatic fleet assignment, fleet automation, fleet auto-assign.
## Before You Start
Only users with the **Admin** or **Partner Admin** role can access Management → Fleets and configure this feature.
## Steps
1. Navigate to Management → Fleets. From the main navigation menu, go to **Management**, then click **Fleets**.
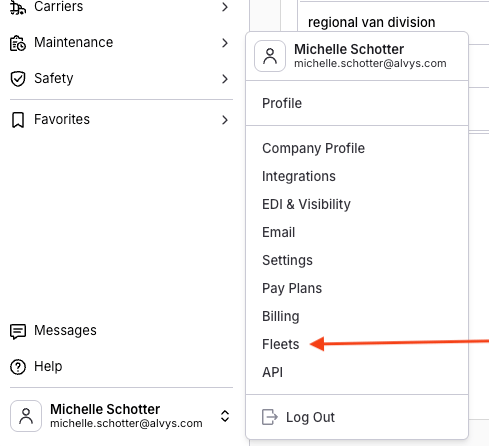 *The main navigation showing the Management → Fleets path.*
2. Open the Auto-Assign setup. On the Fleets page, locate the "Auto-assign to loads" banner. Click the **Add Automation** button within the banner.
*The main navigation showing the Management → Fleets path.*
2. Open the Auto-Assign setup. On the Fleets page, locate the "Auto-assign to loads" banner. Click the **Add Automation** button within the banner.
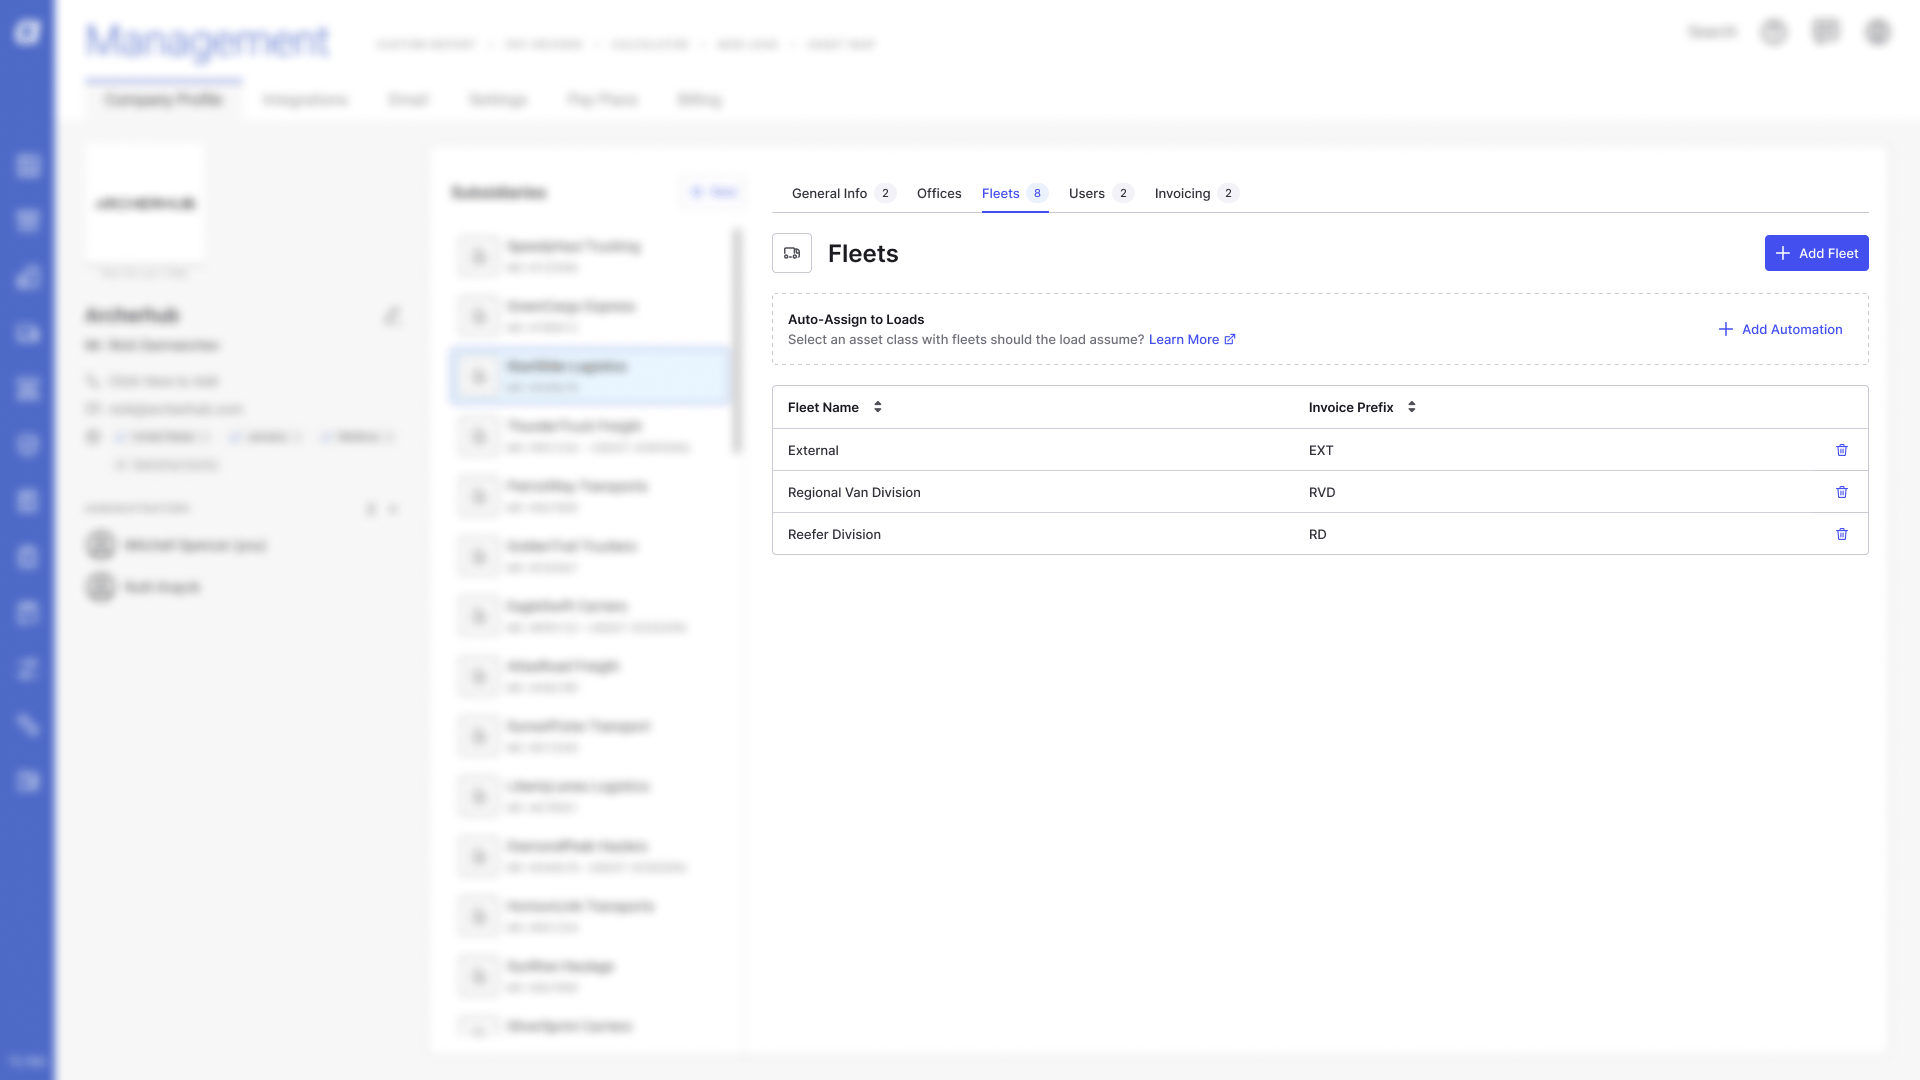 *The Auto-assign to loads banner on the Fleets page with the Add Automation button.*
3. Select the Asset Fleet matching rule. In the modal that opens, select **Asset Fleet** as the matching rule. This tells Alvys to match the fleet on a load to the fleet of the truck, trailer, or driver assigned to that load.
*The Auto-assign to loads banner on the Fleets page with the Add Automation button.*
3. Select the Asset Fleet matching rule. In the modal that opens, select **Asset Fleet** as the matching rule. This tells Alvys to match the fleet on a load to the fleet of the truck, trailer, or driver assigned to that load.
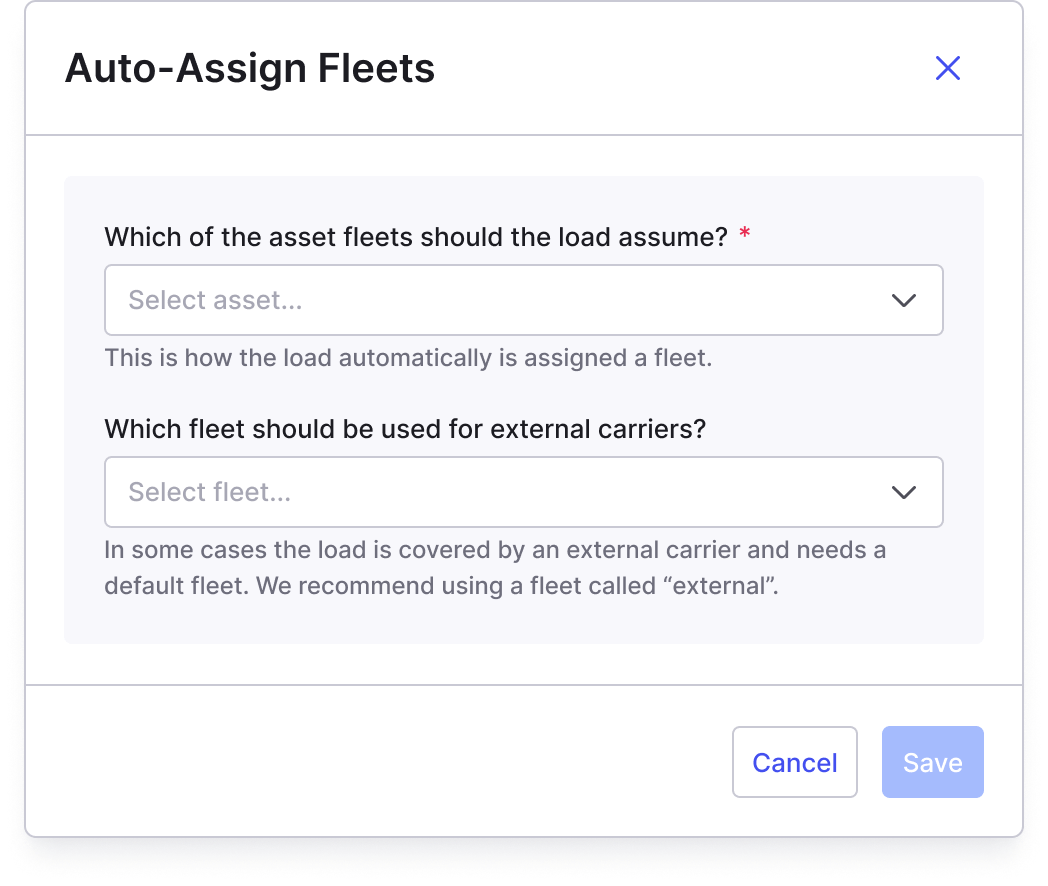 *The modal showing the Asset Fleet matching rule option.*
4. Set a default fleet for external carriers (recommended). When a load is covered by an external carrier rather than one of your internal assets, Alvys needs a designated fleet for reporting. In the same modal, select a fleet to use as the default for these loads.
💡 Create a dedicated fleet named "External" or "Brokerage Loads" and select it here.
*The modal showing the Asset Fleet matching rule option.*
4. Set a default fleet for external carriers (recommended). When a load is covered by an external carrier rather than one of your internal assets, Alvys needs a designated fleet for reporting. In the same modal, select a fleet to use as the default for these loads.
💡 Create a dedicated fleet named "External" or "Brokerage Loads" and select it here.
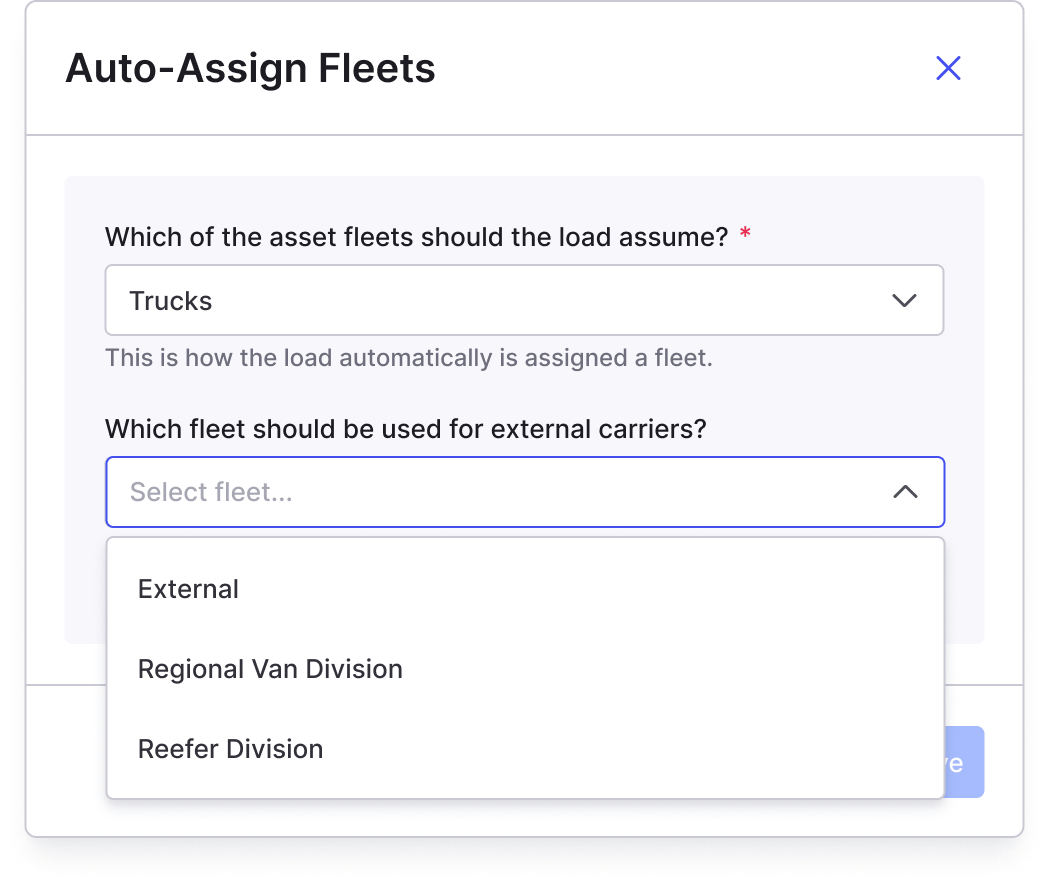 *The modal showing the default fleet selection for loads covered by external carriers.*
1. Save the automation. Click **Save** to confirm your settings. The Fleets page updates to show the automation as active.
*The modal showing the default fleet selection for loads covered by external carriers.*
1. Save the automation. Click **Save** to confirm your settings. The Fleets page updates to show the automation as active.
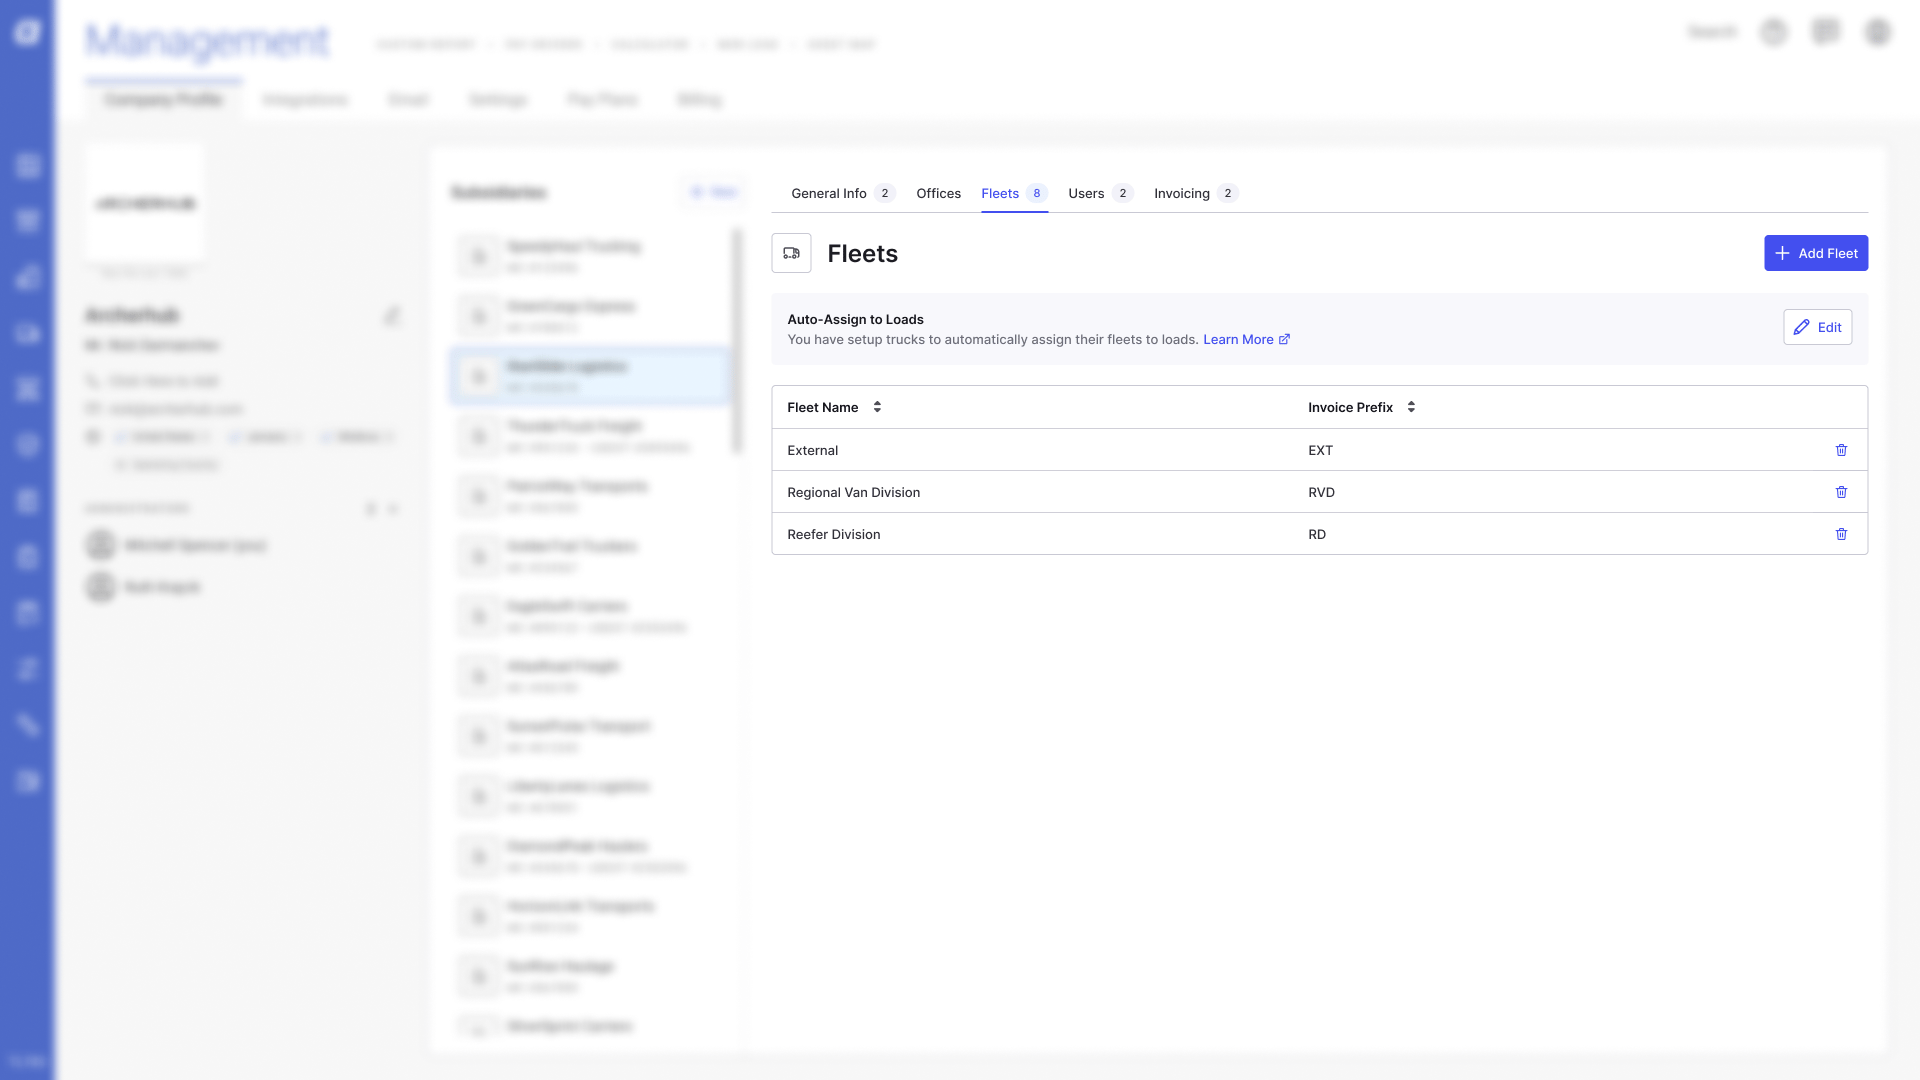 *The Fleets page showing the Auto-assign automation as active.*
## Result
Once active, every time a truck, trailer, or driver is assigned to a load, Alvys automatically finds the fleet that asset belongs to and applies it to the load. Loads covered by external carriers receive the default fleet you configured.
## Variations
### Disable Auto-Assign
If you need to turn this feature off:
1. Go to **Management → Fleets**.
2. Click **Edit** on the active Auto-assign banner.
3. In the edit screen, click the **Disable** button.
4. Click **Save** to apply the change.
## Troubleshooting
### Fleet was not automatically assigned to a load
Auto-assignment only runs when the assigned asset has a fleet linked to its profile in Alvys. If the truck, trailer, or driver on a load is not assigned to any fleet, auto-assignment cannot run for that asset. Ensure all assets are linked to a fleet in their respective profiles under Assets.
### The wrong fleet was applied to a load
Alvys applies the fleet from the matching asset. If the wrong fleet was applied, the asset may be linked to an incorrect fleet in its profile. Update the asset's fleet assignment, then manually correct the fleet on the affected load.
## FAQs
**Q: Can I manually change the fleet on a load after auto-assignment runs?**
**A:** Yes. Auto-assignment sets the fleet as a starting point. You can manually update the assigned fleet on any load at any time.
**Q: Does this feature apply retroactively to loads created before I enabled it?**
**A:** No. Auto-assign only applies to new assignments made after the feature is activated. Existing loads are not updated.
**Q: What happens if the truck and driver on a load belong to different fleets?**
**A:** Alvys applies the fleet from the first asset it matches. To avoid inconsistencies, ensure the truck, trailer, and driver on each load belong to the same fleet where possible.
## Go Deeper
* [Adding Fleets](/help/assets-fleet/how-to-add-and-manage-fleets-in-alvys)
*The Fleets page showing the Auto-assign automation as active.*
## Result
Once active, every time a truck, trailer, or driver is assigned to a load, Alvys automatically finds the fleet that asset belongs to and applies it to the load. Loads covered by external carriers receive the default fleet you configured.
## Variations
### Disable Auto-Assign
If you need to turn this feature off:
1. Go to **Management → Fleets**.
2. Click **Edit** on the active Auto-assign banner.
3. In the edit screen, click the **Disable** button.
4. Click **Save** to apply the change.
## Troubleshooting
### Fleet was not automatically assigned to a load
Auto-assignment only runs when the assigned asset has a fleet linked to its profile in Alvys. If the truck, trailer, or driver on a load is not assigned to any fleet, auto-assignment cannot run for that asset. Ensure all assets are linked to a fleet in their respective profiles under Assets.
### The wrong fleet was applied to a load
Alvys applies the fleet from the matching asset. If the wrong fleet was applied, the asset may be linked to an incorrect fleet in its profile. Update the asset's fleet assignment, then manually correct the fleet on the affected load.
## FAQs
**Q: Can I manually change the fleet on a load after auto-assignment runs?**
**A:** Yes. Auto-assignment sets the fleet as a starting point. You can manually update the assigned fleet on any load at any time.
**Q: Does this feature apply retroactively to loads created before I enabled it?**
**A:** No. Auto-assign only applies to new assignments made after the feature is activated. Existing loads are not updated.
**Q: What happens if the truck and driver on a load belong to different fleets?**
**A:** Alvys applies the fleet from the first asset it matches. To avoid inconsistencies, ensure the truck, trailer, and driver on each load belong to the same fleet where possible.
## Go Deeper
* [Adding Fleets](/help/assets-fleet/how-to-add-and-manage-fleets-in-alvys)