
📋 Applies to: Admin · Partner Admin · Operation ManagerModule: Settings > Custom ReferencesCustom References let you define and attach custom-named fields to loads, trips, stops, drivers, trucks, and trailers in Alvys so your team can capture business-specific information not covered by standard fields.
Overview
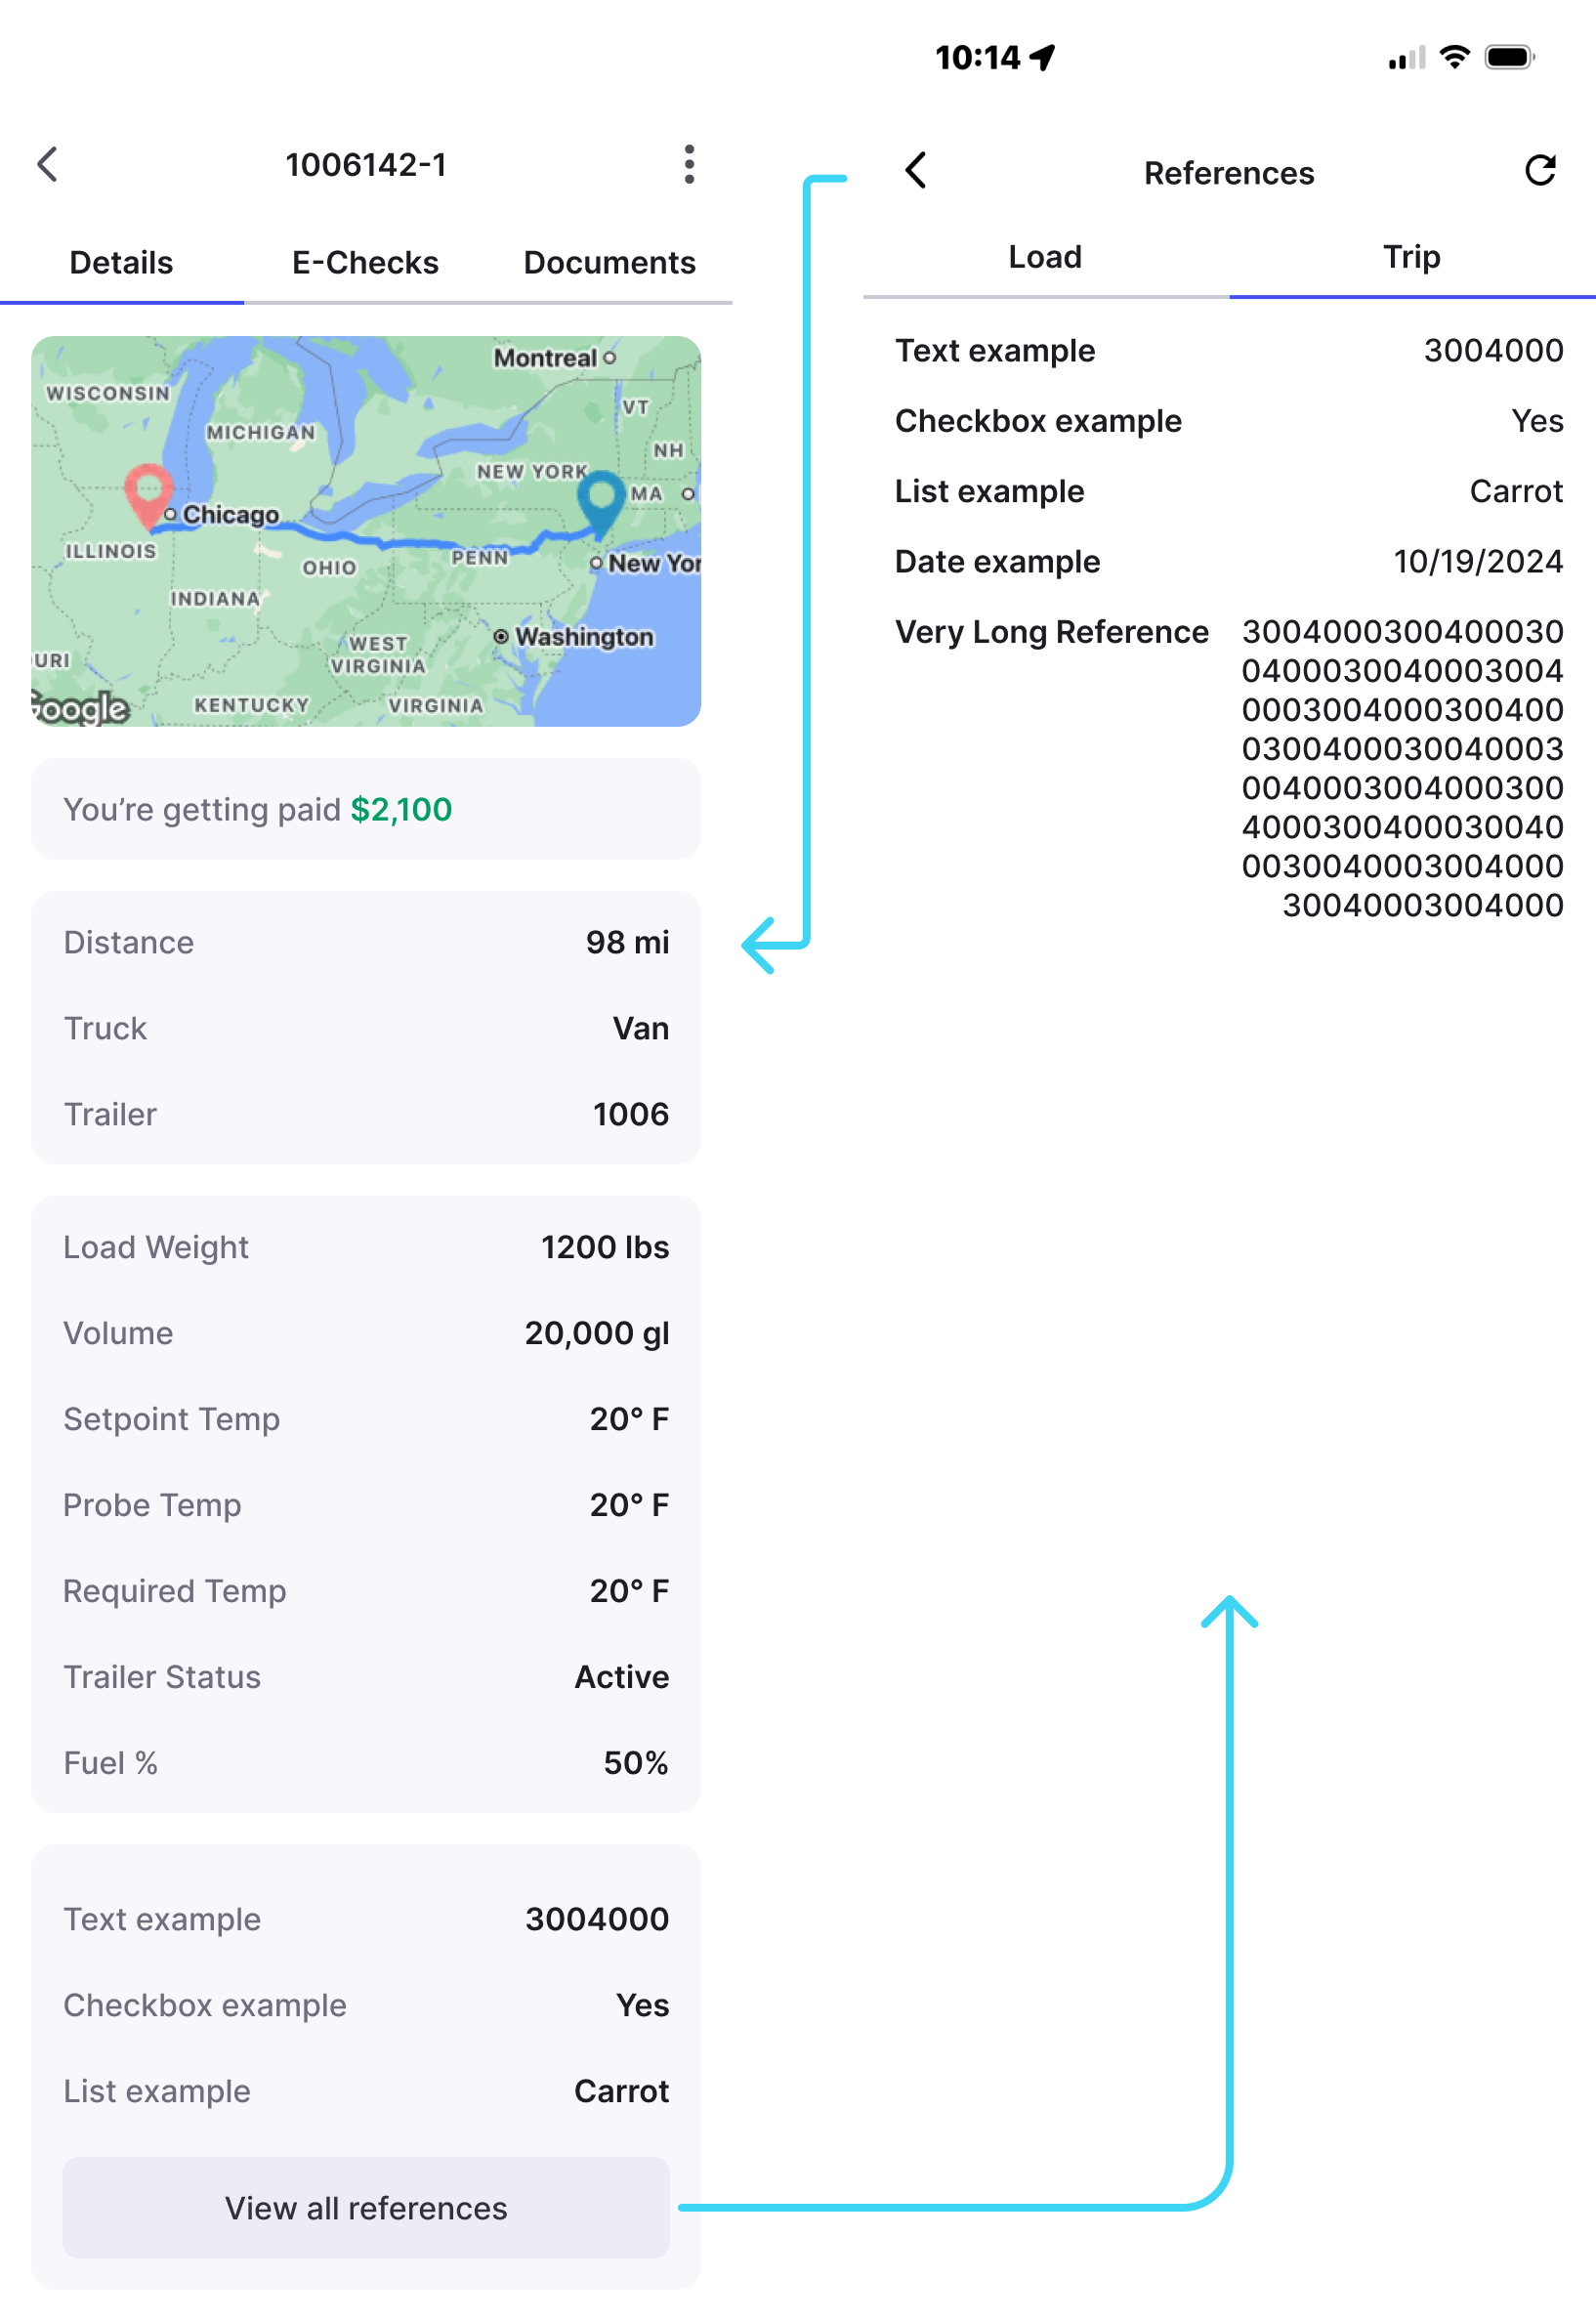
Custom References let you define and attach custom-named fields (also called user-defined fields or custom data fields) to loads, trips, stops, drivers, trucks, and trailers in Alvys, so your team can capture business-specific information not covered by standard fields. Custom References allow your organization to create additional data fields tailored to your operations. Once defined, these fields appear on the relevant entity pages throughout Alvys and can be included on documents such as rate confirmations and invoices. Supported field types are Text, Date, Select, and Checkbox. References can be applied to Loads, Trips, Stops, Drivers, Trucks, and Trailers. Load and Trip Custom References also display on the Driver Mobile App within Trip Details. Driver Custom References display on the Driver Mobile App within the Driver Profile. Custom Load References appear as custom columns on the Load Board once created.Before You Start
You must be an “Admin”, “Partner Admin”, or “Operation Manager” to access Settings > Custom References. This setting must be enabled for your account; if you do not see Custom References in Settings, contact Alvys Support.Steps
Navigate to Settings > Custom References
- Click your user profile menu in the bottom-left corner of Alvys.
- Select Settings from the menu.
- Click Custom References in the left navigation panel.
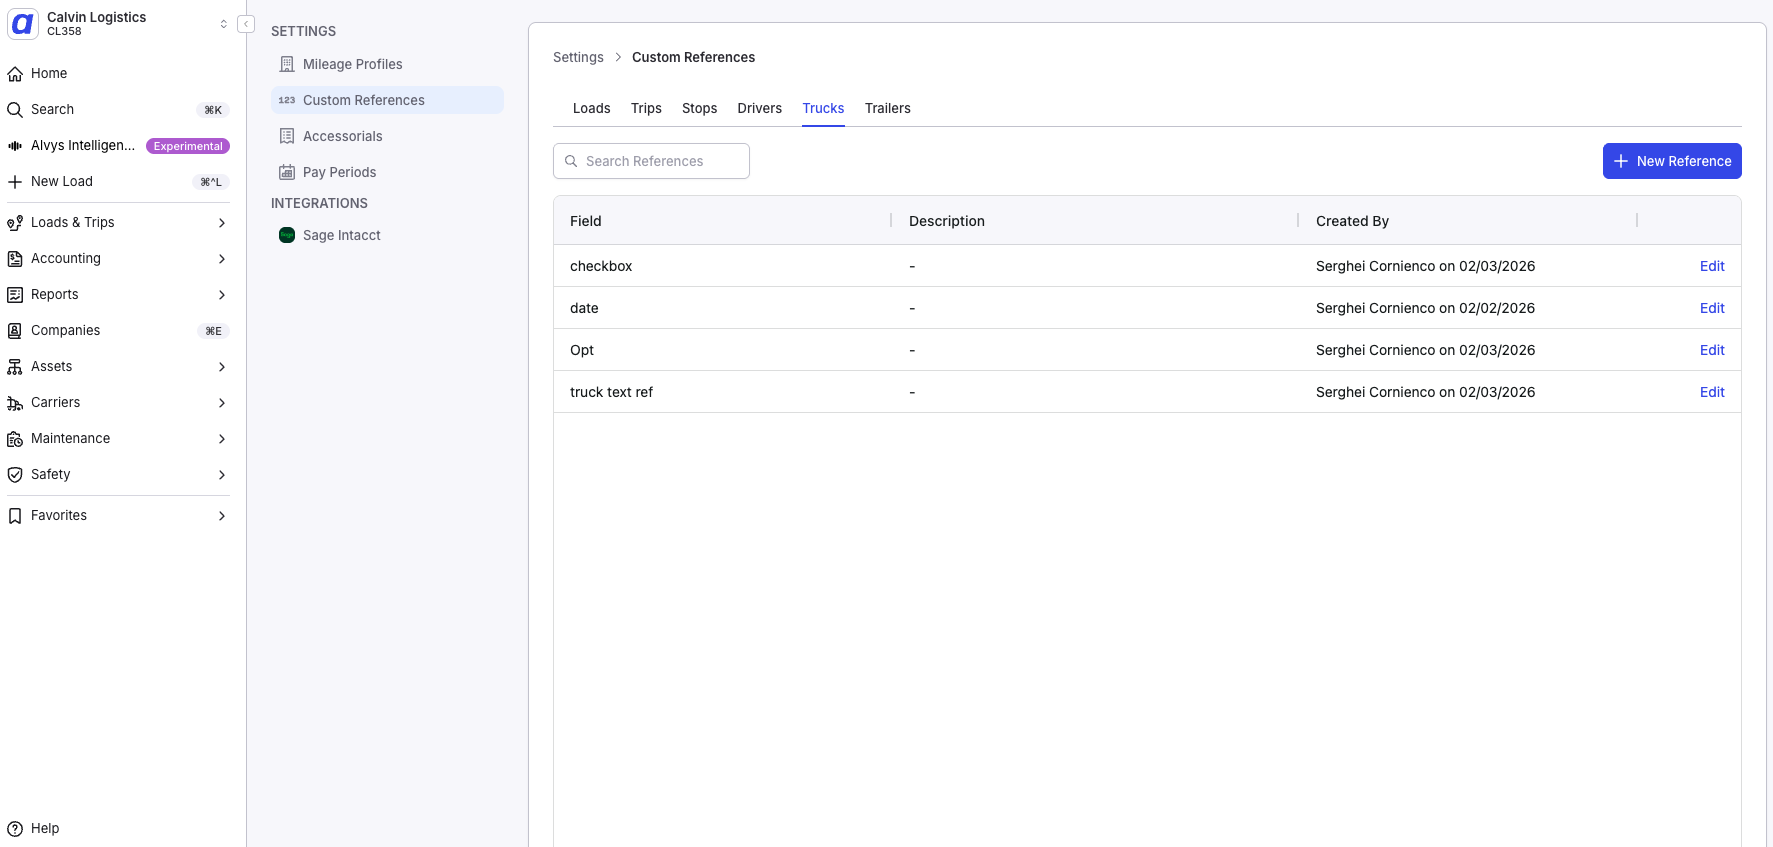 Screenshot showing the Settings navigation with Custom References selected in the left panel.
Select the entity tab
- The Custom References page is organized by entity type. Select the appropriate tab: Loads, Trips, Stops, Drivers, Trucks, or Trailers.
- The table displays the Field Name, Description, Date Created, and Created By for each existing reference on that entity.
- You can rearrange, sort, and search these columns to manage the list.
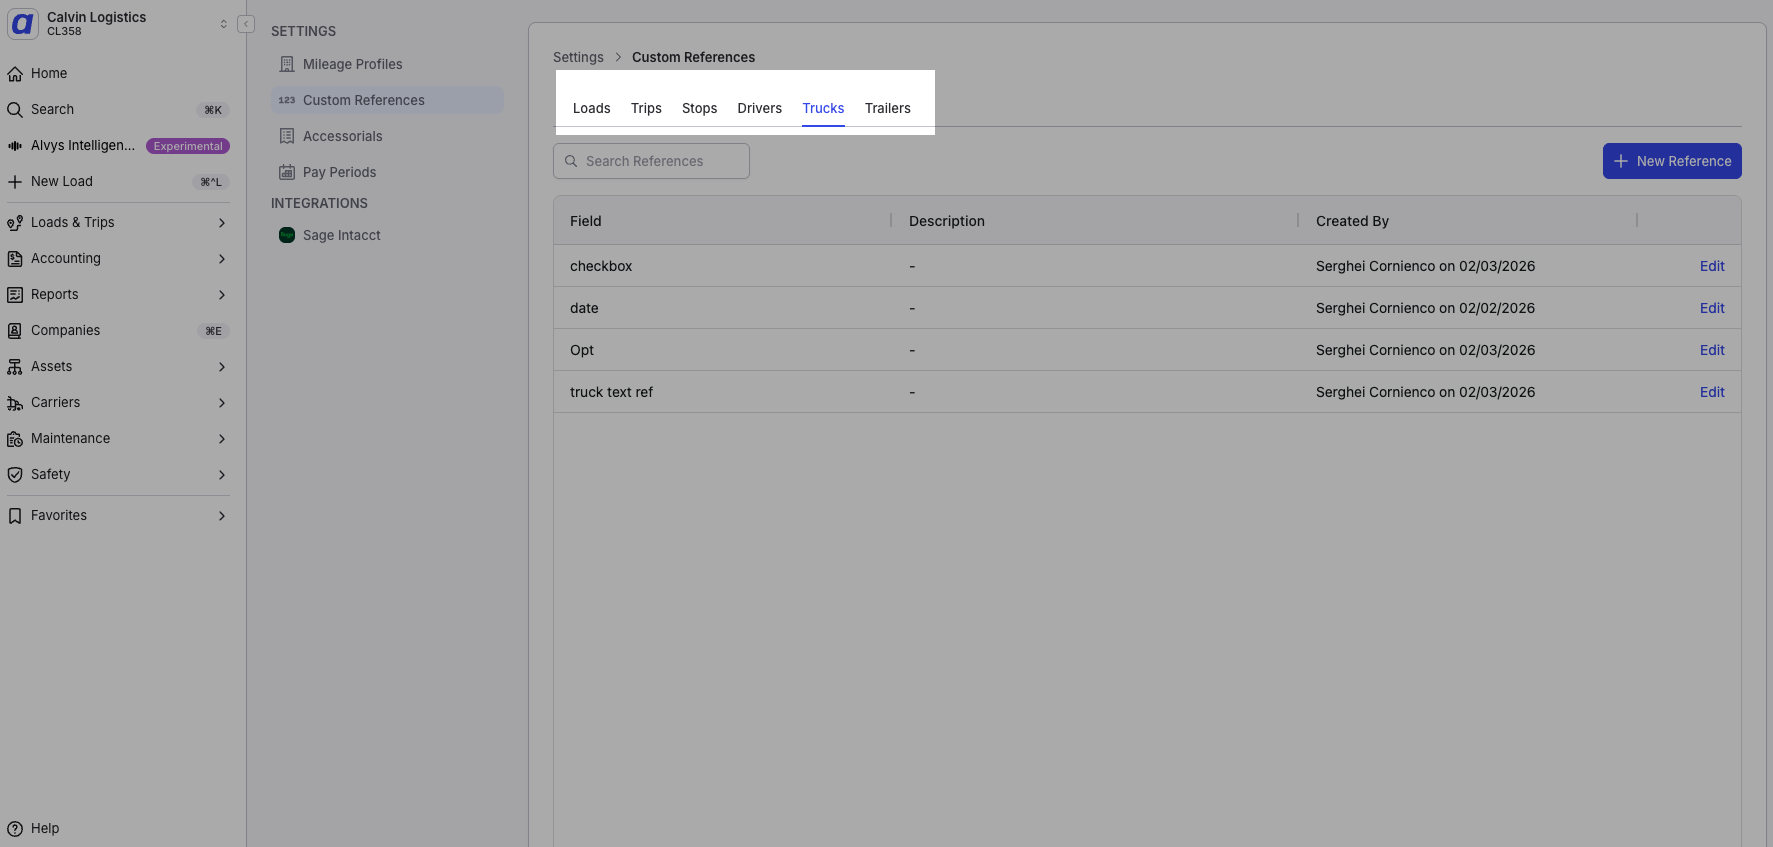 Screenshot showing the Custom References management page with entity tabs (Loads, Trips, Stops, Drivers, Trucks, Trailers) visible.
Create a new reference
- Click the New Reference button (blue button in the top right) to open the creation modal.
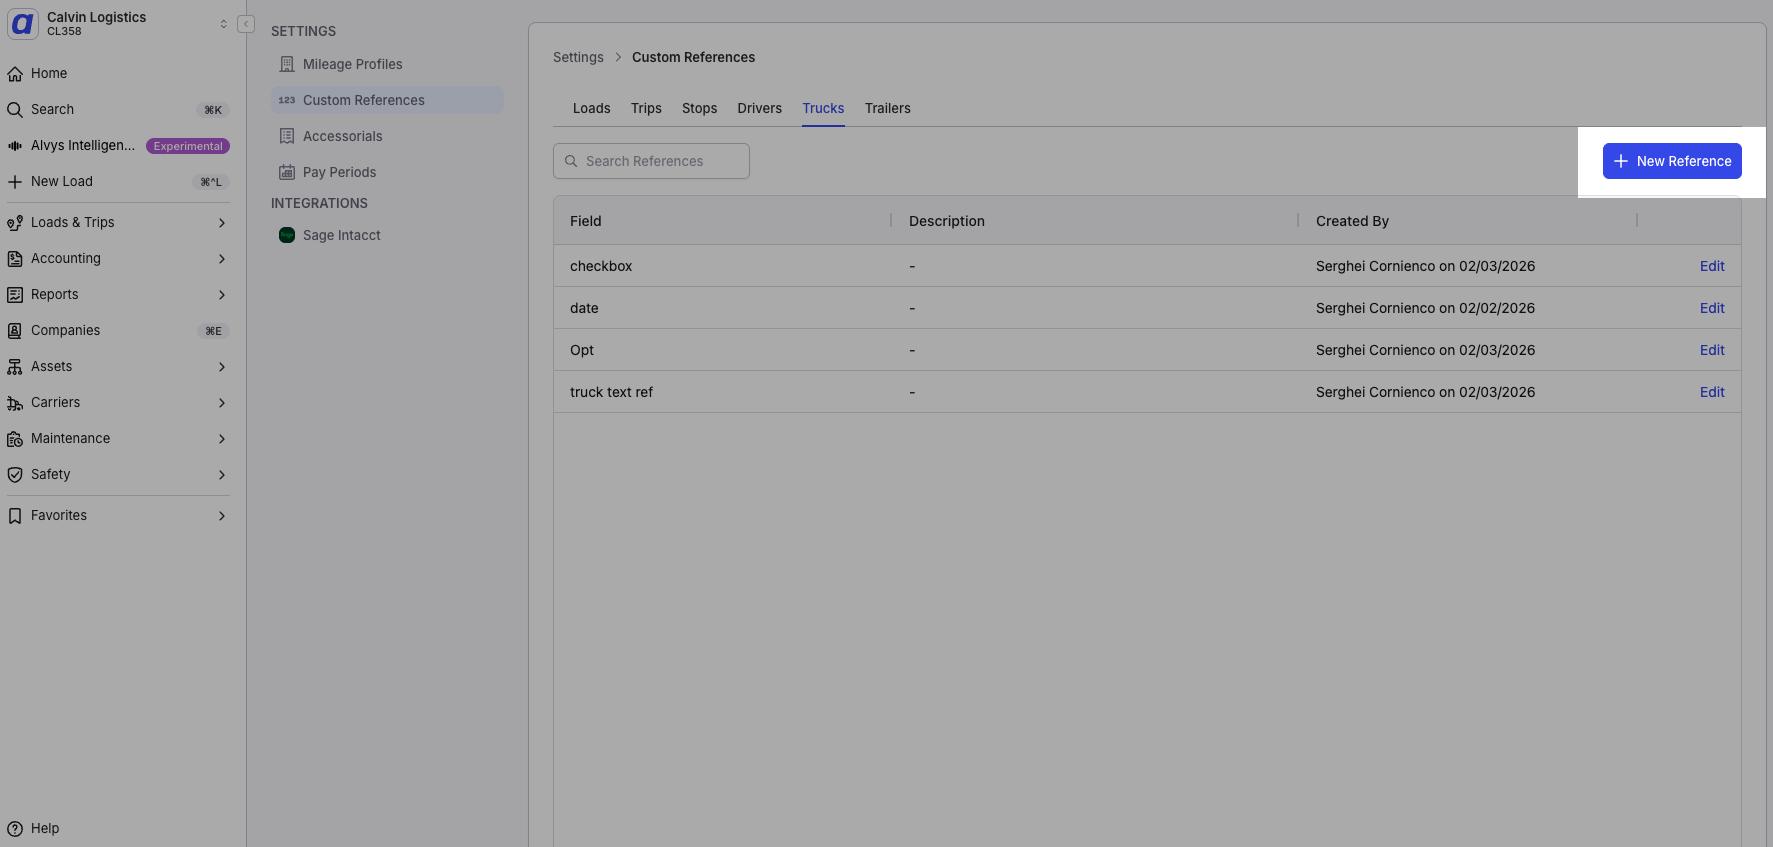 Screenshot showing the full New Reference form with all fields visible
 Screenshot showing the Driver Mobile App with Load and Trip Custom References displayed under Trip Details and the View All References toggle.
- Fill in the following fields:
- Name: Enter a name that is easily identifiable by others in your organization.
- Description: Optionally describe what this reference is intended for.
- Field Type: Choose the type that best suits the data you want to store. Options are Text, Date, Select, and Checkbox. You cannot change the field type after saving.
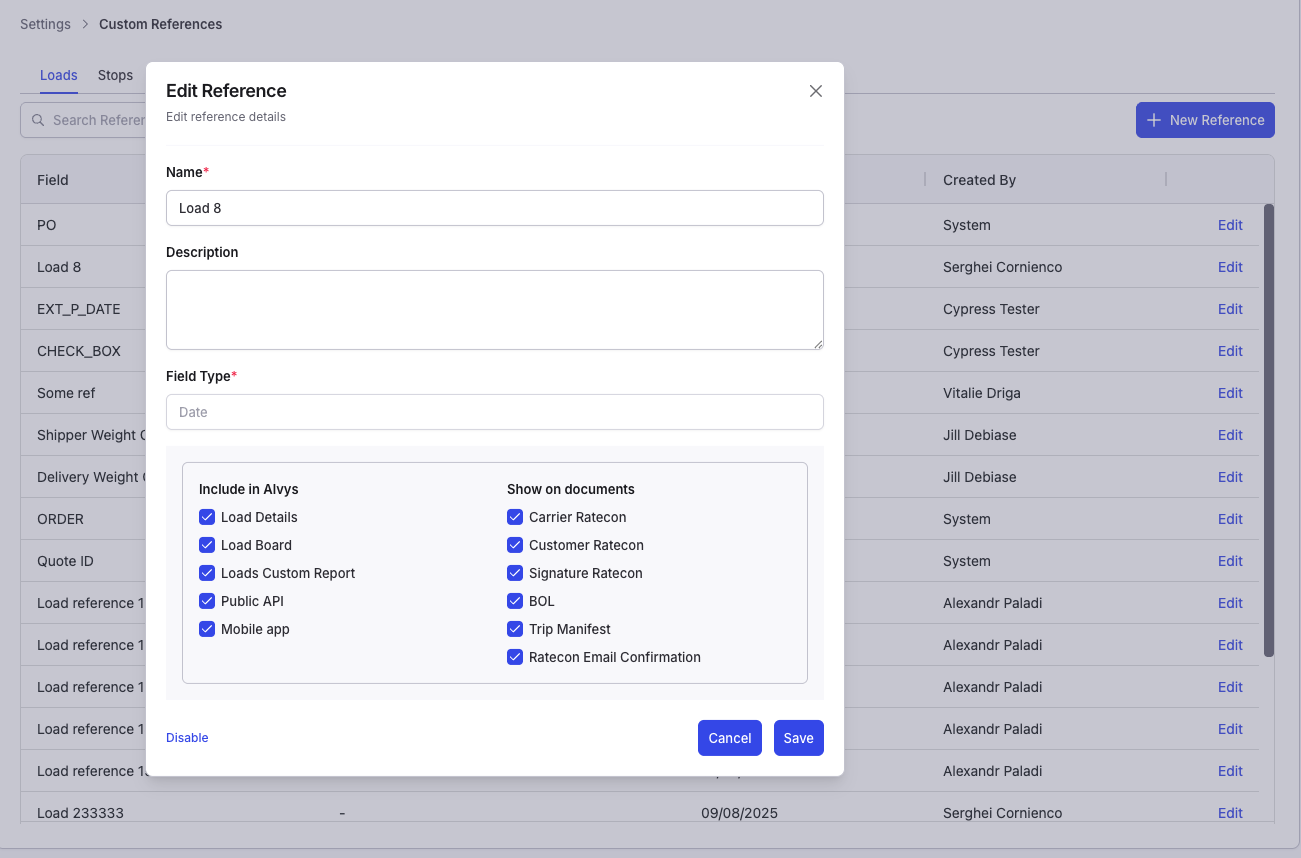
- Include in Alvys: Check the boxes to indicate which pages in Alvys should display this reference.
- Show on documents: Check the boxes to indicate which documents should display this reference (for example, rate confirmations or invoices).
 Screenshot showing the Driver Mobile App with Driver Custom References displayed within the Driver Profile.
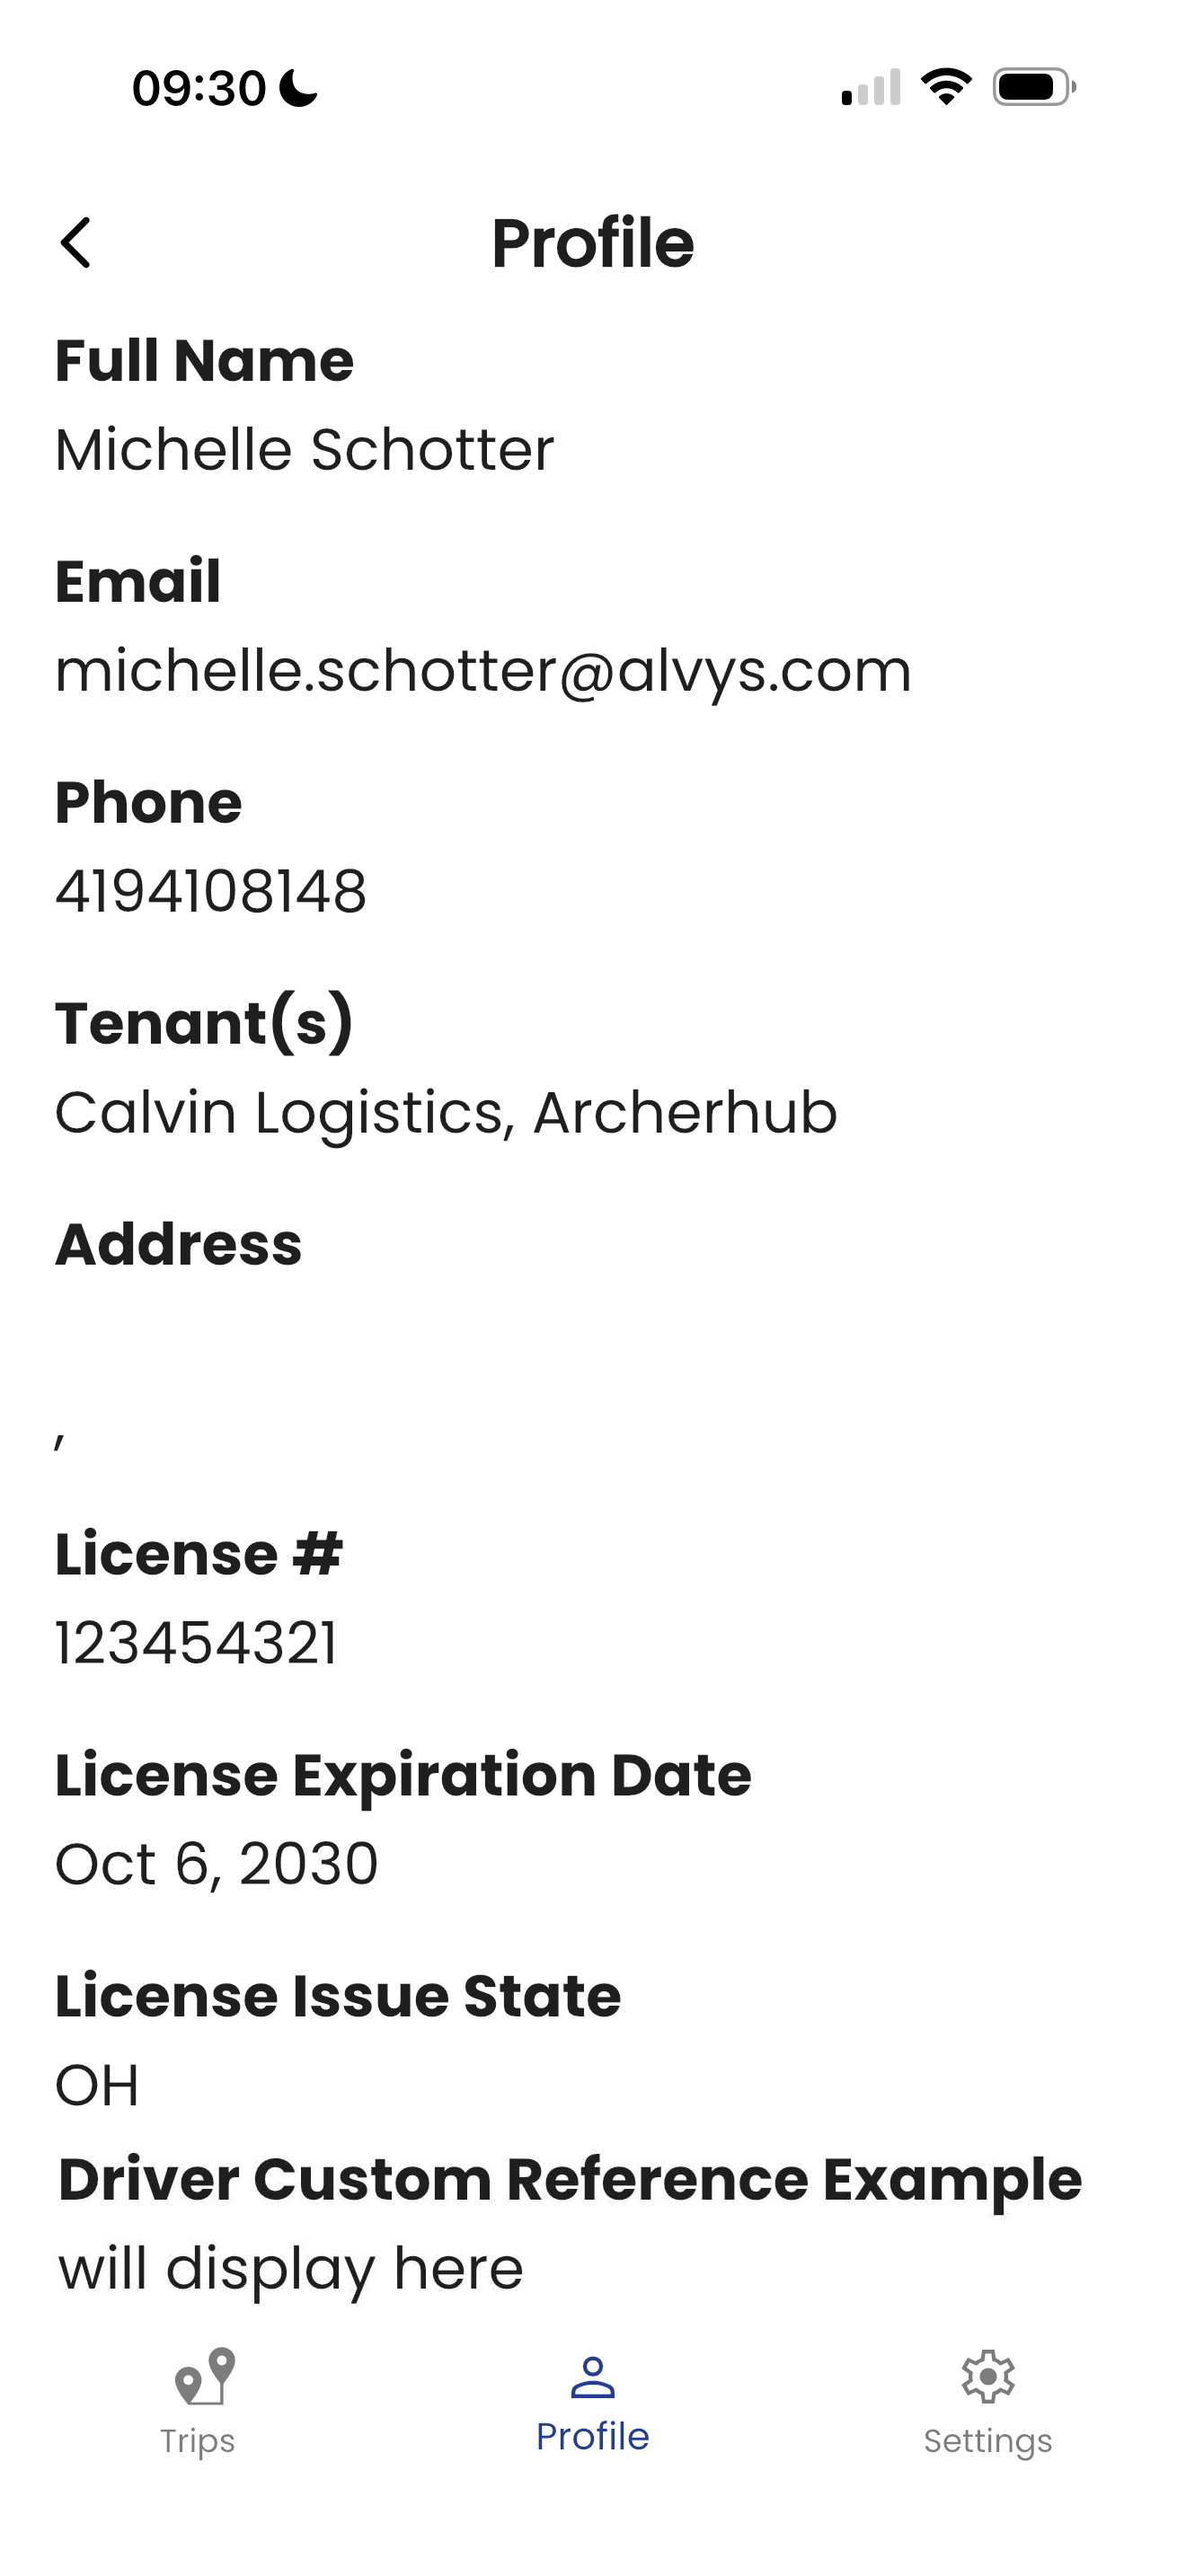 Screenshot from the driver’s profile
Save the reference
- Click Save. The reference is immediately available for use on the selected entity.
- Confirm the new reference appears in the list on the correct entity tab.
ℹ️ The custom load references you set up at the Load Level will be mirrored as custom reference columns on the Load Board.
Managing Existing Custom References
To edit an existing reference, click Edit on the right side of the row. The creation modal opens with the existing data. You can change the Name, Description, and View settings. You cannot change the Field Type. Changes to an existing reference apply only to new entities created after you save. Existing and historical records retain the previous reference settings.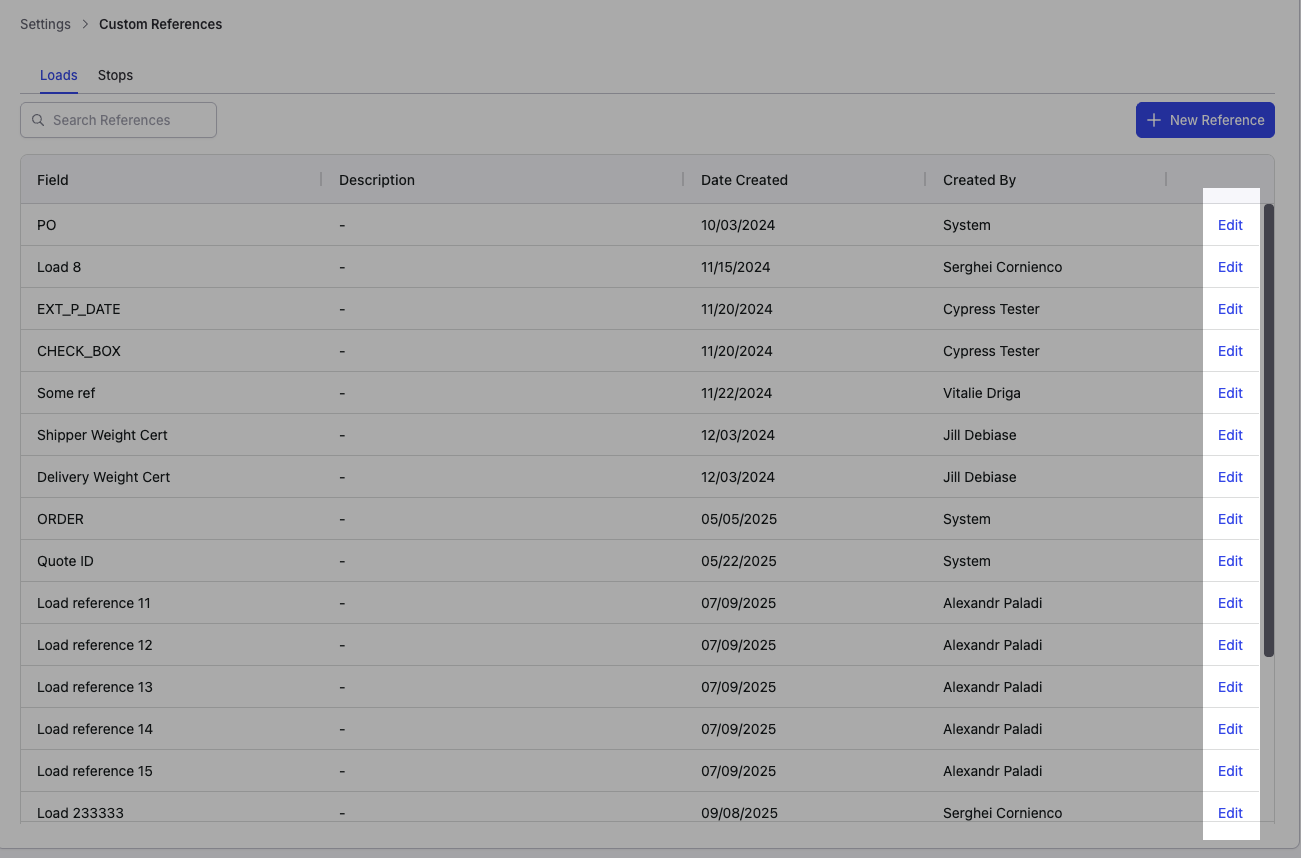 Screenshot showing the Edit reference modal for an existing custom reference.
 Screenshot showing the Enable/Disable toggle inside the Edit reference modal.
Troubleshooting
Custom References option is not visible in Settings
- Confirm you are signed in as an “Admin”, “Partner Admin”, or “Operation Manager”. Other roles do not have access to Settings > Custom References.
- Confirm that the Custom References feature is enabled for your account. If you do not see the option after verifying your role, contact Alvys Support with your account name so they can confirm whether the feature is enabled.
Reference appears grayed out in the list
- A grayed-out reference has been disabled. Click Edit on that row.
- Toggle the Enable switch in the top-right corner of the modal to the Enabled position and click Save.
New reference does not appear on loads or other entities
- Confirm you checked the correct boxes under Include in Alvys when creating the reference. If the relevant page was not checked, the field will not appear there.
- Open the Edit modal for the reference, verify the Include in Alvys selections, update as needed, and save. The change applies to new entities only; existing records are not affected.