
Overview
You can kick off an EDI onboarding yourself from the EDI & Visibility page — no need to email support to get started. Fill out a short form with the trading partner and the documents you want to exchange, and Alvys creates the request and hands it to our EDI team to begin setup.Submit a request
- Go to Manage → EDI & Visibility.
- Click Request EDI.
- Complete the form (see What you’ll enter below).
- Click Submit. The button stays disabled until every field is valid.
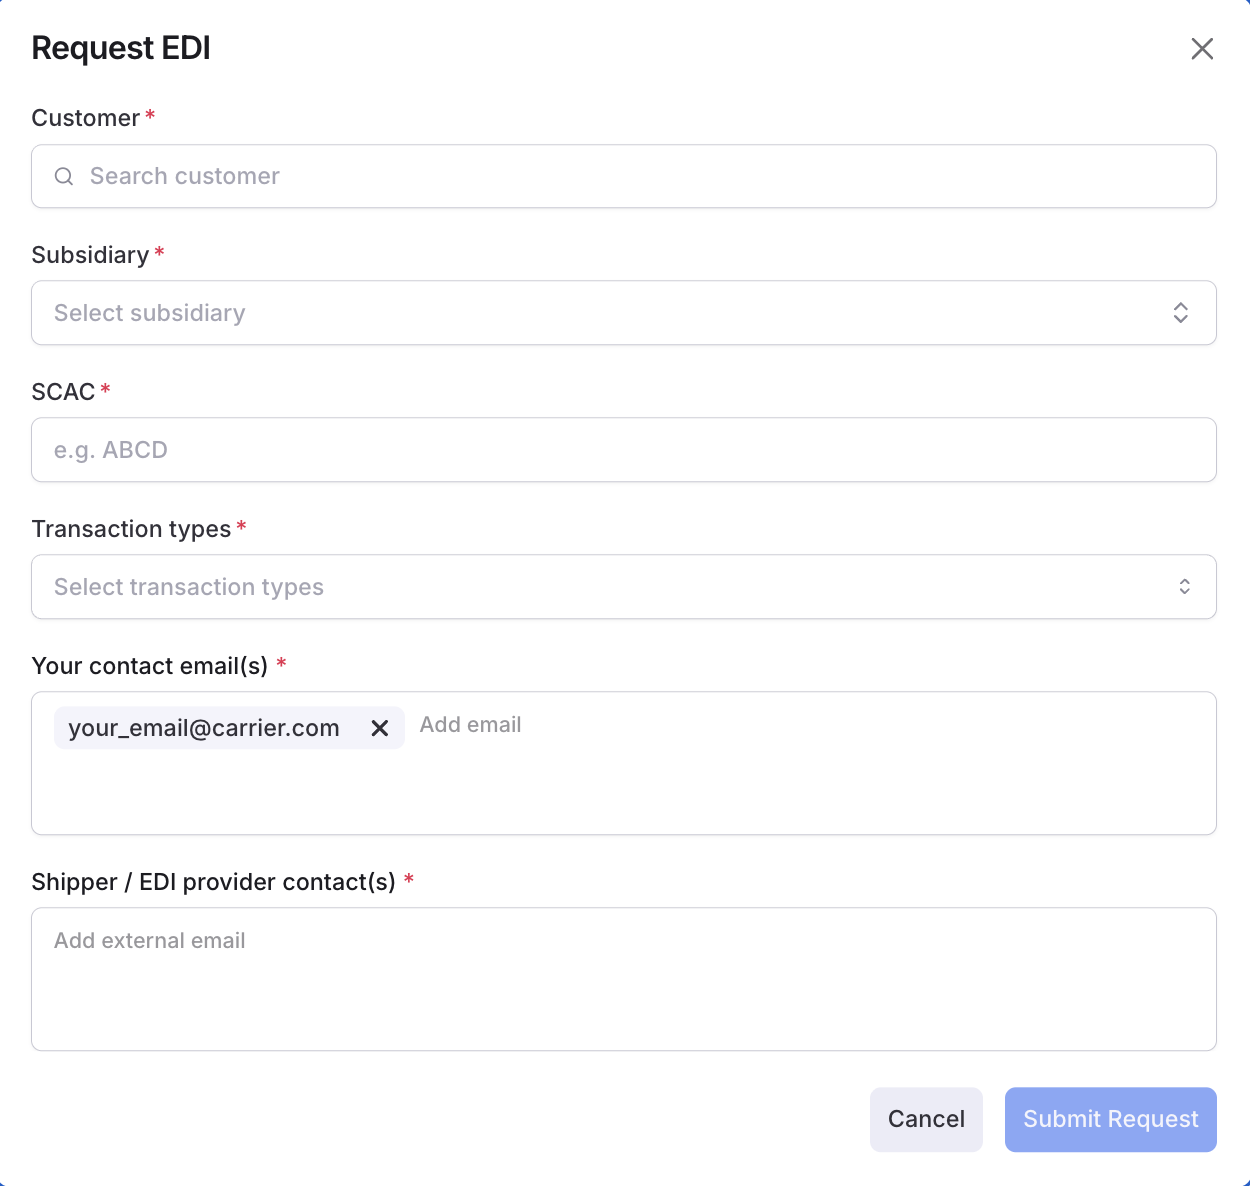
What you’ll enter
- Customer — the company you’re setting up EDI with. Start typing to search for it; if it’s not in Alvys yet, you can add it right from this field.
- Subsidiary — the subsidiary this connection is for.
- SCAC — your SCAC code (2–4 letters or numbers).
- Transaction types — the EDI documents you want to exchange. Select all that apply: 204 (Load Tender), 210 (Invoice), 213 (Status Inquiry), 214 (Shipment Status), 990 (Tender Response), 997 (Acknowledgment).
- Your contact — your email, filled in automatically. Add others on your team if you’d like.
- Trading partner contact — the email address(es) for the customer’s (or their EDI provider’s) contact. Enter their addresses, not your own.