
🚀
Now Available! Waypoints are now live!
The engineering team was hard at work building this exciting new feature to bring you even more precise trip planning. Check it out!Adding and Managing Waypoints on Trips
The Waypoints feature in Alvys allows you to define and manage intermediate stops within a trip that are neither pickups nor deliveries. These are crucial for accurately modeling operational points such as mandatory fuel stops, rest areas, or asset transfer points, providing a more precise representation of your trip’s actual route. User Roles with Access: All users who have access to add and manage stops on a trip (e.g., Dispatchers, Load Planners, Admins). Summary: Waypoints enhance trip modeling by allowing you to include non-revenue-generating stops. You can add Waypoints with specific locations, time windows, instructions, and references. They are visible on the Load Details Page within the trip timeline and are communicated to drivers via the Driver Companion App, where drivers can check in/out and issue e-checks just like regular stops. This improves mileage accuracy and streamlines planning.How to Add a Waypoint
You can add Waypoints by editing an existing load on the Load Details Page.Adding a Waypoint via the Load Details Page
Navigate to the Load Details Page: Open the specific load to which you want to add a Waypoint. Click “Add Stop”: In the “Trips / Stops” section, locate and click the “Add Stop” button. Choose “Waypoint” Stop Type: In the “Add Stop” modal that appears, select the “Waypoint” radio button. This will display the fields relevant to a Waypoint. Enter Waypoint Properties: Dates (Required): Enter the beginning and end date and times. Location/Address (Required): Enter the Waypoint’s location. You can manually type an address, select from the map, or choose an existing company. Scheduled Time Window: Provide a start and end time for the planned arrival at the Waypoint. Stop Instructions: Add any free-form text to provide additional information to the driver (e.g., “Mandatory fuel stop, use card 1234”). References: Add any relevant references to the stop.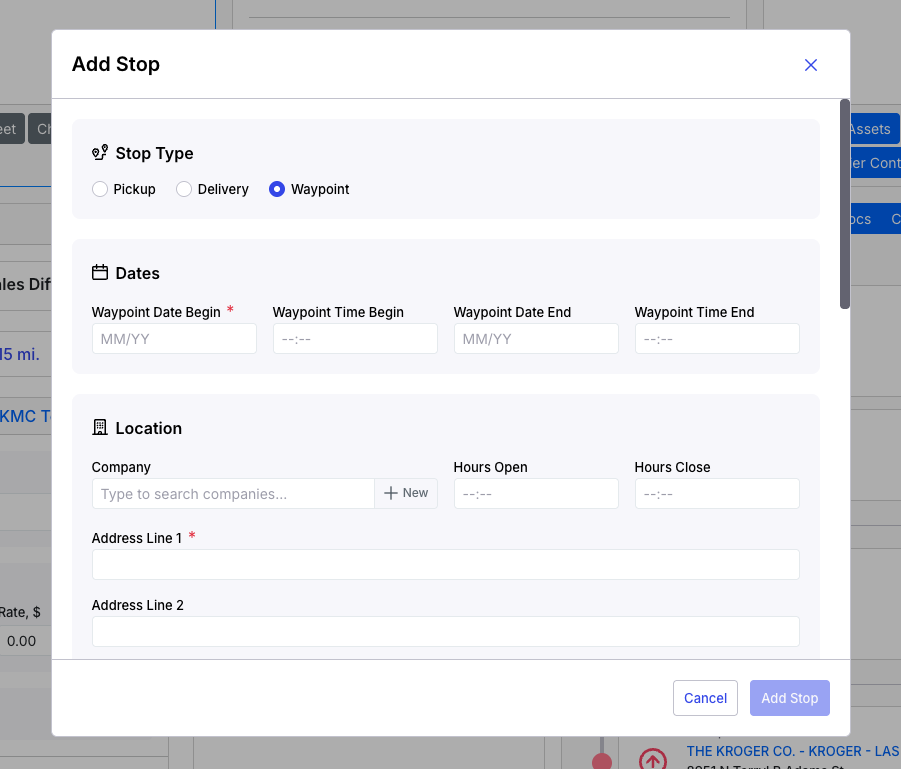 Save the Waypoint:
Click the “Save” button in the modal to attach the Waypoint to the trip.
Save the Waypoint:
Click the “Save” button in the modal to attach the Waypoint to the trip.
How Waypoints Appear and Function
Once a Waypoint is added and saved, it integrates seamlessly into your trip management workflows:On the Load Details Page (LDP)
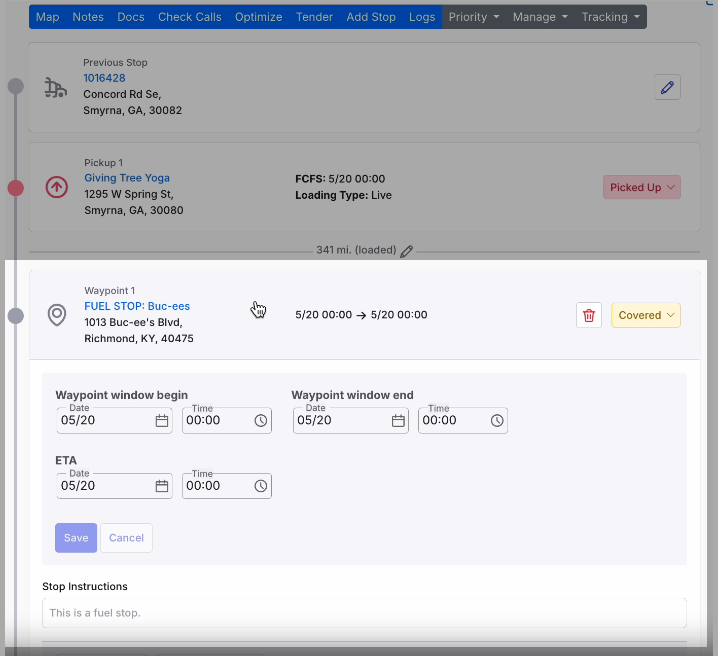
Visibility: Waypoints will appear clearly in the trip timelines within the “Trips / Stops” section of the LDP. They are visually distinguishable from Pickup and Delivery stops.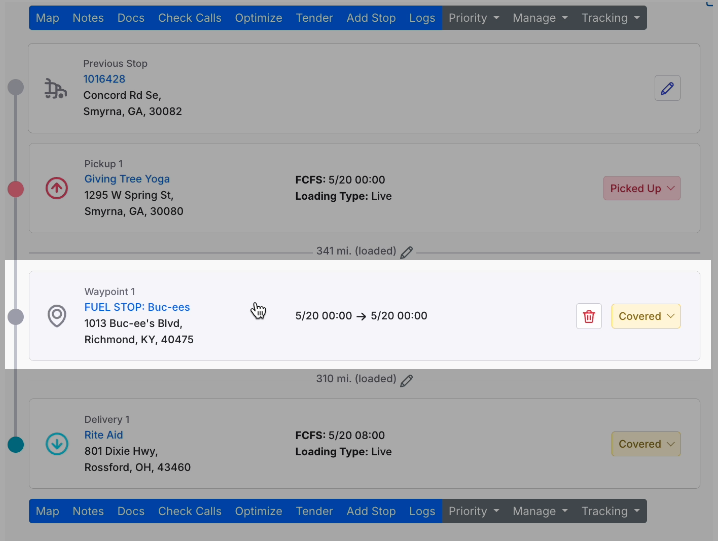 Expand/Collapse: After a Waypoint is saved, it will appear on the LDP as a stop that can be expanded and collapsed, allowing you to customize your view.
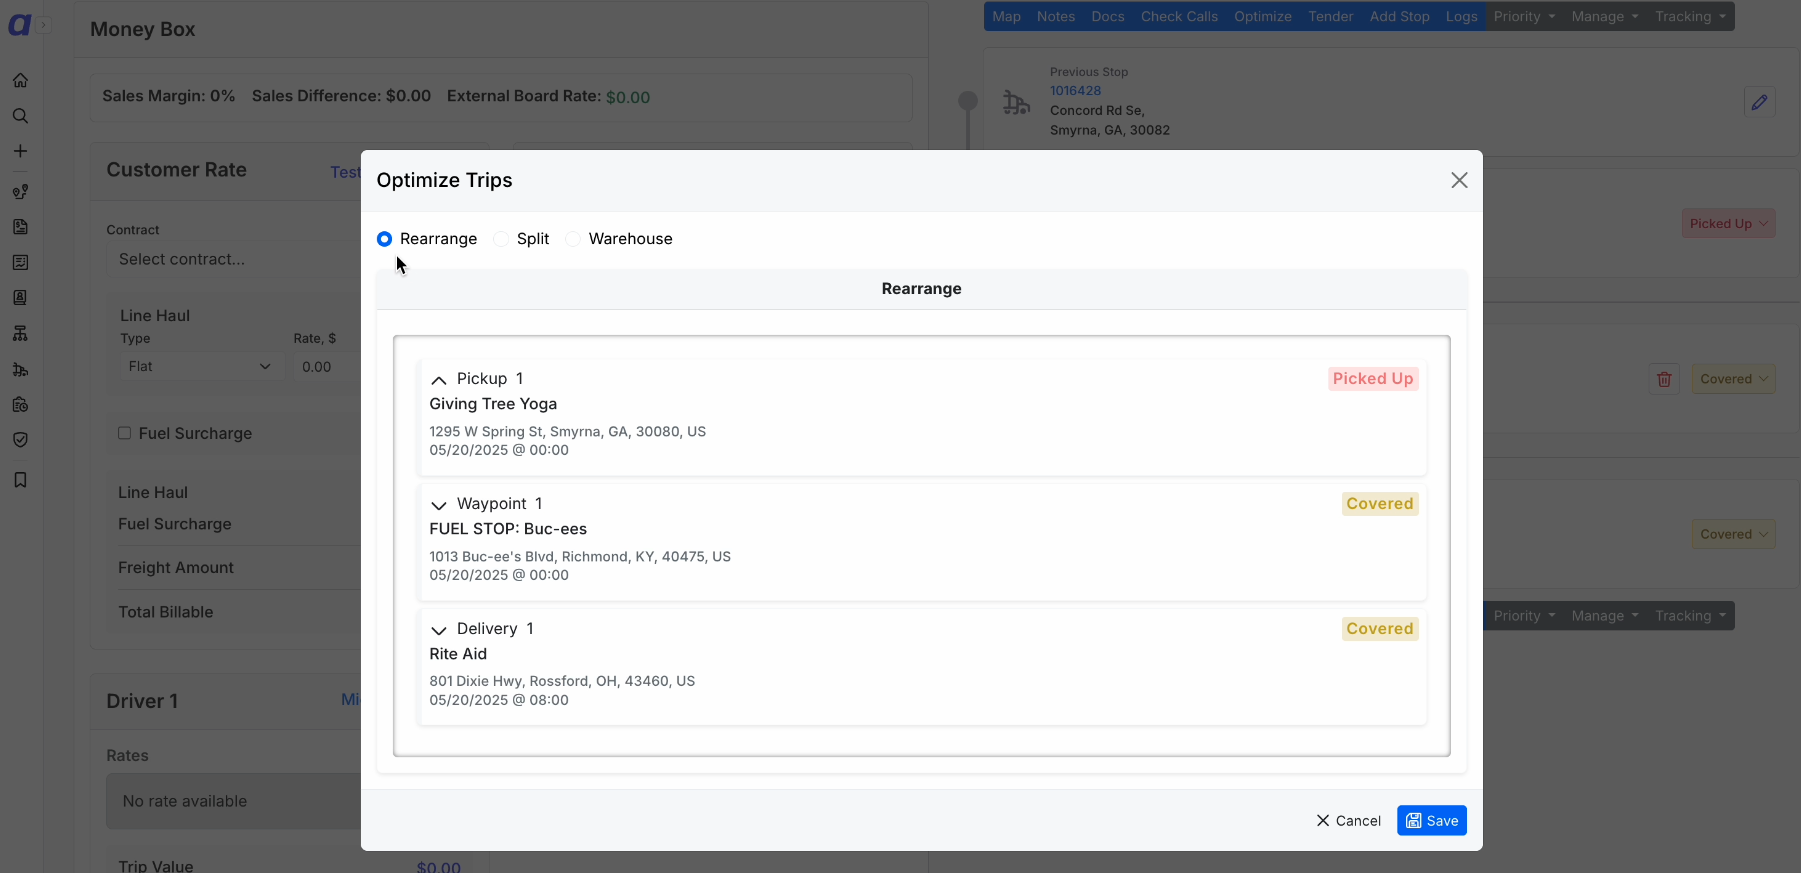
 Sequencing: The order of Waypoints within a trip can be changed using the traditional “Optimize > Rearrange” flow. If you rearrange stops, the mileage between stops will automatically update.
 Actual Times:
 Actual Arrival & Departure Times will be system-generated timestamps, dependent on driver check-in and check-out events, enabling real-time progress tracking for Waypoints.
In the Driver Companion App
Visibility: When a trip gets dispatched to a driver, the Waypoint stop type will appear in the Driver Companion App (mobile app) as part of their trip itinerary.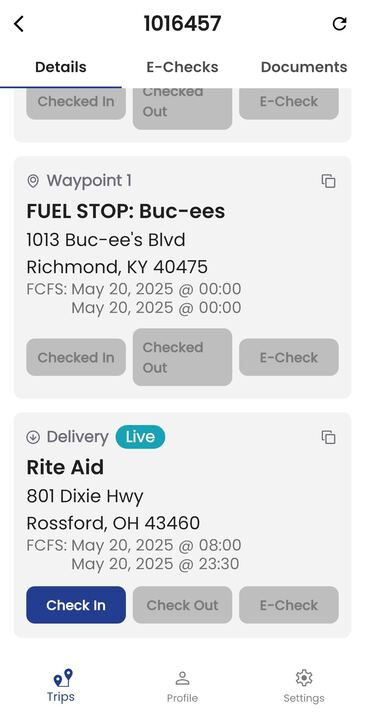 Driver Interaction: Drivers can click on the Waypoint stop to see additional Stop Details (e.g., instructions, references).
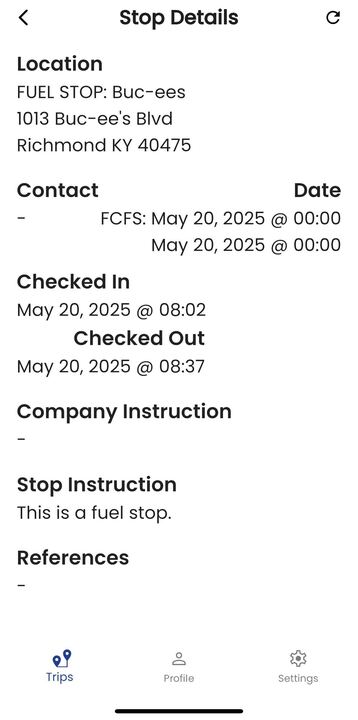 Check-in/out & E-check: Drivers have the ability to check in, check out, and issue e-checks for Waypoints, just like they do for traditional Pickup or Delivery stop types.