
Dispatching a load assigns a driver, truck, and trailer to a trip and advances the trip to Covered status, signaling the load is ready to move.
Overview
Dispatching a load connects a trip to a driver and equipment so the load can move. Once dispatched, the trip advances to Covered status, which updates all parties that the load is assigned and ready. There are two ways to dispatch: the standard flow, where you assign assets and then dispatch in separate steps, and the preference dialog flow, which appears when assignment preferences are configured and lets you assign and dispatch in a single action. Synonyms: assign a load, cover a trip, send a load, book a driver, schedule a trip.Before You Start
Before dispatching a load, confirm the following:- The trip you want to dispatch is in Open or Planned status in the trips grid.
- You have a driver, truck, and trailer available to assign.
- You have access to Loads and Trips > Dispatch Planner v2. All authenticated Alvys users can access Dispatch Planner v2.
- If you want the preference dialog flow to appear, dispatch preferences must be configured for the driver or carrier in advance.
Steps
Open Dispatch Planner v2- In the left navigation menu, select the Loads and Trips icon.
- Click Dispatch Planner v2 from the menu options.
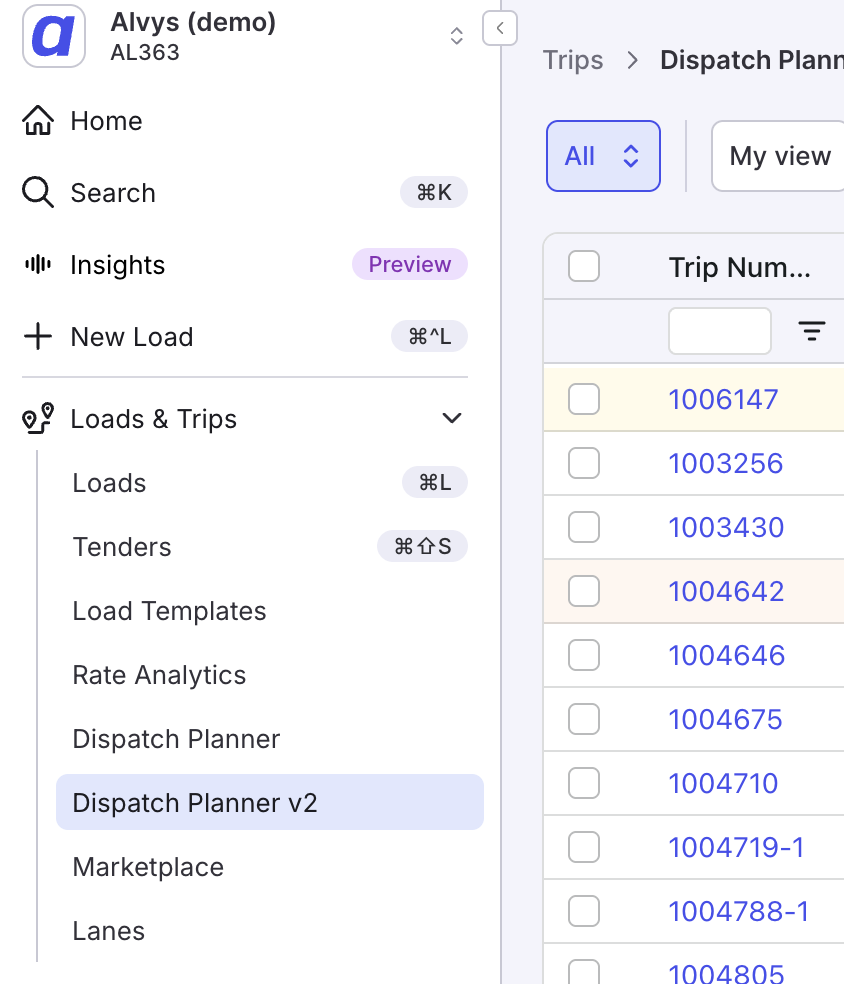 The Loads and Trips left navigation menu expanded, showing the “Dispatch Planner v2” menu item highlighted.
- In the trips grid, locate the load you want to dispatch. The trip must have a status of Open or Covered to be available for dispatch.
- Double-click the row for that trip to open it.
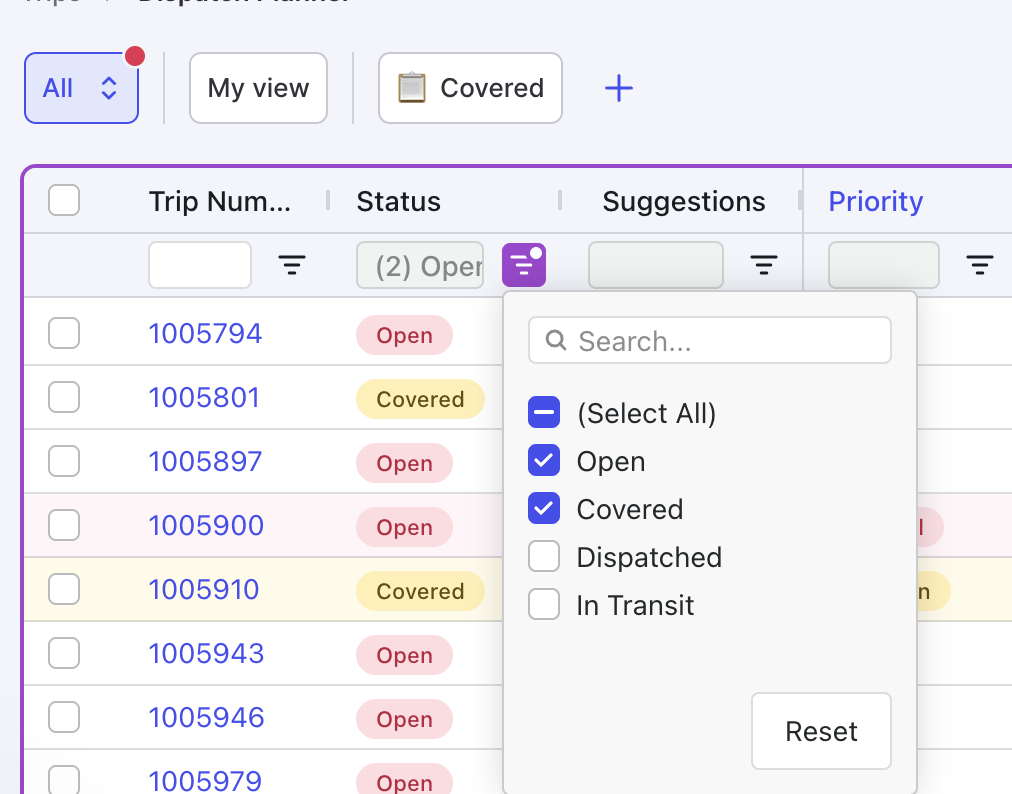 The trips grid in Dispatch Planner v2 with an Open load row highlighted, illustrating where to double-click
- In the Carrier Details panel on the right side of the screen, click “Assign Carrier” or “Manage Assets” in the bottom left of that panel.
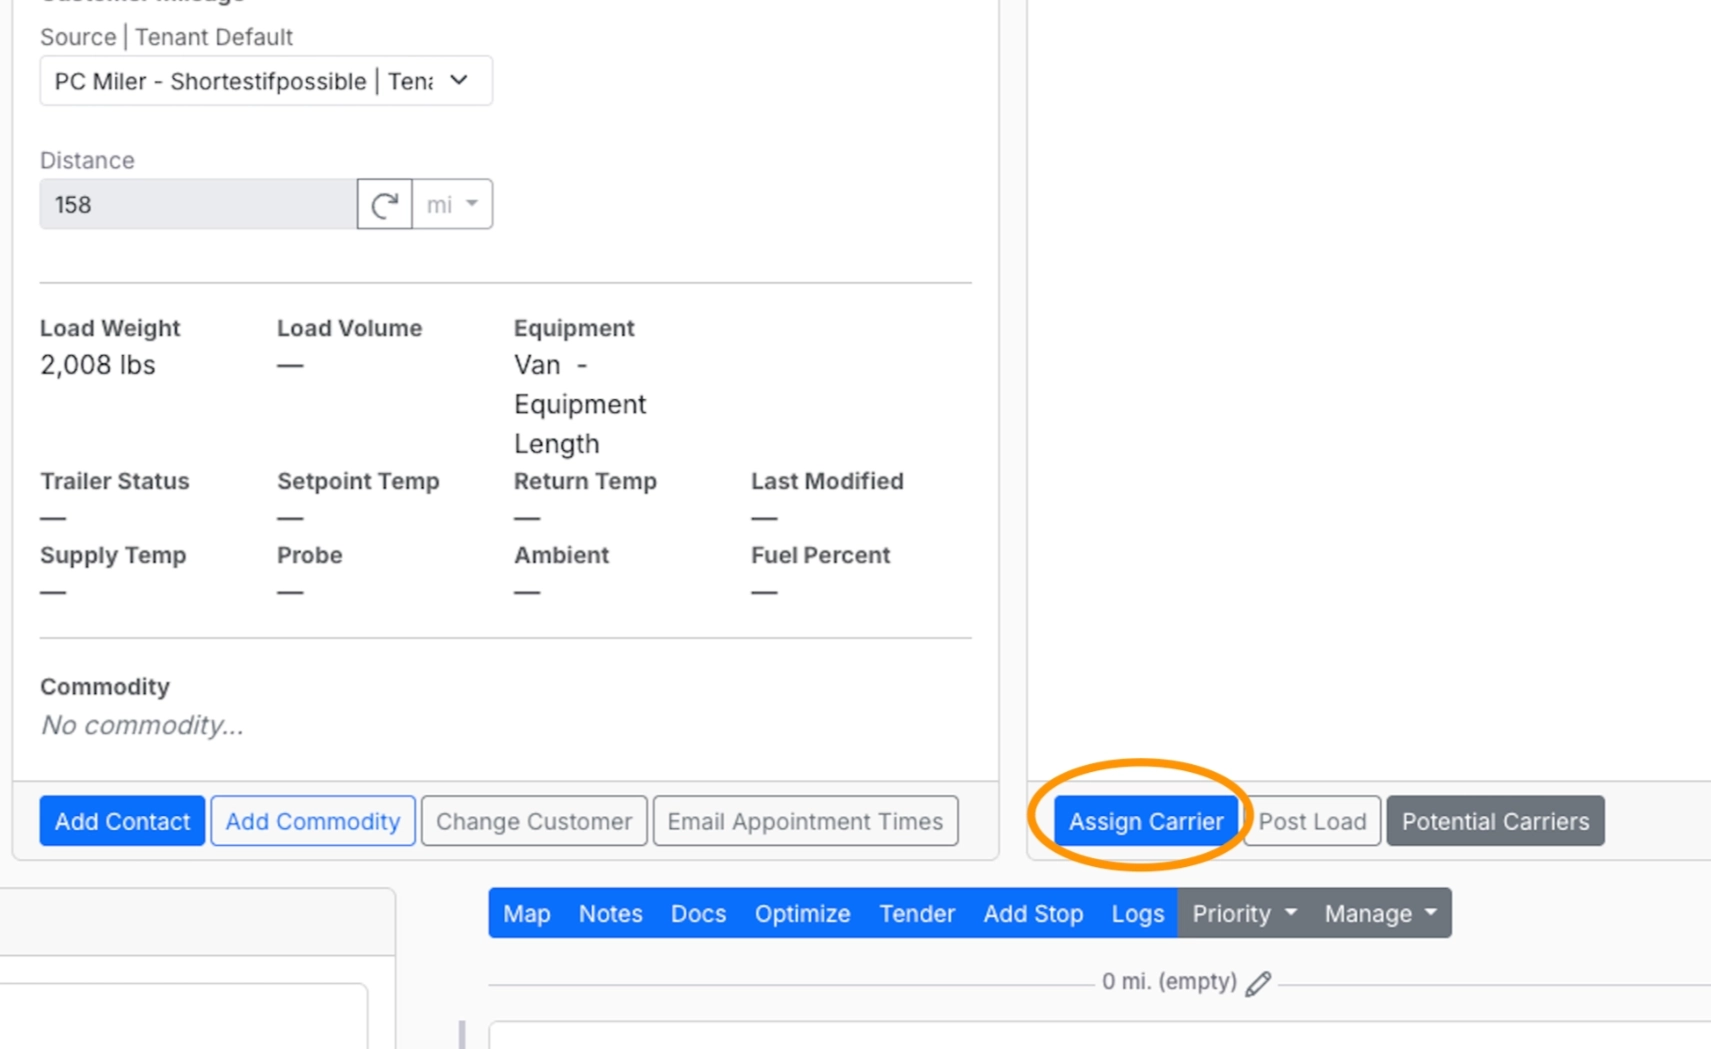 *The Carrier Details panel with the “Assign Carrier” button visible in the bottom left corner. *
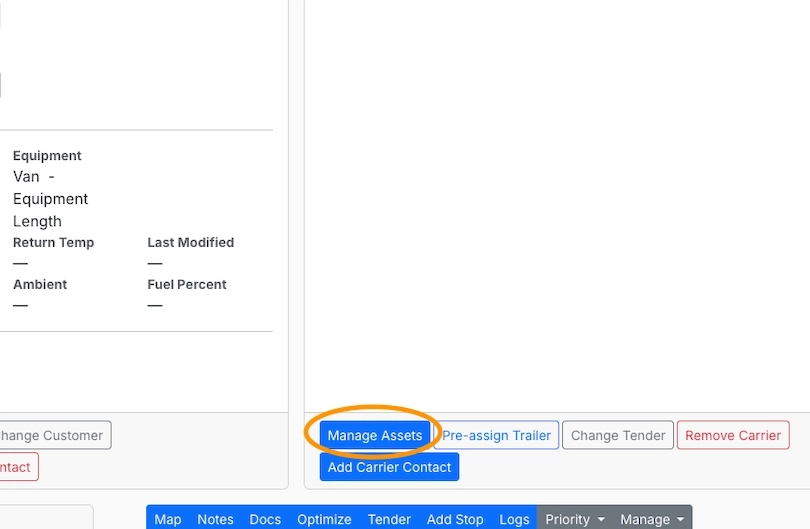 *The Carrier Details panel with the “Manage Assets” button visible in the bottom left corner. *
- In the asset assignment fields, select the driver for this trip.
- Select the truck.
- Select the trailer.
- Select the Dispatcher.
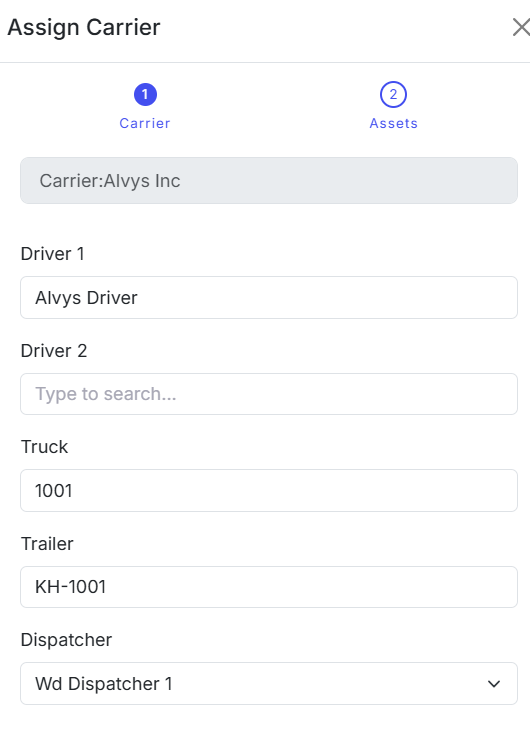 The asset assignment fields showing the driver, truck, and trailer selection dropdowns populated.
- Click Assign to assign the assets to the trip. The trip advances to Covered status, and is not yet dispatched.
- Or click “Assign and Dispatch” to assign and dispatch the trip.
 The Assign Carrier form showing the separate “Assign and Dispatch” and “Assign” buttons in the action area. Upload image from original Notion article.
Result
After dispatching, the trip status updates to Dispatched. This status confirms that a driver and equipment have been assigned and the load is ready to move.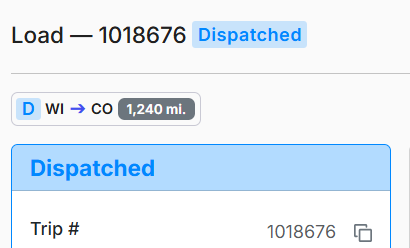 The trip details page showing the dispatched load with “Dispatched” status.
Variations
Dispatch using assignment preferences (assign and dispatch in one step)
When assignment preferences are configured for a driver or carrier, Alvys may display an assignment preferences suggestion modal when you open the trip. This modal offers two actions:- Assign: assigns the suggested assets to the trip without dispatching. The trip status does not change to Covered.
- Assign and dispatch: assigns the suggested assets and dispatches the trip in a single step. The trip advances to Covered status immediately.
💡 If assignment preferences are configured and a truck is paired with a driver, the truck auto-assigns when you select the driver. You do not need to select the truck separately.
Dispatch without a trailer
If a trip does not require a trailer or no trailer is currently available:- Complete the steps above, leaving the trailer field empty.
- Click Assign, then Dispatch as described in the assign and dispatch step.