
Create dimension values and custom fields in Sage Intacct, then map them to Alvys fields so every exported bill and invoice carries the right dimension tags and custom-field data.
Overview
Dimensions and custom fields let you push additional categorization and data from Alvys into Sage Intacct on every exported bill and invoice. Configuring them (also called field matching or dimension setup) involves work in two systems: you create the values in Sage Intacct first, then map them to the corresponding Alvys fields from your integration settings. This article walks through all four (4) phases; setting up dimension values in Sage Intacct, mapping those dimensions in Alvys, creating custom fields in Sage Intacct, and mapping custom fields in Alvys — plus the available fields and FAQs.- Also referred to as: Field matching · Dimension Setup · Dimension Mapping
Before You Start
Confirm the following before you begin:- The Sage Intacct setup wizard in Alvys is complete. The Dimensions and Custom Fields tab does not appear until the wizard finishes.
- You know which Sage Intacct dimension types you want to use. Alvys supports the 11 standard types (Location, Department, Class, Customer, Vendor, Employee, Project, Item, Asset, Contract, and Warehouse) as well as custom dimensions built through the Sage Intacct Platform Apps framework (for example, a custom Equipment dimension).
- If you’re using a custom dimension, its containing Application is deployed in Sage Intacct Platform Services and the Web Services user’s role has List/View access to it under Role Subscriptions. See Sage Intacct: Prerequisites — an undeployed or unpermissioned Application will not appear in the Alvys mapping interface.
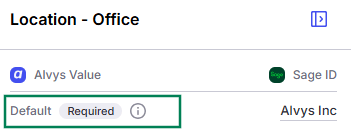
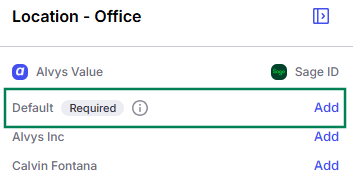
- Any required dimensions (those with a red Required badge in Alvys) have dimension values created in Sage Intacct and will have a Default Value set. Required dimensions without a Default Value will block financial exports.
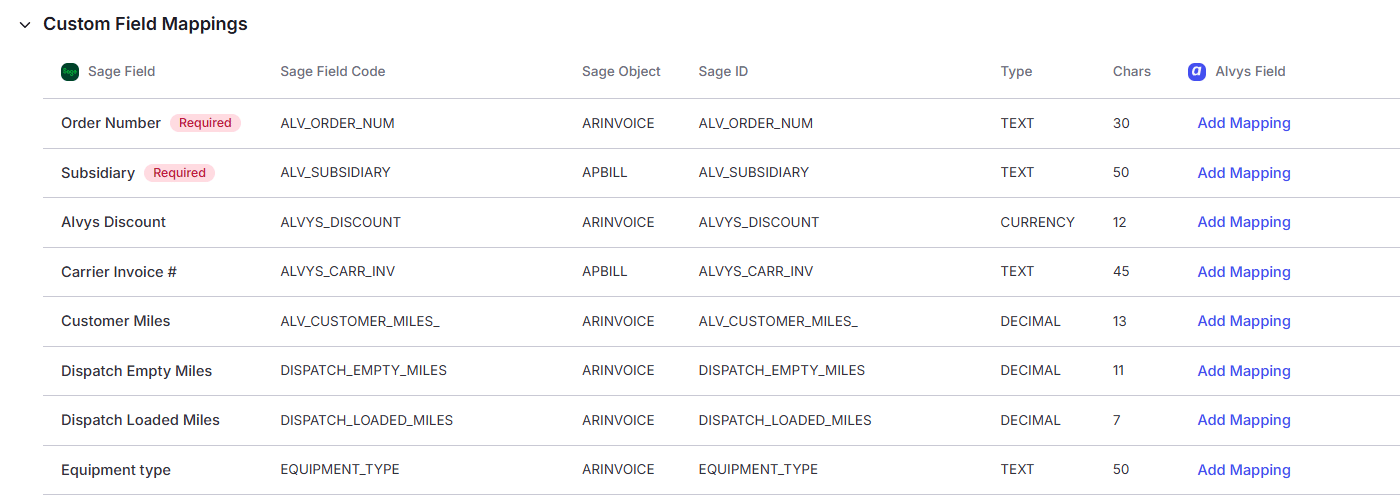
- If you are mapping custom fields, you know which Sage object each should attach to: AR Invoice, AR Invoice Item, AP Bill, or AP Bill Item.
- Required role: Admin or Partner Admin.
Steps
Complete the four phases in order. Phases 1 and 3 are performed in Sage Intacct; phases 2 and 4 are performed in Alvys.Phase 1: Set up dimension values in Sage Intacct
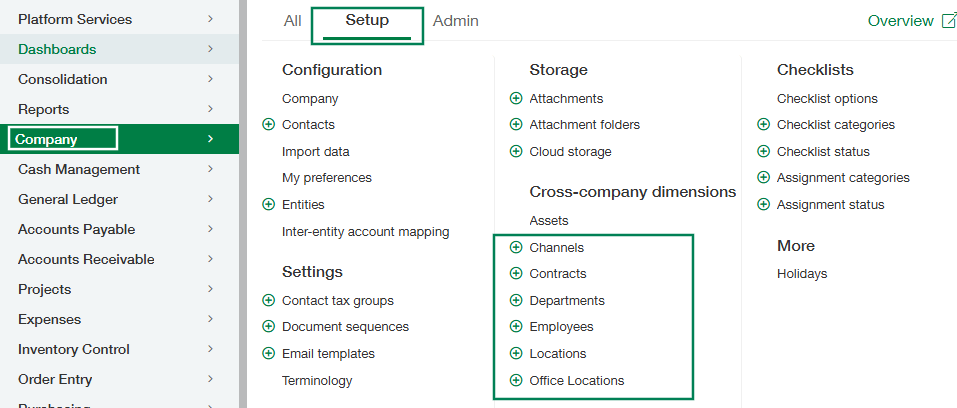
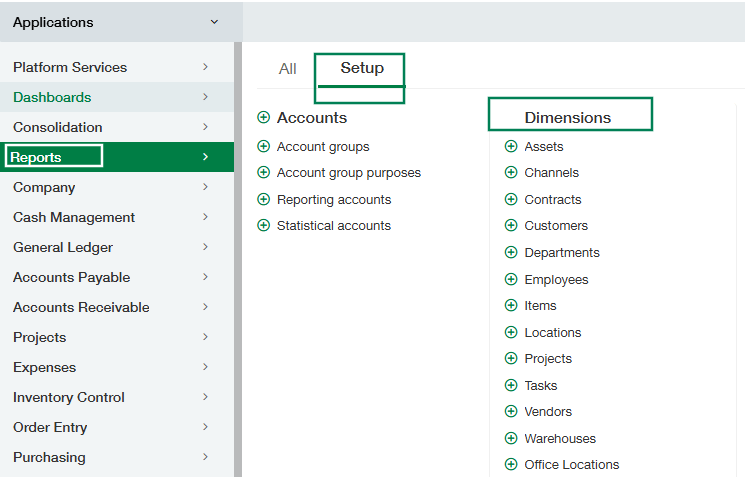
A dimension in Sage Intacct is a classification system — think of it as a tag with a set of values — that lets you sort and report on financial data across business segments such as location, department, or class without complicating your chart of accounts. Create the dimension values you need in Sage Intacct before mapping them in Alvys, and repeat this sub-process for each value.- Navigate to the relevant dimension module. For Location and Department, go to Company > Setup. For other standard dimension types, go to Reports > Setup > Dimensions to manage all dimension types.
- Click Add to begin creating a new dimension value.

- Enter a unique ID for the dimension value. We recommend choosing this ID carefully, as it cannot be changed after creation.
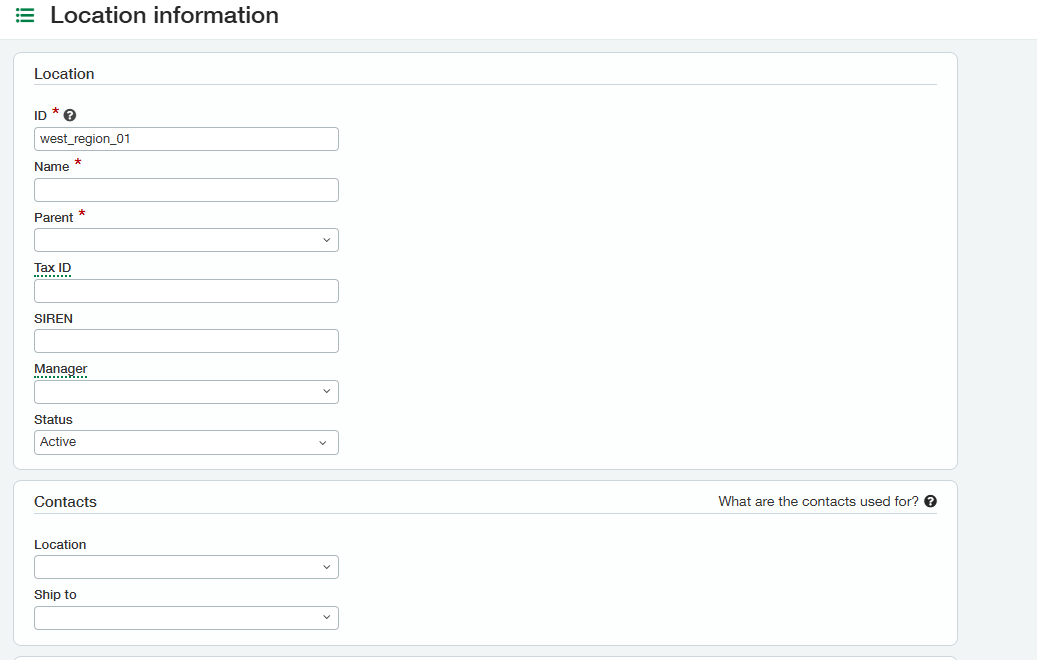
- Enter a Name for the dimension value. Unlike the ID, the name can be updated later if needed.
- Optionally provide a Description or other relevant details depending on the dimension type. For locations, you may also configure a primary Contact with address details that appear on invoices and forms.
- To build a parent-child hierarchy, specify a Parent to nest the new value under an existing one. Leave it blank if the value should sit at the top level.
- Set the Status: Active allows transactions to post against the value. Active Non-Posting, which is available for Department, Location, Class, Customer, Vendor, and Project dimensions, makes the value available for reporting and roll-ups but prevents Alvys from posting transactions directly to it.
- Click Save. The dimension value will now appear in your list and become available for tagging on transactions throughout the system.

Phase 2: Map dimensions in Alvys
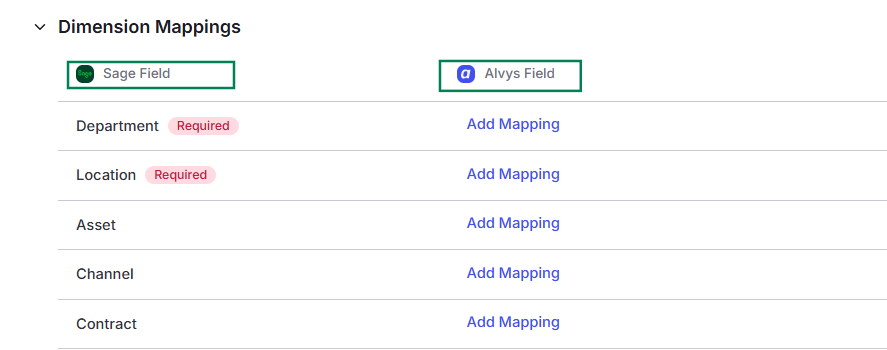
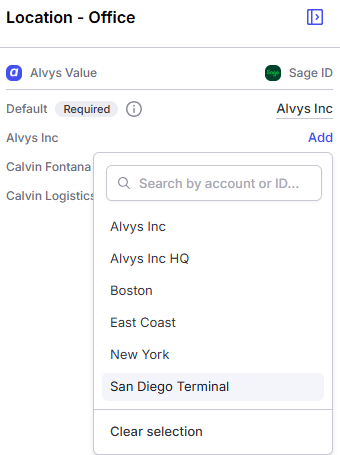
After creating dimension values in Sage Intacct, map each dimension to an Alvys field from Settings > Connections > Sage Intacct > Dimensions and Custom Fields. Each dimension is mapped to one Alvys field. The available Alvys fields are:- Subsidiary: The Alvys subsidiary associated with the transaction.
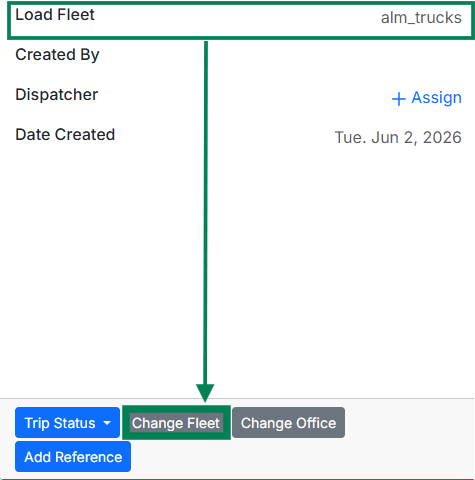
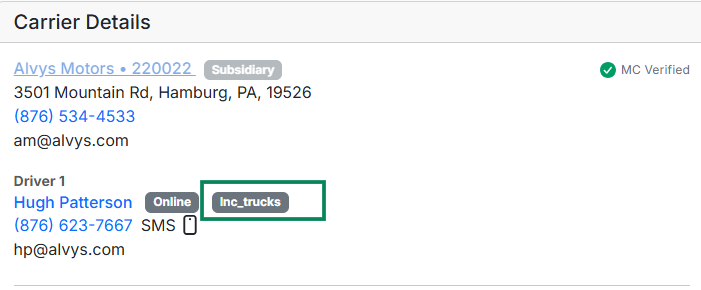
- Fleet: The fleet assigned to the load or trip.
-
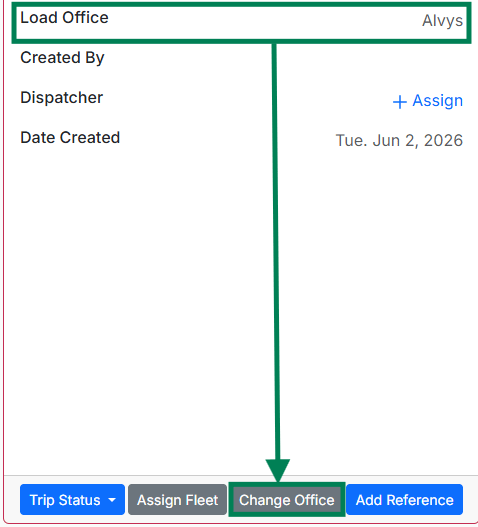
Office: The load office associated with the transaction.
- Driver: The driver assigned to the trip.
- Truck: The truck assigned to the trip.
- Trailer: The trailer assigned to the trip.
- Contractor Type: The contractor type of the driver (e.g., Company Driver, Owner Operator).
💡 For example, if your Sage “Location” dimension represents terminal locations, you might map it to the Alvys Office field so that every exported transaction is tagged with the correct office/terminal.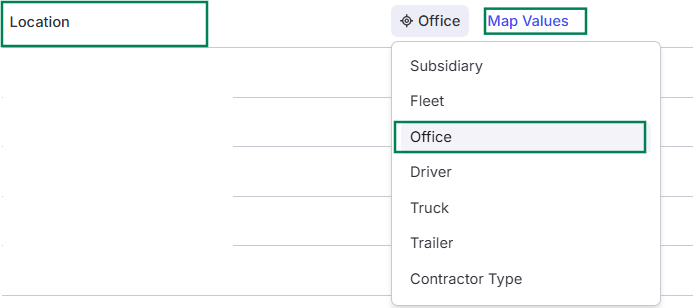


Phase 3: Create a custom field in Sage Intacct
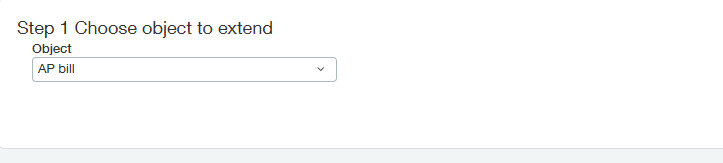
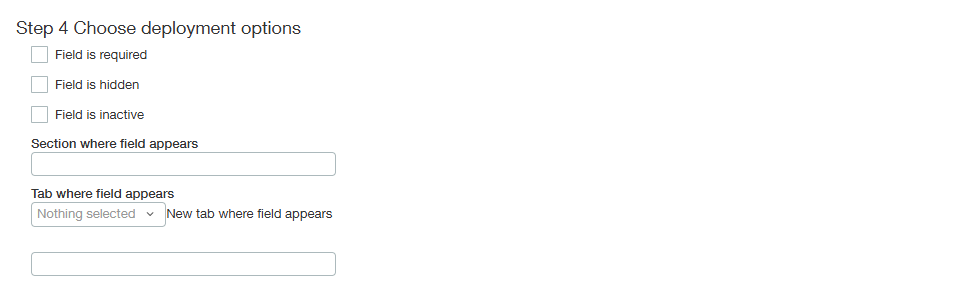
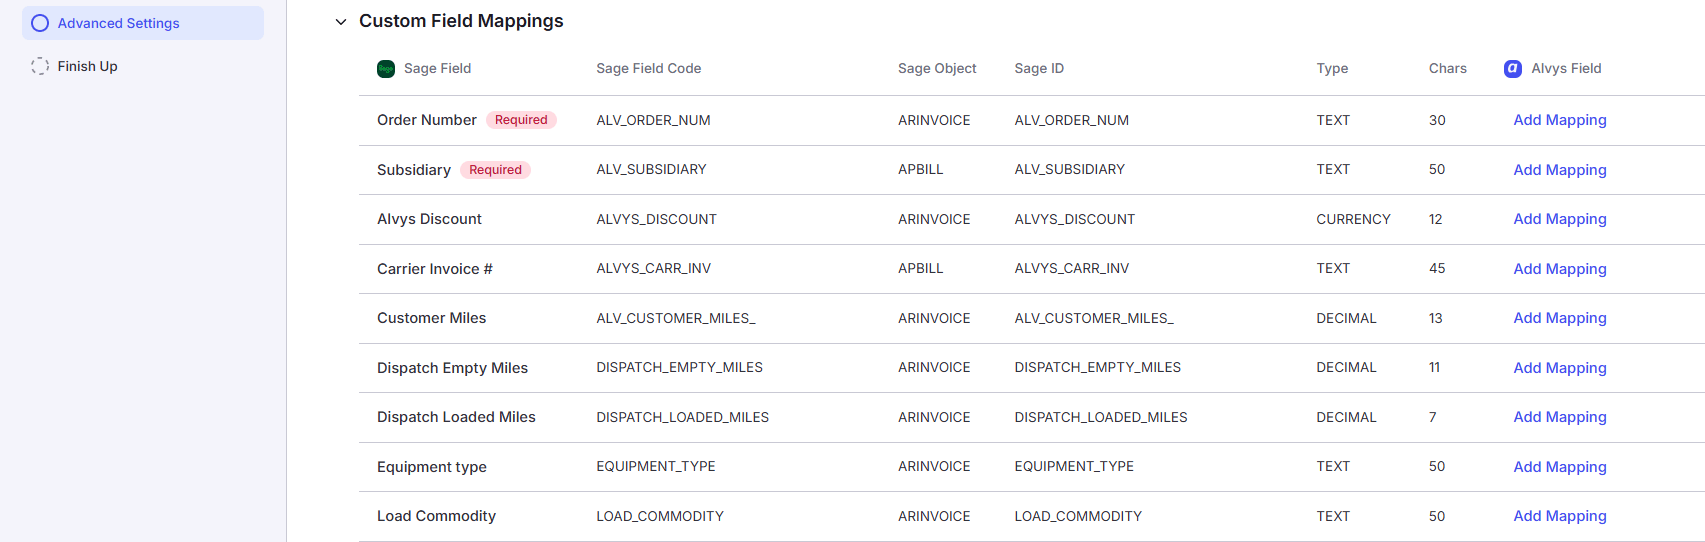
Custom fields are user-defined fields added to standard Sage objects; the Alvys integration can populate them with Alvys data on every exported transaction. They are supported on four Sage objects: AR Invoice (header), AR Invoice Item (line item), AP Bill (header), and AP Bill Item (line item). The object you pick determines where the field appears. Custom fields must exist in Sage Intacct before you can map them in Alvys — repeat this sub-process for each one. Depending on your subscription, navigate to Platform Services > All > Object Customization (or Customization Services > All > Object Customization) and click Add next to Custom Fields.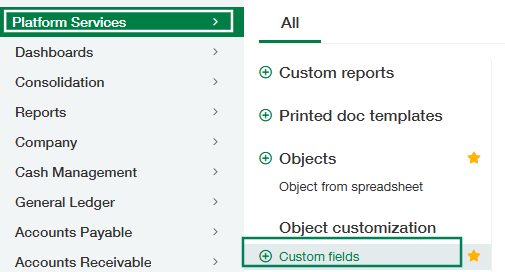

- Date: Date values.
- Currency: Monetary amounts.
- Number: Numeric values.
- Text: Short text strings (up to the character limit defined in Sage Intacct).
- Text Area: Longer text content.

Phase 4: Map custom fields in Alvys
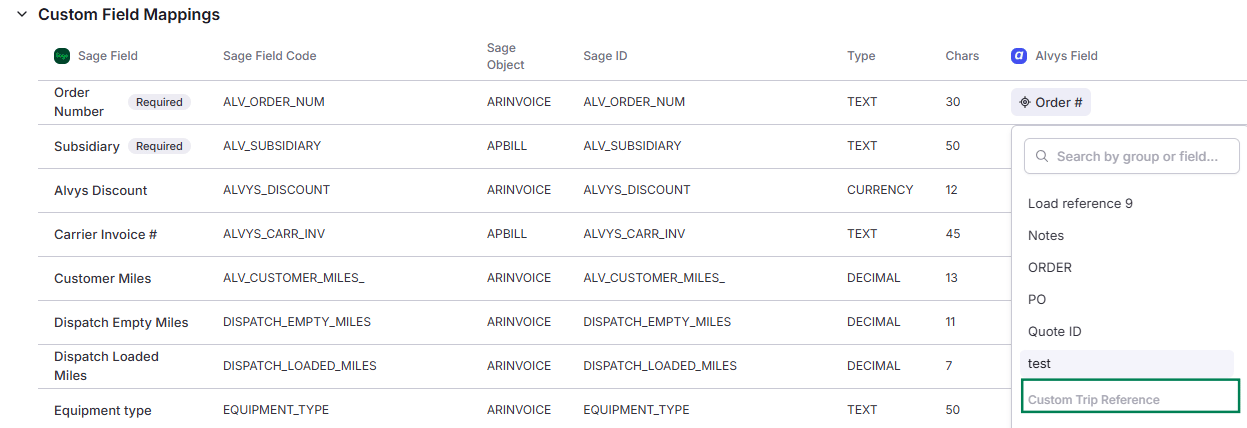
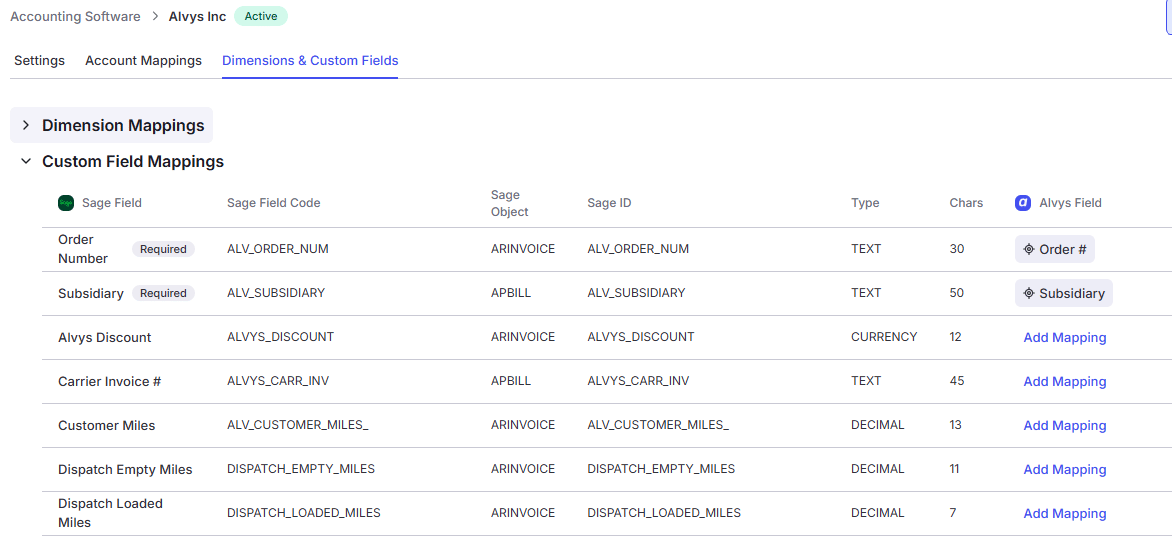
Alvys provides built-in fields, organized into seven groups, that can be mapped to Sage custom fields:- Load Fields: Carrier Invoice Number, Subsidiary, PO Number, Order Number, BOL Number, Office, Fleet, Equipment, Commodity, Weight, Volume, Invoiced Date, Created Date.
- Customer Fields: Net Payment Terms, Miles, Sales Agent.
- Dispatch Fields: Total Miles, Loaded Miles, Empty Miles, Dispatched By, Dispatched Date.
- Shipper Fields: Name, Address, City, State, Country, Pickup Date.
- Consignee Fields: Name, Address, City, State, Country, Delivery Date.
- Equipment Fields: Truck, Trailer.
- Driver Fields: Primary, Secondary, Fleet.

Result
After completing all four phases:- Dimension mappings are active: every financial export from Alvys includes the configured dimension values in the corresponding Sage Intacct fields.
- Custom field mappings are active: every export includes Alvys data in the configured custom fields on the selected Sage objects.
- Required dimensions with a Default Value set no longer block financial exports.
- Tip: export one test transaction and verify the values land correctly in Sage before bulk exporting.
Variations
- Updating mappings after initial setup: Add, change, or remove dimension and custom field mappings any time from the Dimensions and Custom Fields tab. Changes apply to future exports only.
- Required dimension with no Default Value: If a required dimension has no Default Value and an unmapped Alvys value reaches export, the export fails. Open Map Values for that dimension and set a Default Value.
Troubleshooting
Financial exports fail after dimension mapping is configured
- Open Settings > Connections > Sage Intacct > Dimensions and Custom Fields and expand Dimension Mappings.
- Identify any dimension with a red Required badge, and confirm an Alvys field is selected for each.
- Click Map Values for each required dimension and confirm a Default Value is set — exports fail for any unmapped Alvys value when no Default is configured.
- If a required dimension does not appear, confirm the matching Sage subscription is active (Asset → Fixed Assets Management; Contract → Contracts; Warehouse → Inventory).
- If none of the above apply, contact Alvys support.
A custom dimension does not appear in the Alvys mapping interface
- In Sage Intacct, confirm the Application containing the custom dimension (for example, “WD Reports”) is deployed in Platform Services. An undeployed Application’s objects never appear in Role Subscriptions or in the Alvys mapping interface.
- Go to Company > Roles > (the Web Services user’s role) > Subscriptions, open the Application’s permissions, and confirm List and View are checked for the custom dimension under Objects.
- If recently deployed or permissioned, refresh the Sage Intacct integration settings page and expand Dimension Mappings again.
- If it still does not appear, contact Alvys support.
A custom field does not appear in the Alvys mapping interface
- Confirm the field uses a supported data type (Date, Currency, Number, Text, Text Area). Unsupported types are not displayed.
- Confirm the field is on a supported object (AR Invoice, AR Invoice Item, AP Bill, AP Bill Item).
- If recently created, refresh the Sage Intacct integration settings page and expand Custom Field Mappings again.
- If it still does not appear, contact Alvys support.
Exported values are truncated in Sage Intacct
- In the Custom Field Mappings table, check the Chars column for the field’s maximum length in Sage.
- If the Alvys value typically exceeds that limit, increase the field’s maximum length in Sage via Object Customization and export again.
- If the limit cannot be increased, map a shorter Alvys field or use a Custom Reference with a truncated value.