
Scope: This article covers Load Board navigation, column management, filtering, sorting, and right-click actions. The Alvys Load Board is your internal list of loads and trips. It is not an external freight board. To find carriers or trucks to cover a load, use the Alvys Carrier Marketplace. To post a load to an external board, see Post Loads to DAT Load Board or TruckStop Load Board Integration.For related topics see Load statuses and how to revert them, Dispatch permissions, Billing permissions, Driver settlements, and Clear cache, cookies, and troubleshoot common issues.
Loads vs. Trips
A load is the full shipment from first pickup to final delivery, and it carries the customer billing. A trip is one movement of that load by a driver or carrier, and it carries the carrier or driver cost. If one driver or carrier handles the whole shipment, the load has one trip. If the shipment is split, it keeps one load number and each leg gets its own trip number (for example, Load 12345 with Trips 12345-1 and 12345-2).Navigation & Setup
Navigate to the Load Board
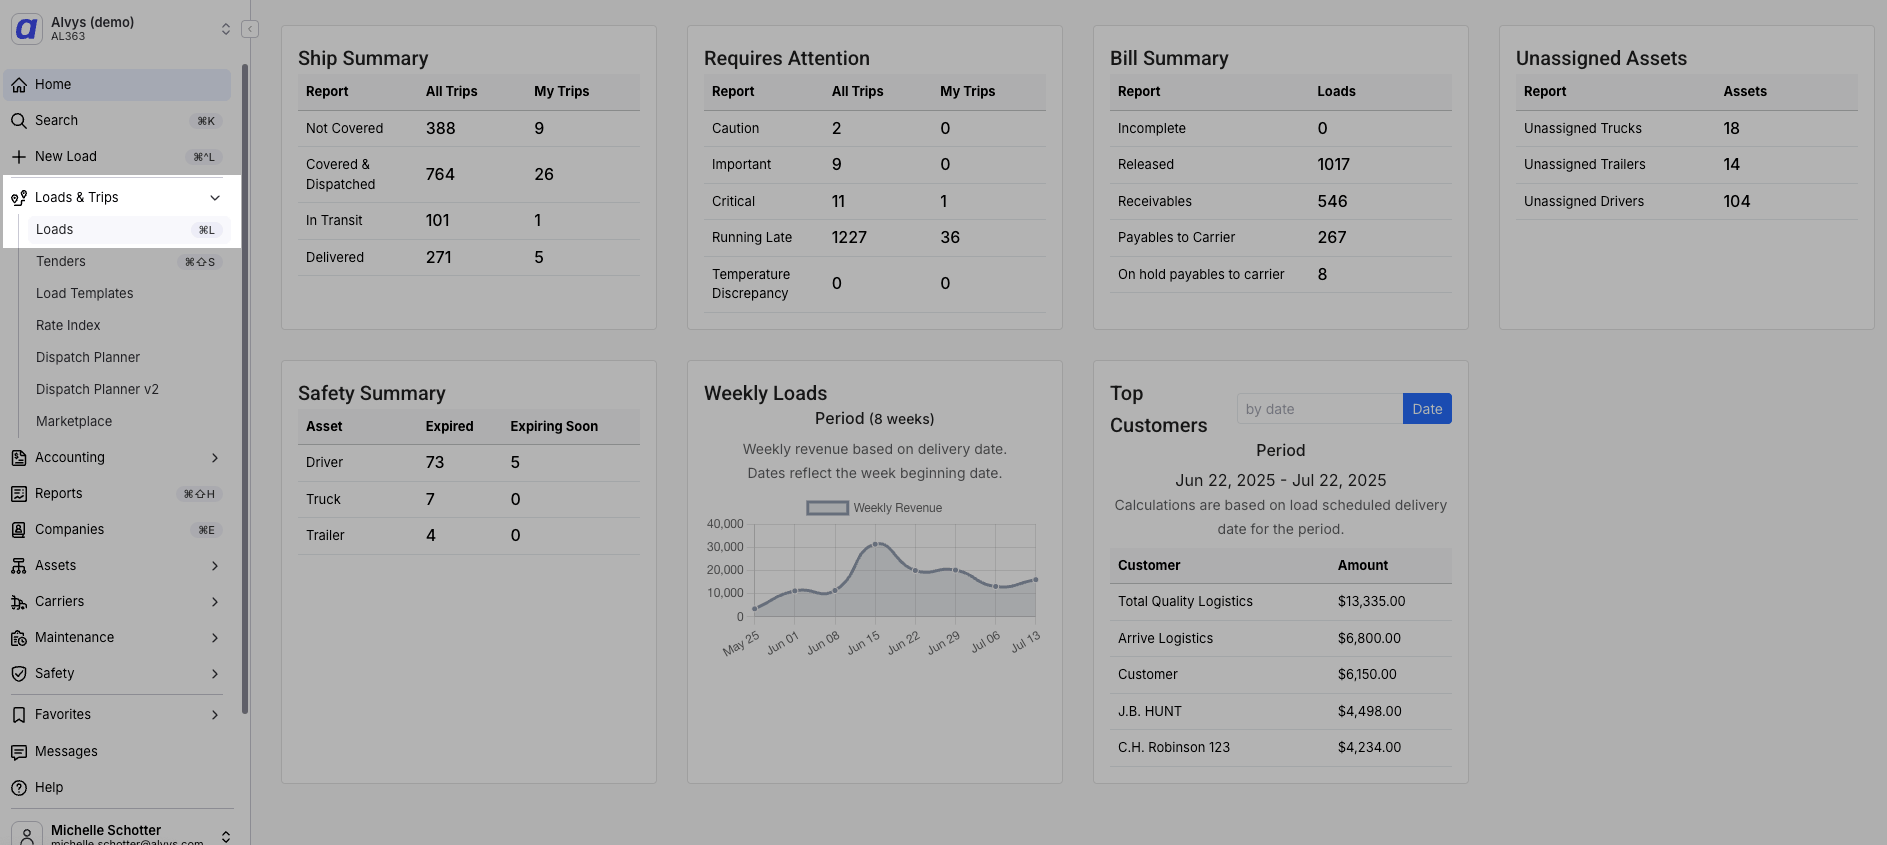
There are several convenient ways to access the Alvys Load Board from anywhere in the application: From the Home Screen (Left Side Panel Navigation):- On the left-hand side navigation panel, click “Loads and Trips.”
- Then, select the “Loads” option from the submenu.
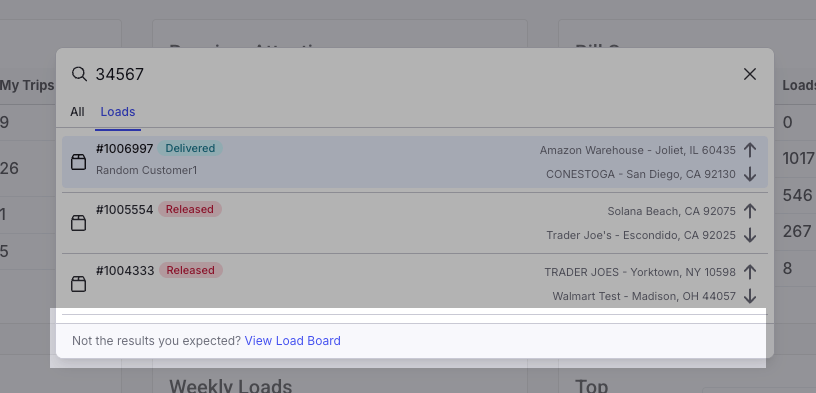
- Use Global Search, at the top left of Alvys, to find any load by load number.
- Type in a load number (or other search query).
- Click “Loads” in the search results.
- If the results are not what you expected, click the link that says “Not the results you expected? View load board.” This will take you directly to the Load Board.
Cmd + L (Mac) or Ctrl + L (Windows) on your keyboard. This will instantly take you to the Load Board.
Adding, Removing, and Reordering Columns
The Load Board features a highly customizable table view. You can choose which data points (columns) you want to see, and how they are ordered and displayed. Ensure the “Loads” tab is selected on the board. Using the “Columns” Tab:- On the far right side of the table header, click the “Columns” tab.
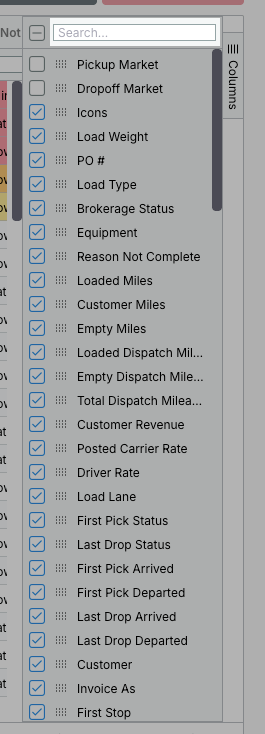
- A panel will appear with a list of all available columns.
- To show a column: Ensure the checkbox next to its name is checked.
- To hide a column: Uncheck the checkbox.
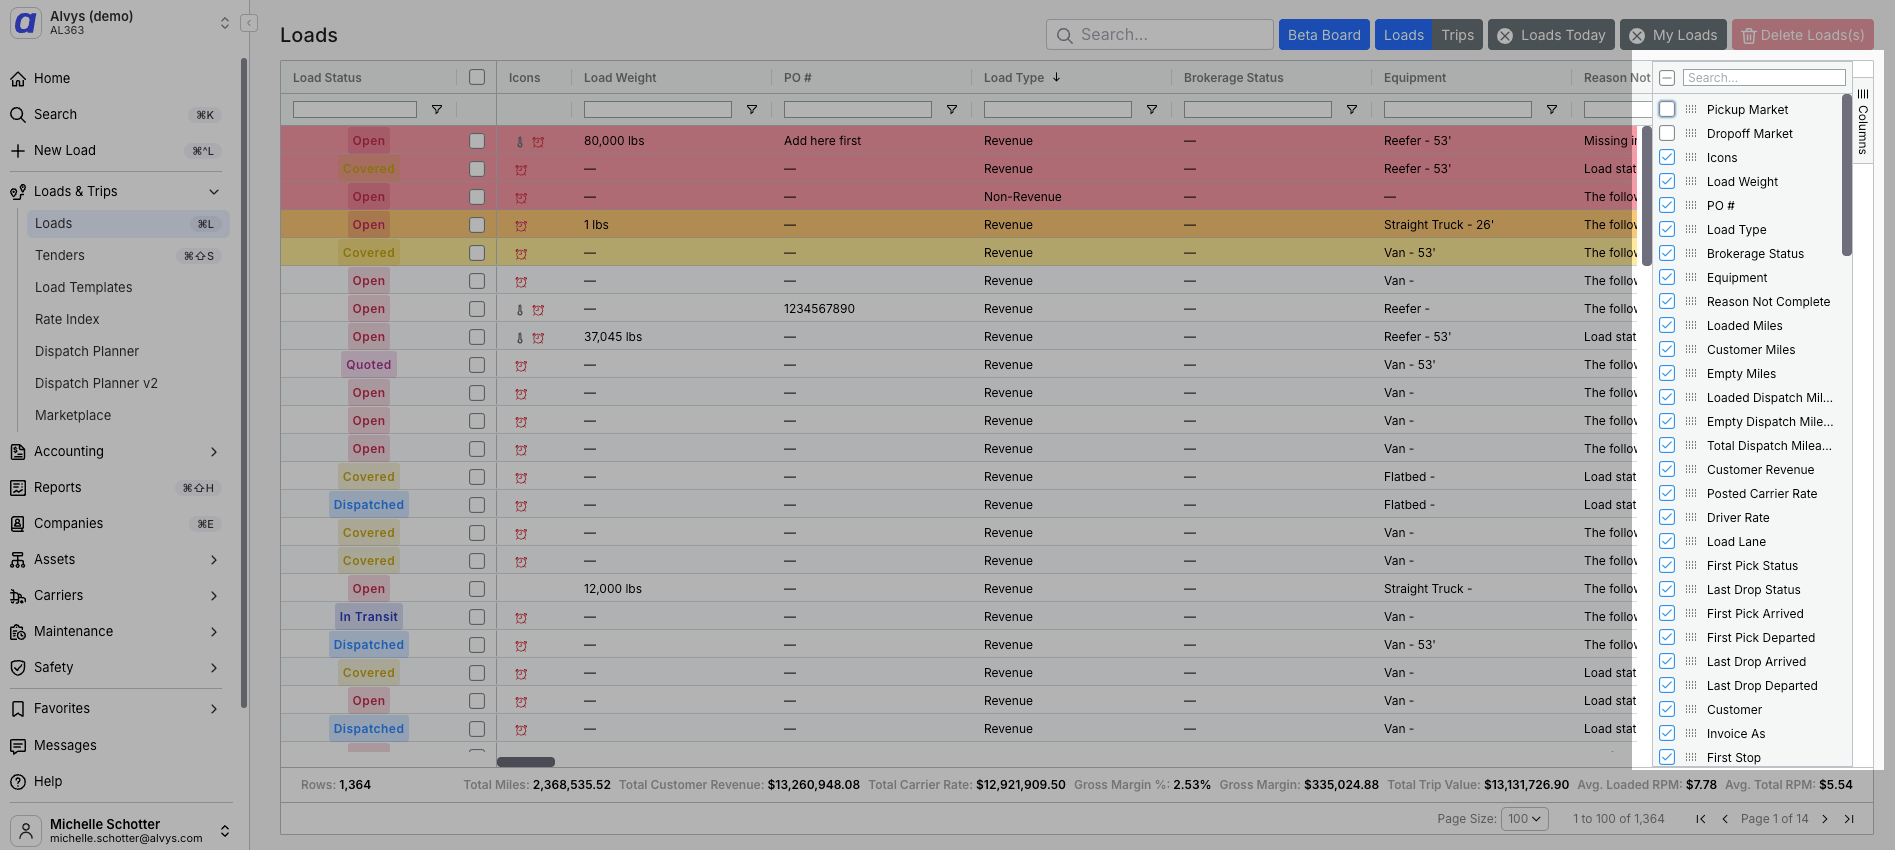
- To reorder columns: Click and drag the drag handle next to a column name to change its position in the list. This will update its order on the table.
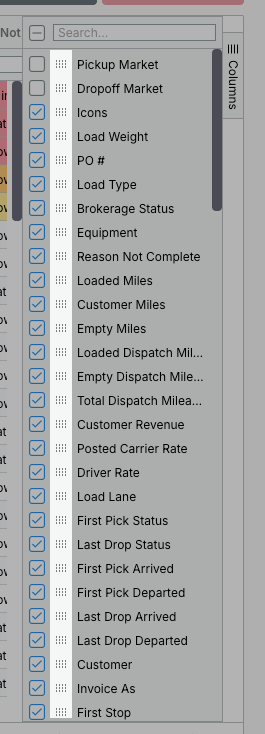
- You can also use the search bar at the top of this panel to quickly find a specific column name.
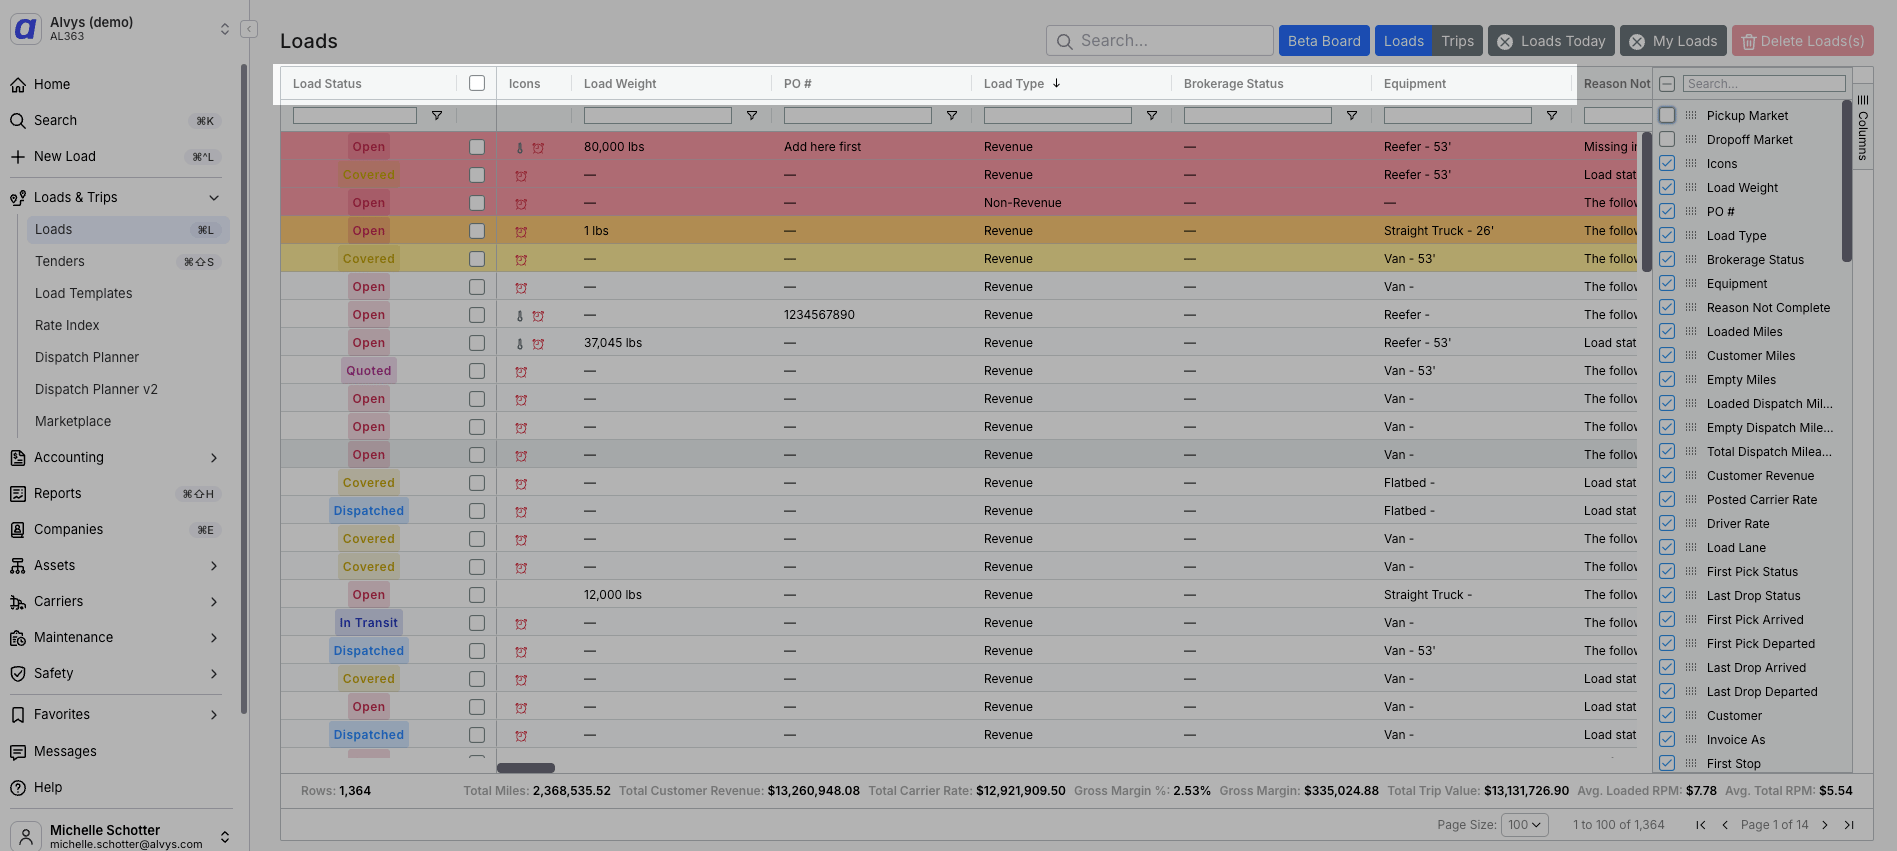
- You can also click and hold down on any column header directly on the table.
- Drag and drop the column to your desired position in the table.
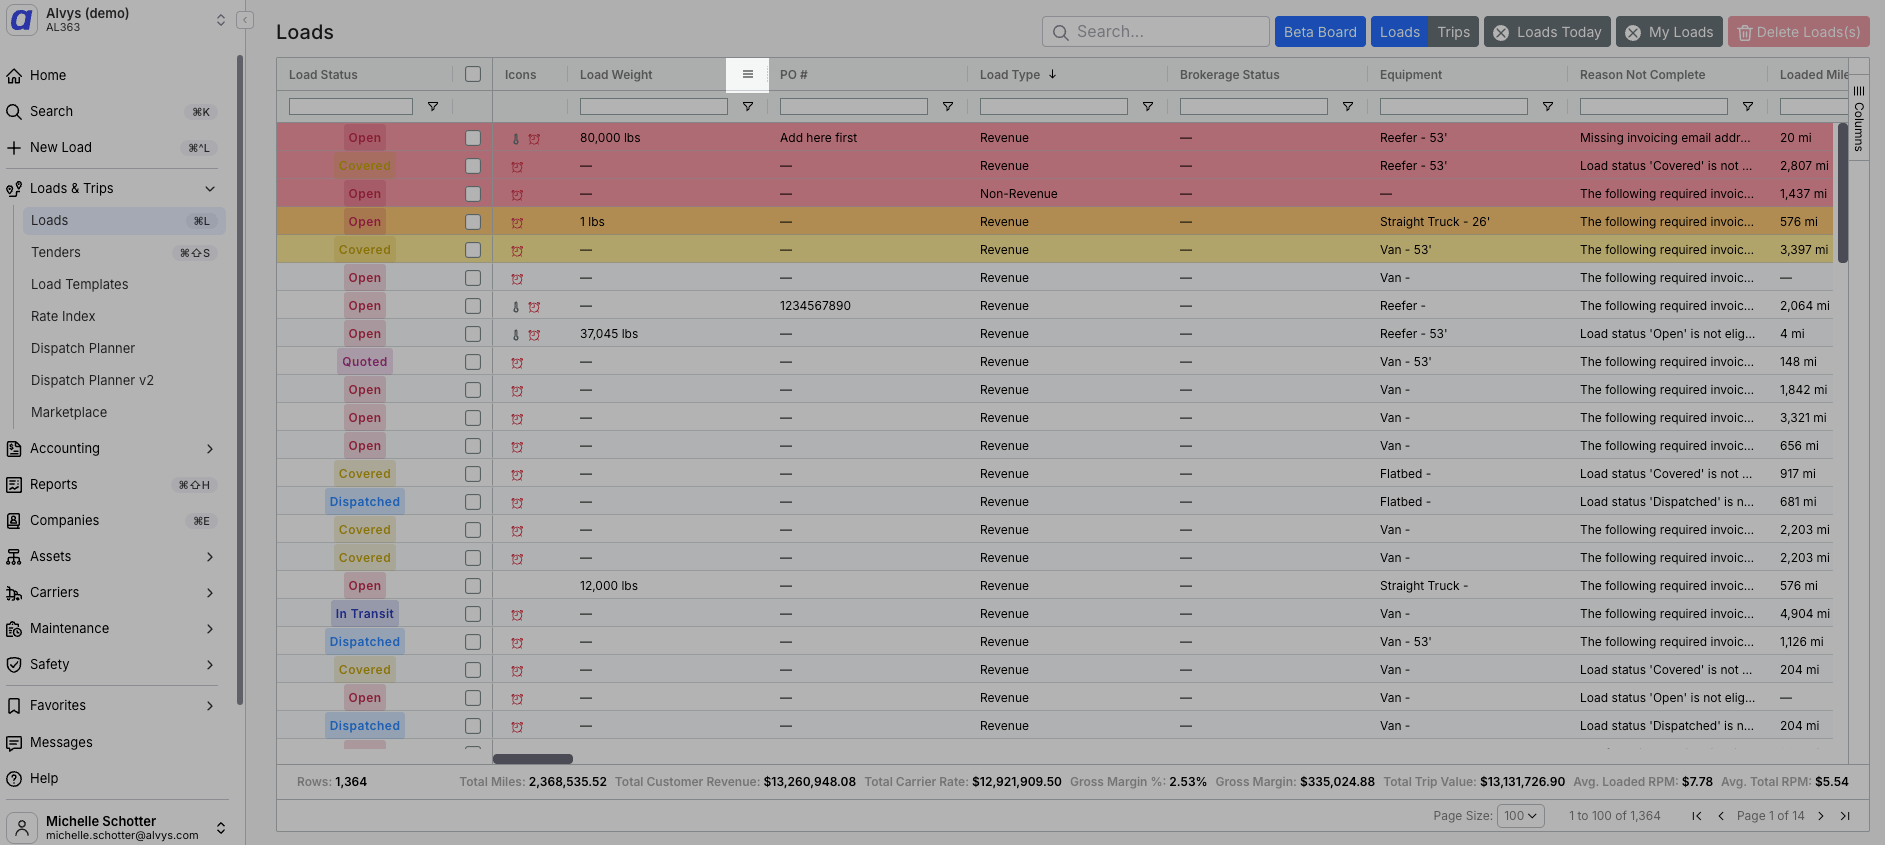
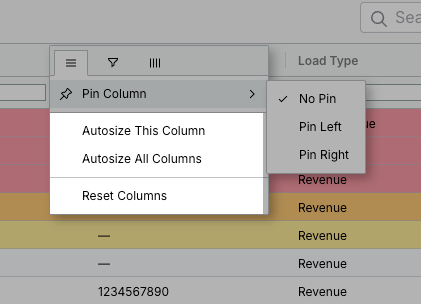
- “Pin Left”: The column will always be the leftmost column, staying in your viewport even with horizontal scrolling.
- “Pin Right”: The column will always be the rightmost column, staying in your viewport even with horizontal scrolling.
- “No Pin”: The column will not be pinned and will scroll horizontally with the rest of the table.
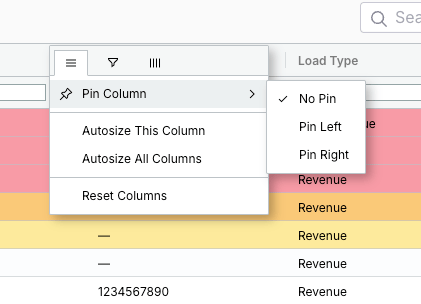
- Click the menu icon (three lines) in a column header.
- Select “Autosize this column” to adjust the column width to fit its content, wrapping text as needed.
- Click the menu icon (three lines) in any column header.
- Select “Autosize all columns” to adjust all visible columns to fit their content.
- Click the menu icon (three lines) in any column header.
- Select “Reset columns” to revert all columns back to their default widths and order that you had previously set up.
Filtering Columns
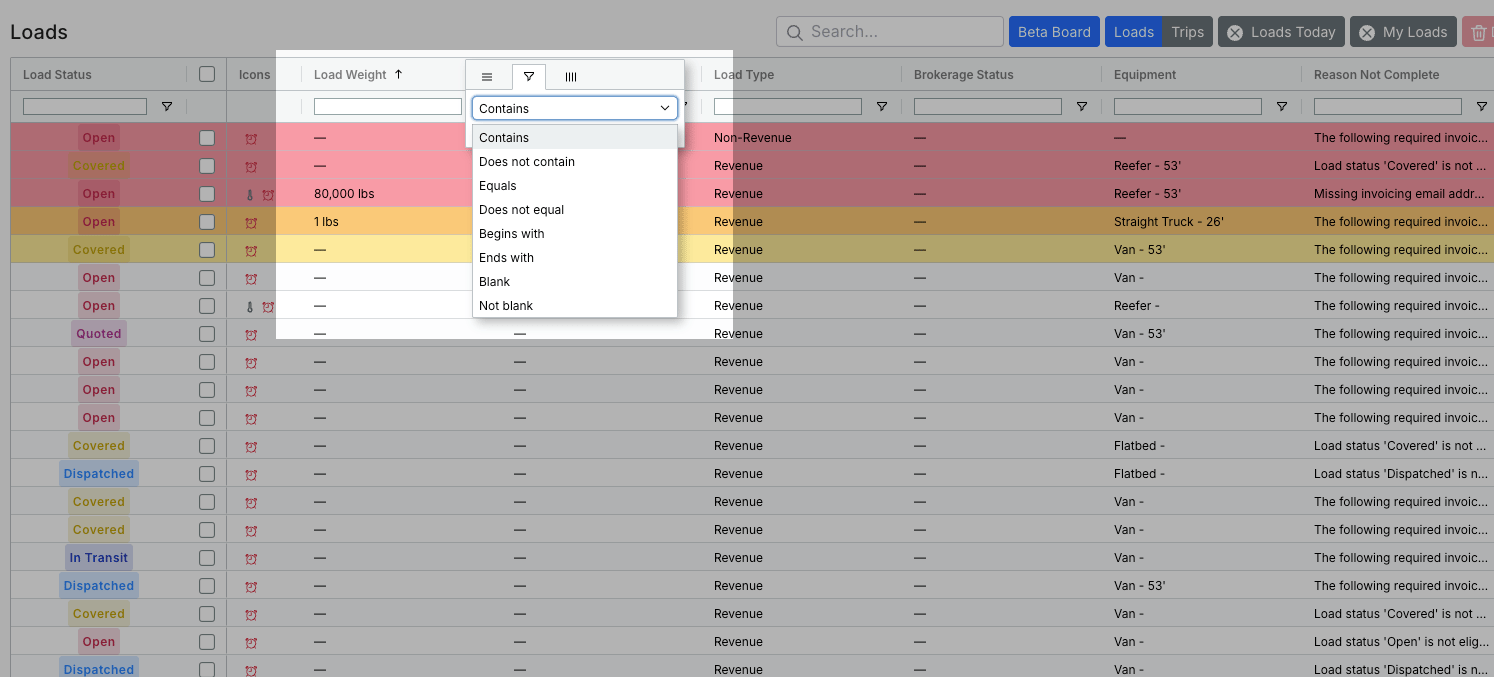
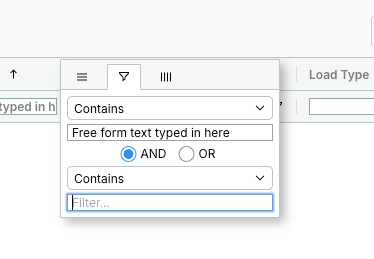
The Load Board offers powerful filtering and sorting capabilities to help you quickly find and organize the loads you need. Filtering Columns Individually Access Filter Options: Hover over any column header and click the menu icon (three lines). Click “Filter”: From the dropdown menu, click the Filter icon. Enter Search Criteria: A search bar will appear. Type your desired text or value into this search bar. Choose Filter Method: You can select different methods for how you’re filtering your data:- “Contains”: Shows results that include your text anywhere.
- “Does not contain”: Excludes results that include your text.
- “Equals”: Shows exact matches.
- “Does not equal”: Excludes exact matches.
- “Begins with”: Shows results that start with your text.
- “Ends with”: Shows results that end with your text.
- “Blank”: Shows records where the field is empty.
- “Not blank”: Shows records where the field is not empty.
TONU.
Clear a filter
A column with an active filter shows a filter icon on its header. Click that column’s menu icon and clear the filter text. Scroll horizontally to check every column.
Filter by a number range (for example, loads over 500 miles)
Load Board column filters match text. To filter by a number range, open the Loads Custom Report from the Reports menu, export it to Excel, and filter the mileage column there.
Sorting Columns
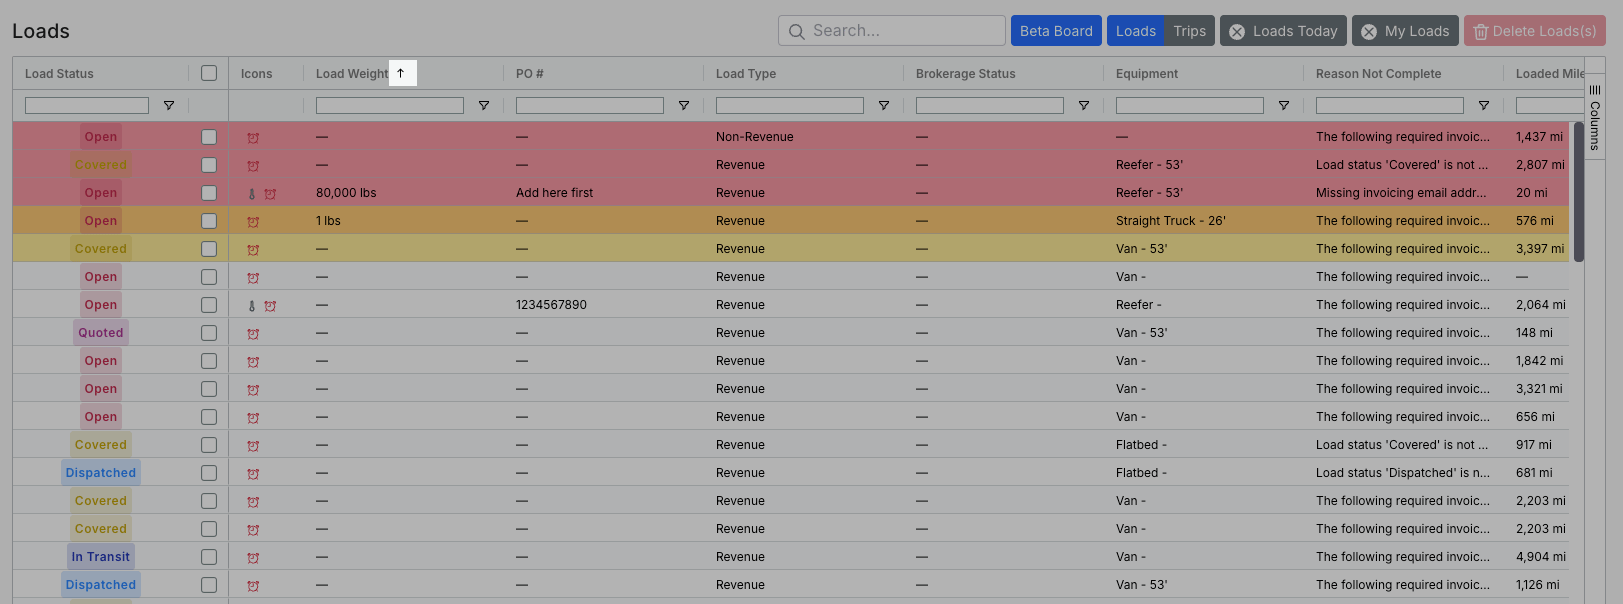
You can sort most columns to organize your data ascending or descending. Click Column Header: Click directly on the header of the column you wish to sort. Click once to sort ascending; click again to sort descending.Only one column can be sorted at a time.
Page-Wide Search
In addition to individual column filters, you can perform a search across the entire visible table. Click Page Search at the top right of the Load Board. It searches only the loads in the current table view, not all of Alvys.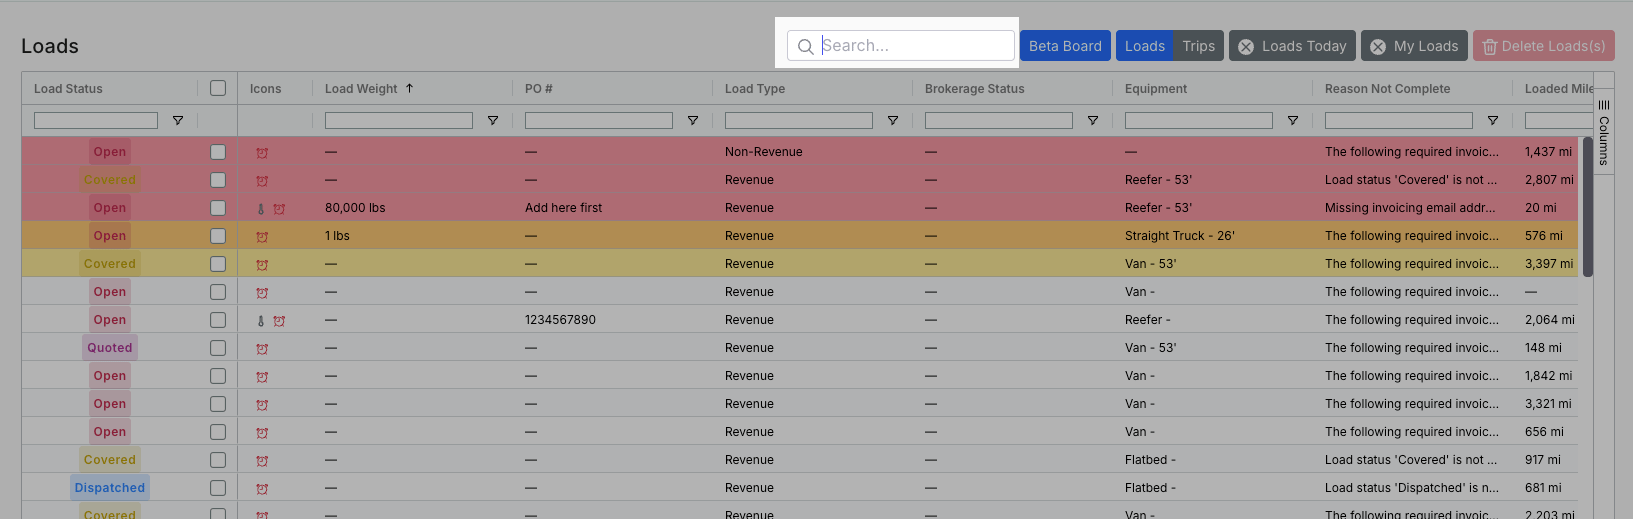
Additional Load Board Filters
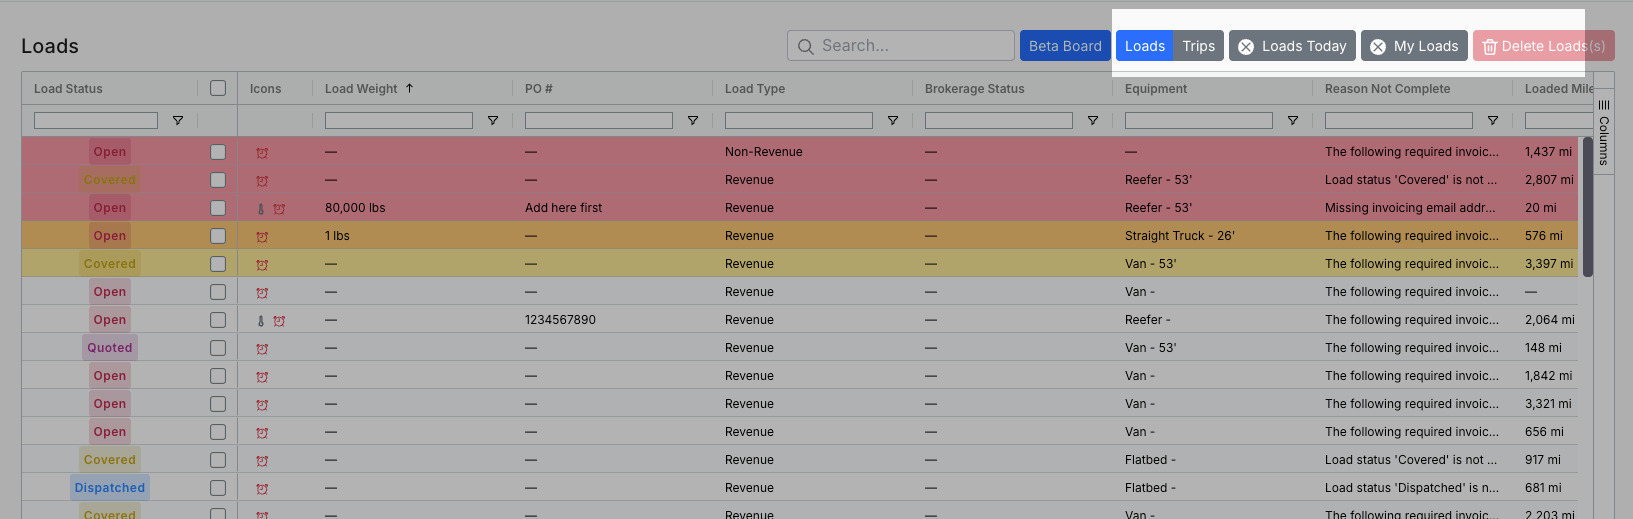
At the top of the Load Board, you may find additional quick filters:- “Loads/Trips”: Ensure Loads is selected to display loads in the rows of the table. If you select Trips, it will display the trips in the rows.
- “Loads Today” or “Trips Today”: Filters the table to only display loads scheduled for the current day. This means any load or trip that has a pickup or delivery date in the local timezone of the user.
- “My Loads” or “My Trips”: Filters the table to show loads where you have a named role or responsibility. A load or trip appears under My Loads or My Trips if you are listed in any of the following capacities:
- You invoiced the load
- You created the load
- You cancelled the load
- You dispatched the load
- The load was dispatched on your behalf
- You released the load to billing
- You are the assigned customer service rep
- You are the assigned customer sales agent
- You are the assigned customer sales manager
- You are the assigned customer load planner
- You are the assigned customer account manager
- You are the assigned carrier sales agent
Pagination
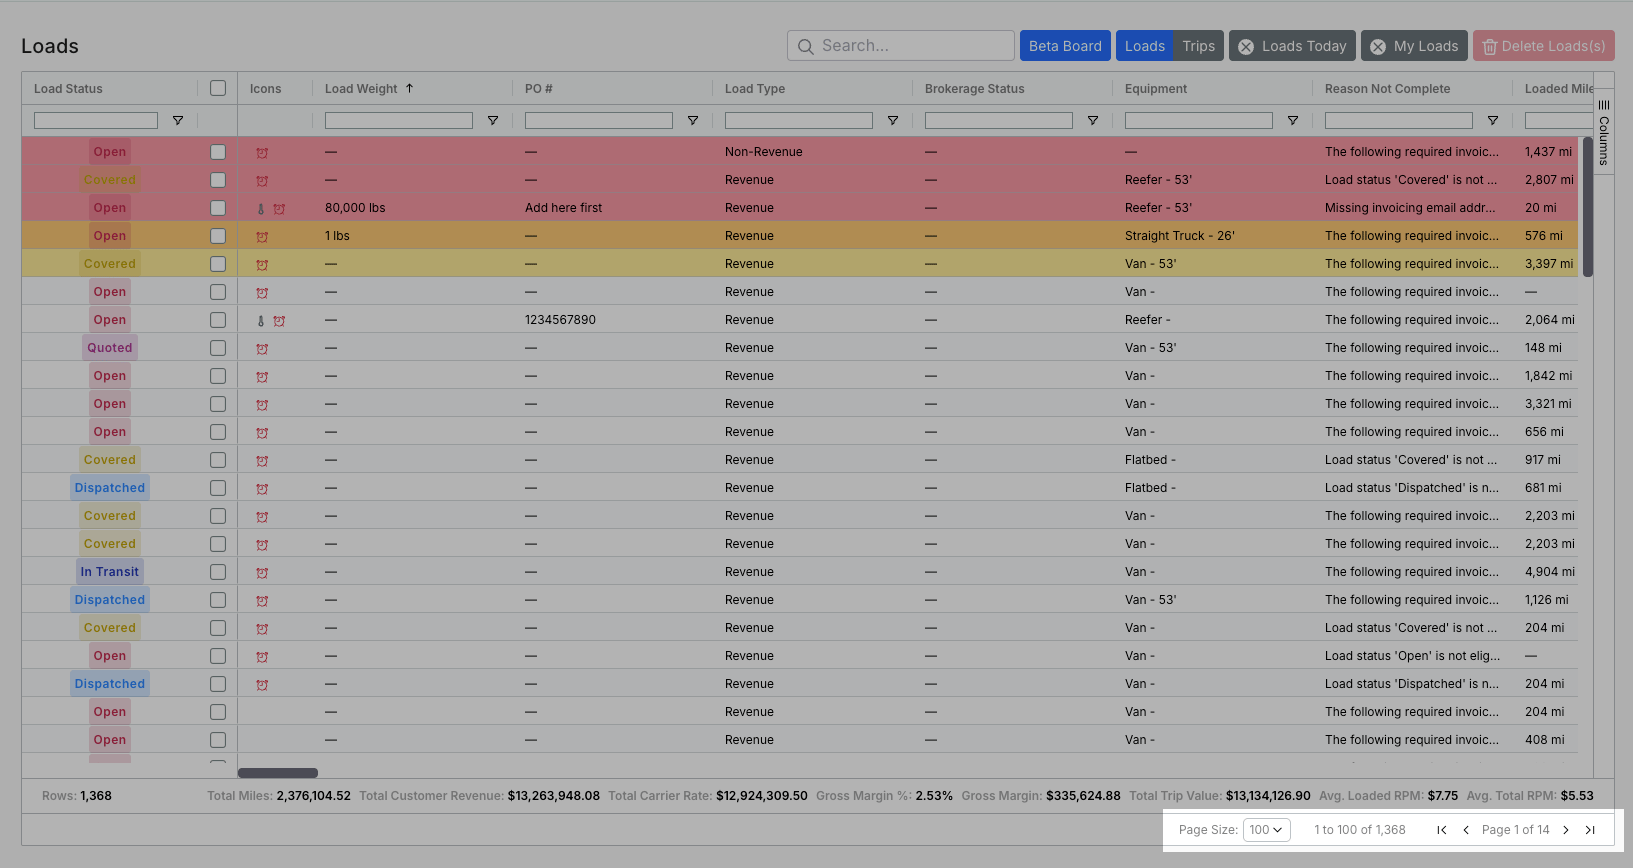
The Load Board is paginated to manage large datasets.- Rows per page: At the bottom right of the table, you can set the number of rows displayed per page (e.g., 20, 50, 100, 200, 500 rows).
- Navigation Arrows: Use the navigation arrows to move between pages (e.g., to page 2, page 3).
- First/Last Page: Click the far right or far left arrows to go directly to the first or last page of results.
Understanding the Summary Bar
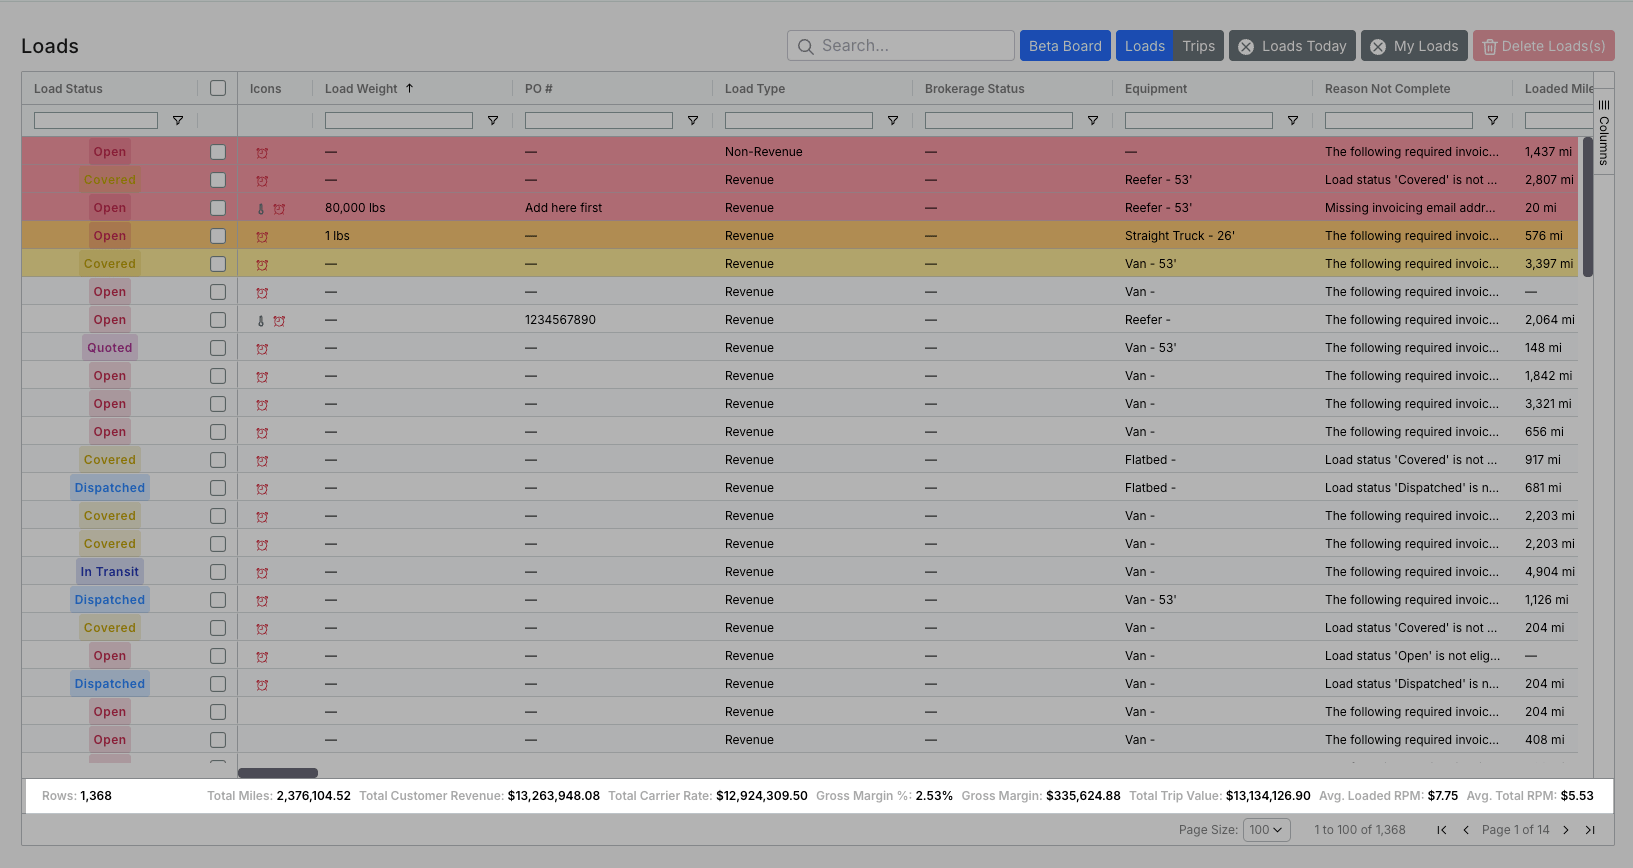
At the bottom of the Load Board, a summary bar provides quick, aggregated insights into the data currently displayed in your table.- Total Number of Rows: Shows the total count of loads matching your filters.
- Selected Rows: Displays how many loads you currently have selected.
- Total Loaded Miles: Sum of loaded miles for all displayed loads.
- Total Customer Revenue: Sum of customer revenue for all displayed loads.
- Total Carrier Rate: Sum of carrier rates for all displayed loads.
- Gross Margin Percentage: Calculated gross margin percentage.
- Gross Margin: Total gross margin amount.
- Total Trip Value: Overall value of trips displayed.
- Average Loaded RPM: Total trip value ÷ total loaded dispatch miles for the loads shown.
- Average Total RPM: Total trip value ÷ total loaded + empty dispatch miles.
Summary bar RPM uses trip value, not customer revenue, so it can differ from the Rate Per Mile column (rate ÷ customer miles) and from the Detailed Financial Report.
What the Truck, Trailer, and Driver columns show on a split load
On a split load, the board row reads its assets from the load’s active trips, so a load whose trips are covered shows the truck, trailer, and drivers on the row itself.- If every active trip carries the same asset, the row shows that asset.
- If two active trips carry different assets, the row shows Multiple Trips. Open the load to see which trip has which.
- If no active trip carries the asset, the column is blank.
A load counts as split for as long as it has trips, even after every trip is cancelled. The last row above is blank rather than falling back to a cancelled trip’s truck.
Side Panels
The Side Panel is designed to give you an at-a-glance overview of a load or trip without needing to navigate to the full Load Details Page immediately. Its content changes to display the most relevant information based on the load or trips status (e.g., “Open,” “Dispatched,” “Delivered”). The panel also provides quick actions and deep links to related profiles and reports.Accessing the Right Side Panel & General Features
Opening the Side Panel- Click a Load Row: Perform a single click anywhere on the row of the desired load.
- Panel Appearance: A side panel will appear on the right-hand side of your screen, displaying additional information about the selected load or trip.
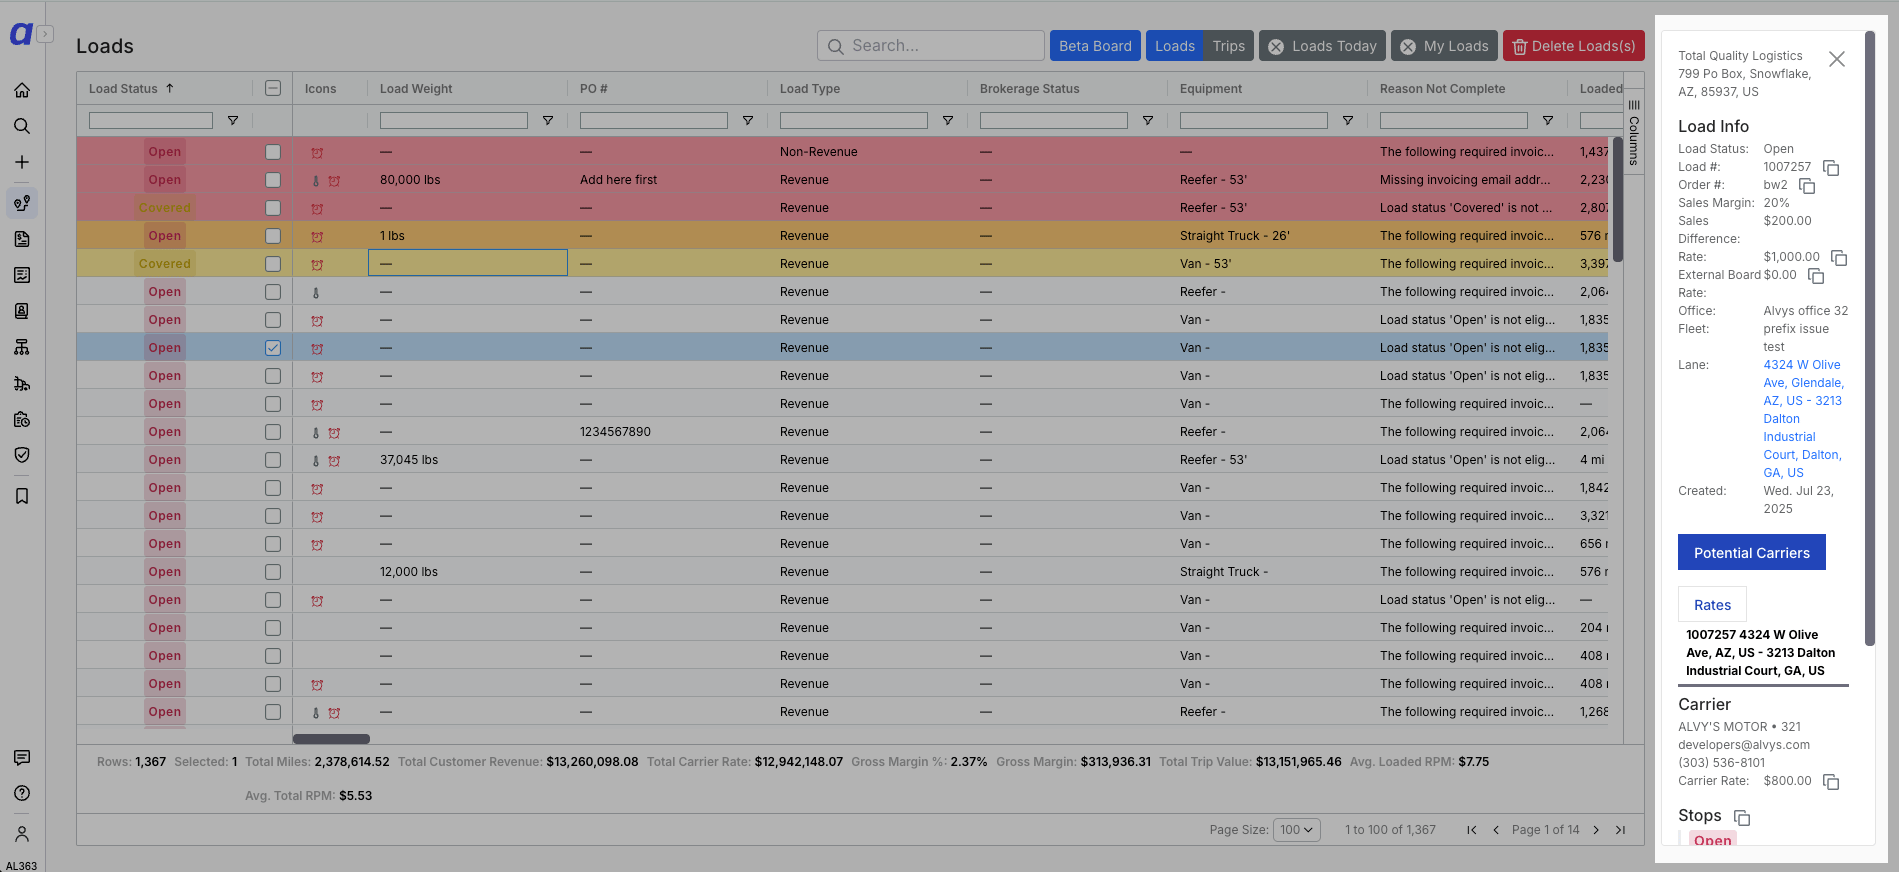
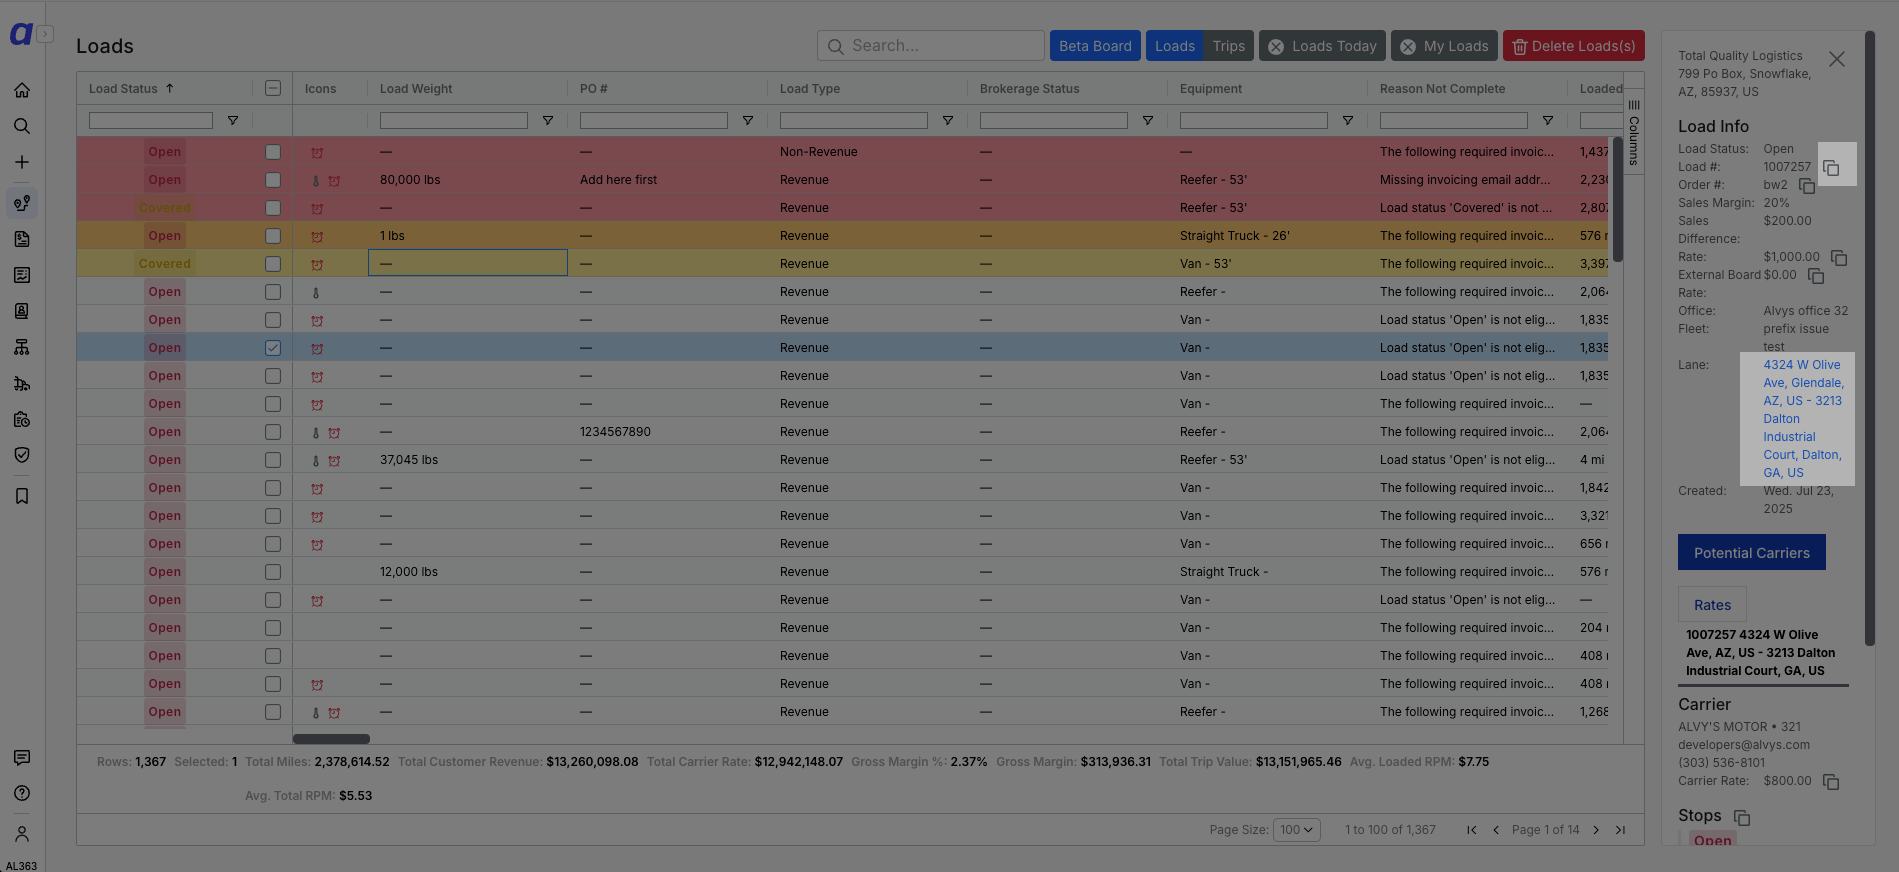
- Copy to Clipboard Icon: Throughout the side panel, you will see a copy icon (two overlapping squares). This allows you to quickly copy the adjacent information (e.g., load number, address) to your clipboard for easy pasting elsewhere.
- Deep Links: Many names (Customer, Carrier, Truck, Driver, Trailer) and links (Lane) are hyperlinked. Clicking these will typically open the related profile page or report in a new browser tab.
Side Panel Content
Content in this section varies by Load Status (Open, Covered, Dispatched, In Transit, Quoted, TONU, Delivered, Reserved). Top-Level Company / Customer / Broker Info- Name (deep-linked to Company Page)
- Address
- Phone Number
- Load Status
- Load Number
- Order Number
- Sales Difference: Customer revenue minus carrier rate, in dollars.
- Sales Margin: Sales Difference as a percentage of customer revenue.
- Rate
- External Board Rate
- Office
- Fleet (Load Fleet)
- Lane (to/from address, deep-linked to Lane Report)
- Created (date/timestamp)
If your own company is the carrier on the trip, customer revenue and carrier rate match, so both Sales Margin and Sales Difference show 0. This is expected on loads you haul with your own trucks.
- A “Rates” button that opens the Rates Modal
- Lane addresses shown underneath Rates
- Breakdown of Trips
- If split load, clickable to update panel context for stops section.
- If not split load, shows original trip lane.
- Carrier Name (deep-linked to Carrier Profile)
- MC Number
- Phone Number
- Status of each stop
- Address of the stop
- Pick/Drop Location
- Timestamp (pick/drop information)
- Truck (deep-linked to Edit Truck page)
- Primary Driver, shown as Driver 1 (deep-linked to Driver Profile)
- Secondary Driver, shown as Driver 2 (deep-linked to Driver Profile)
- Trailer (deep-linked to Edit Trailer page). The panel shows the trailer assigned to the trip you selected. On a split load, each trip keeps its own trailer, so selecting a different trip in the Trip Breakdown section shows that trip’s trailer. When the trip has no trailer assigned, no trailer number is shown.
- Trip Status
- Temperature (if equipment type is Reefer)
- Equipment Type
Right Click Actions
Right click any row in the table to access a list of actions that can be taken. Actions available varies by Load Status (Open, Covered, Dispatched, In Transit, Quoted, TONU, Delivered, Reserved).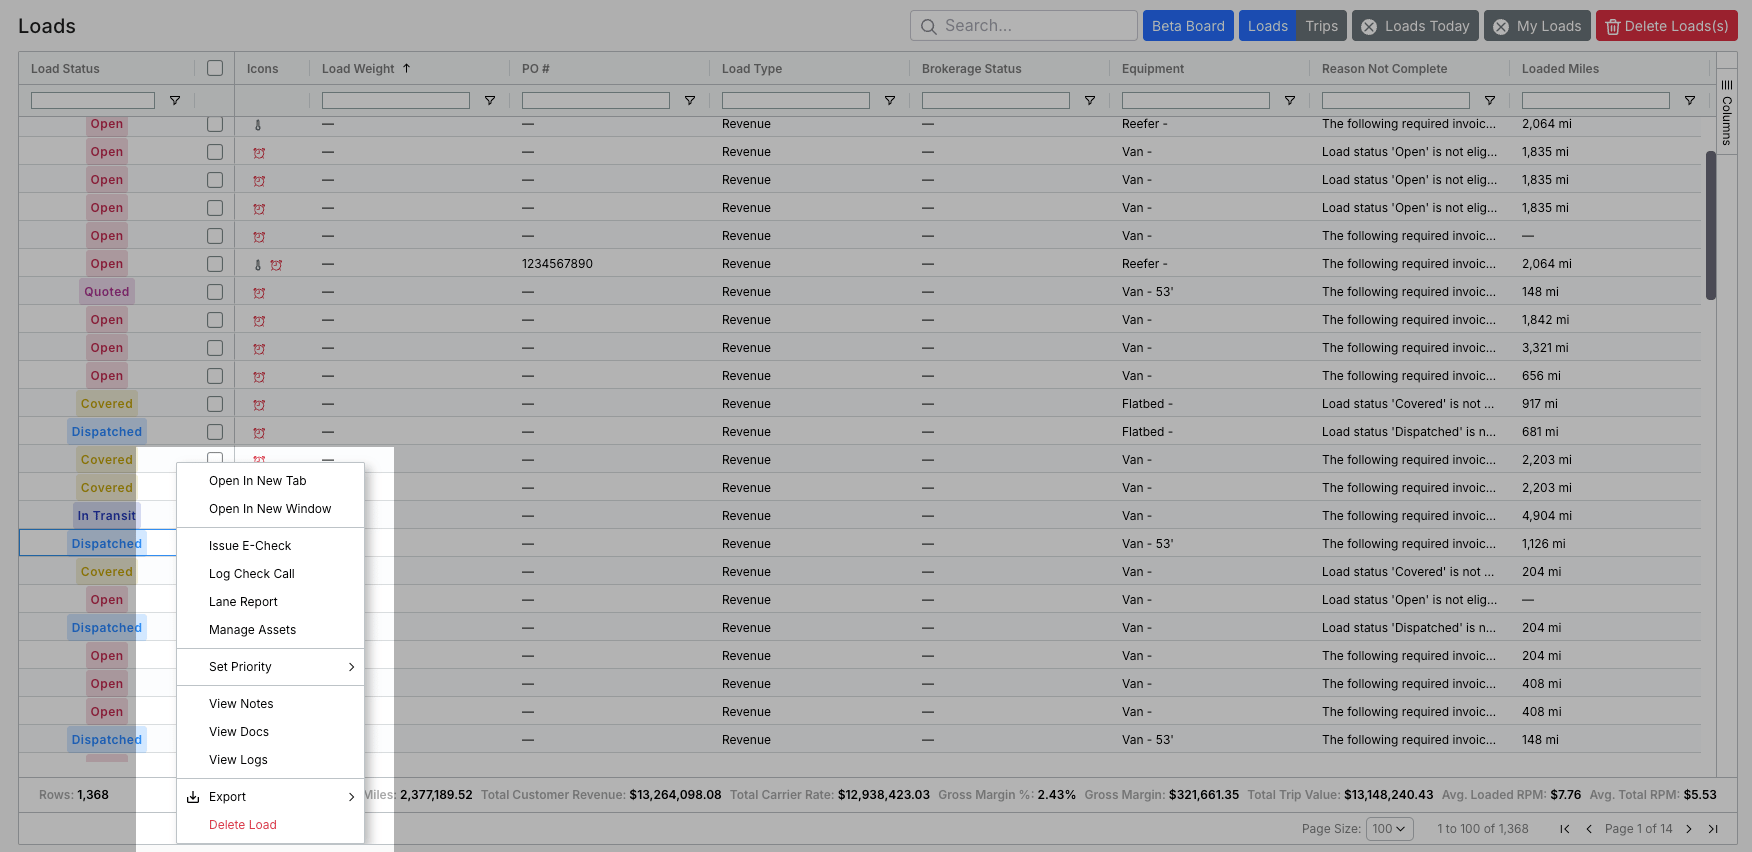
Issue E-Check
Right click row. Select Issue E-Check. A side panel will appear allowing you to Manage E-Check directly from the Load Board.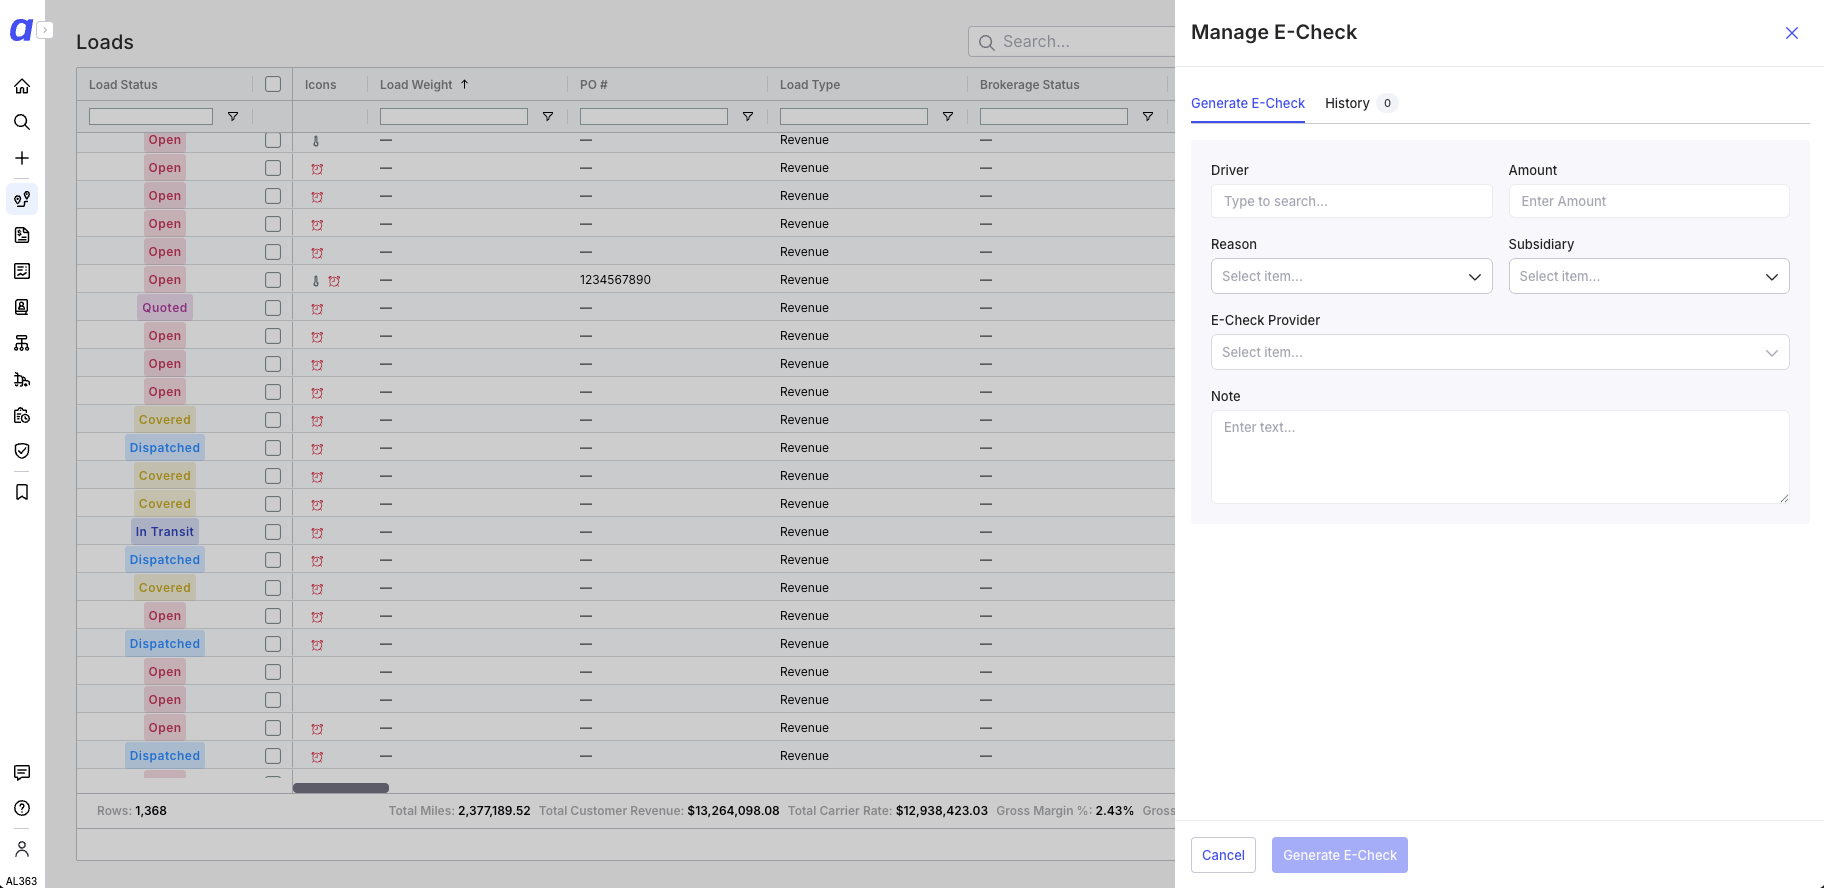
Log Check Call
Right click row. Select Log Check Call. A modal will appear allowing you to manage Check Calls directly from the Load Board.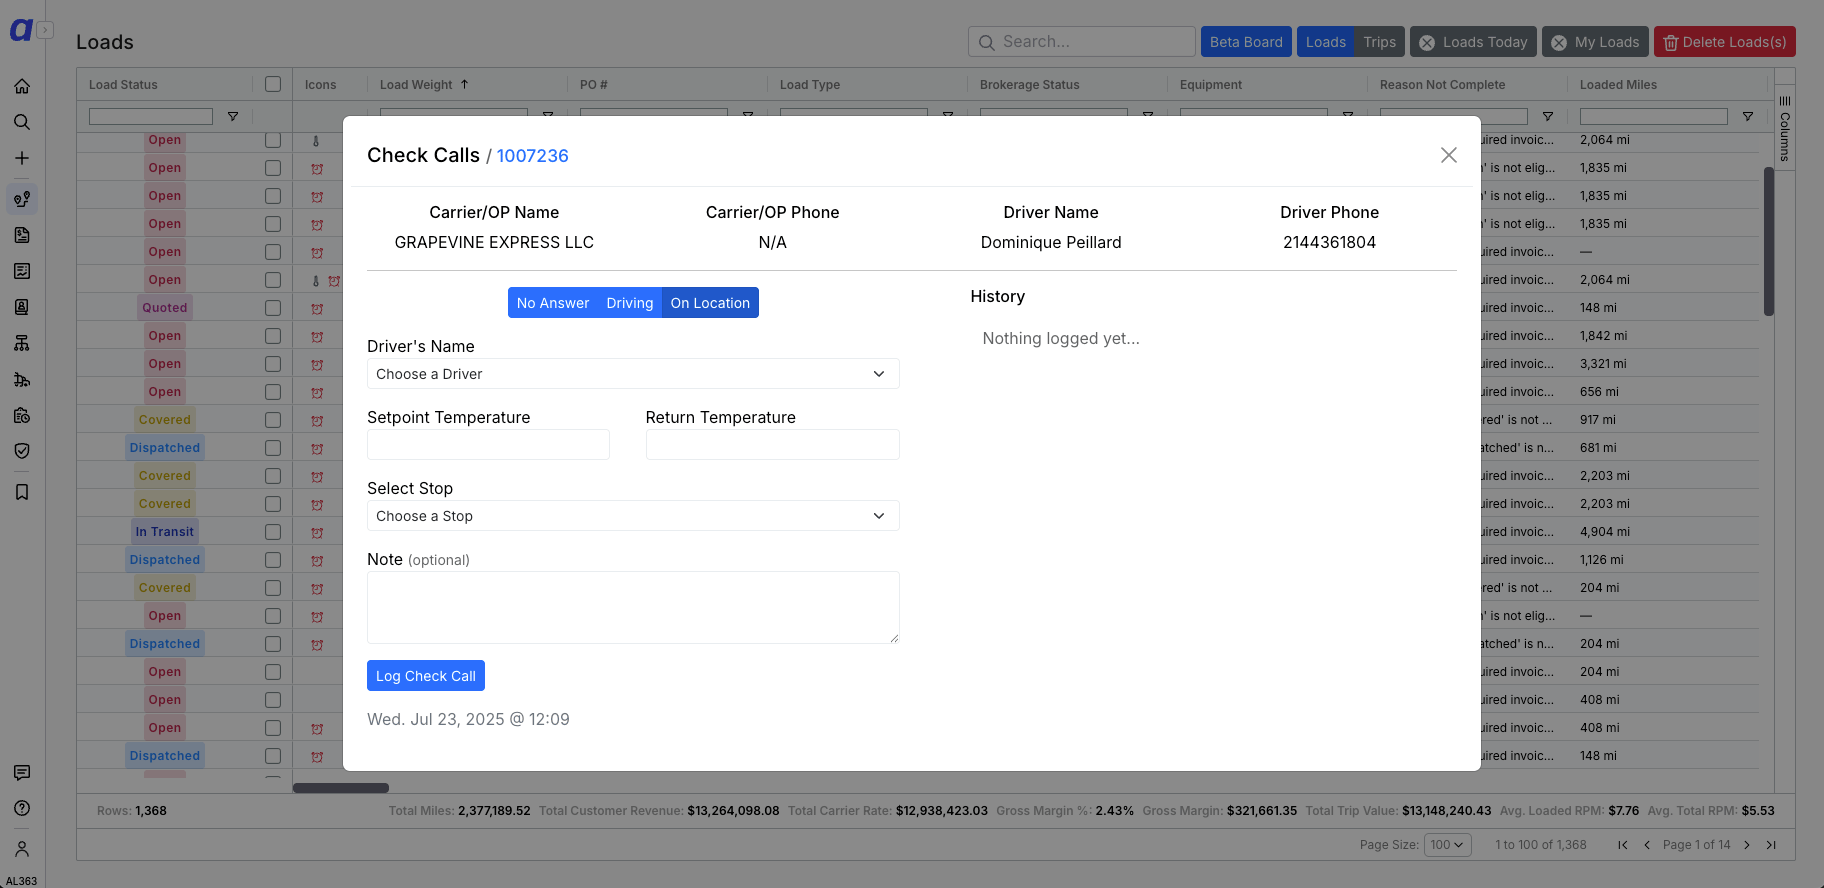
Lane Report
Right click row. Select Lane Report. Opens the Lane Report in a new tab, showing loads that ran the same origin-to-destination lane as the selected load.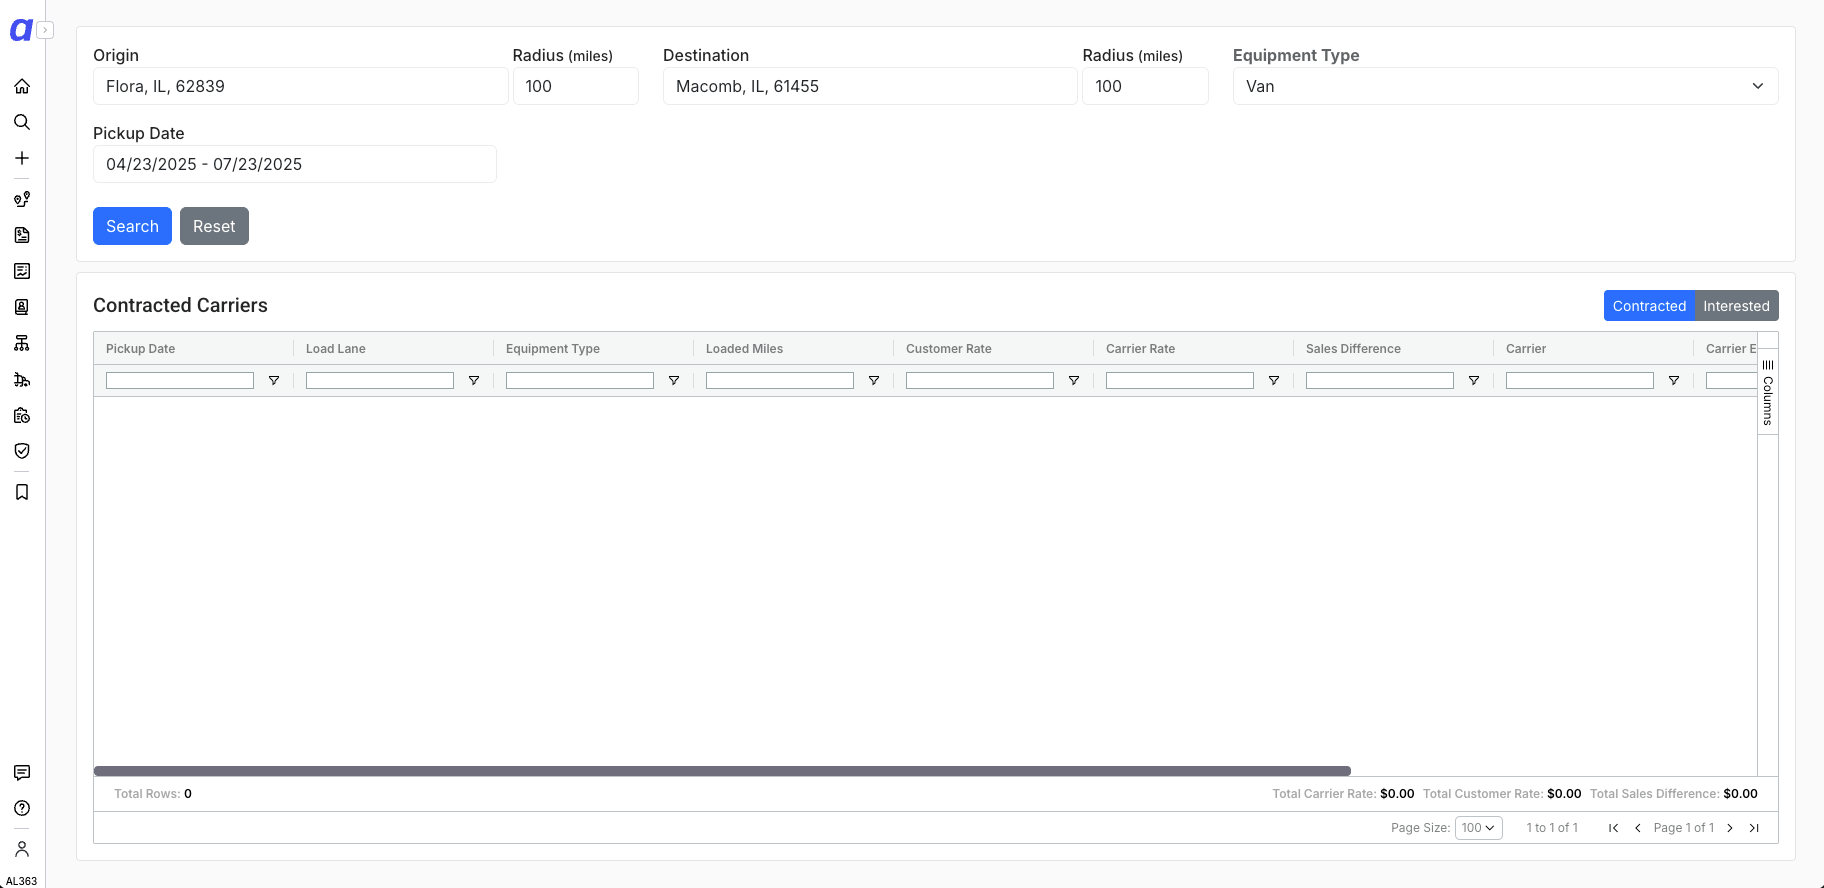
Pre-Assign Trailer
Right click row. Select Pre-Assign Trailer. A modal will appear allowing you to Assign Trailer directly from the Load Board. Once you save, the board and the side panel show the newly assigned trailer for that trip.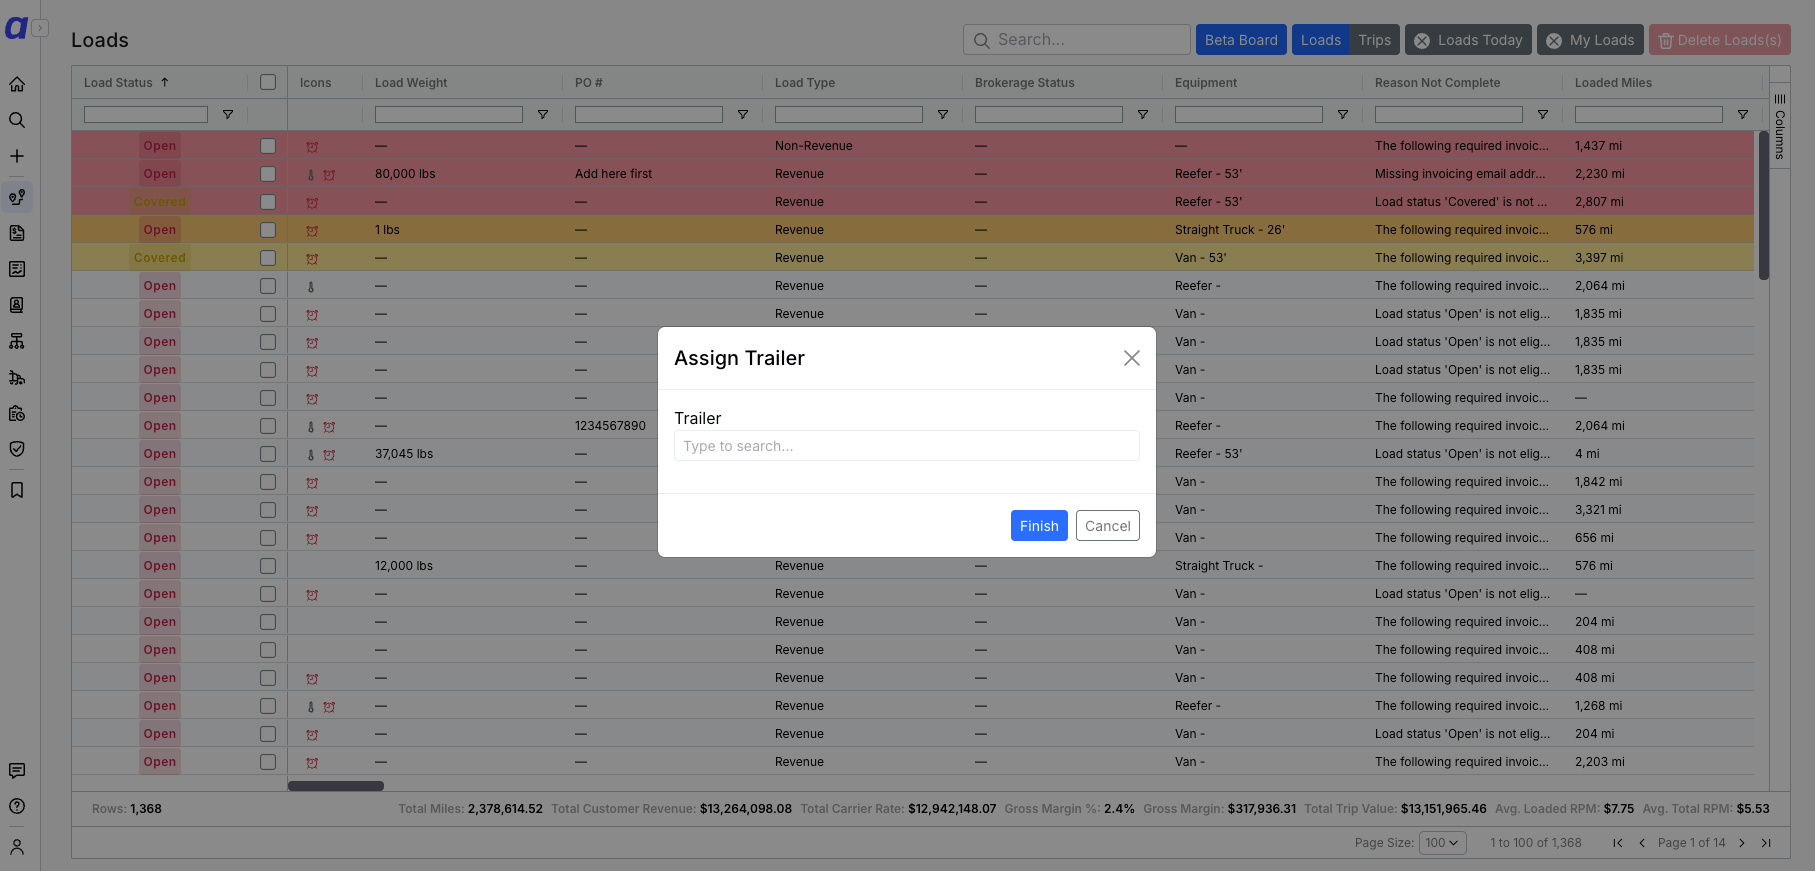
Manage Assets
Right click row. Select Manage Assets. A modal will appear allowing you to manage Carrier and Asset Assignment directly from the Load Board.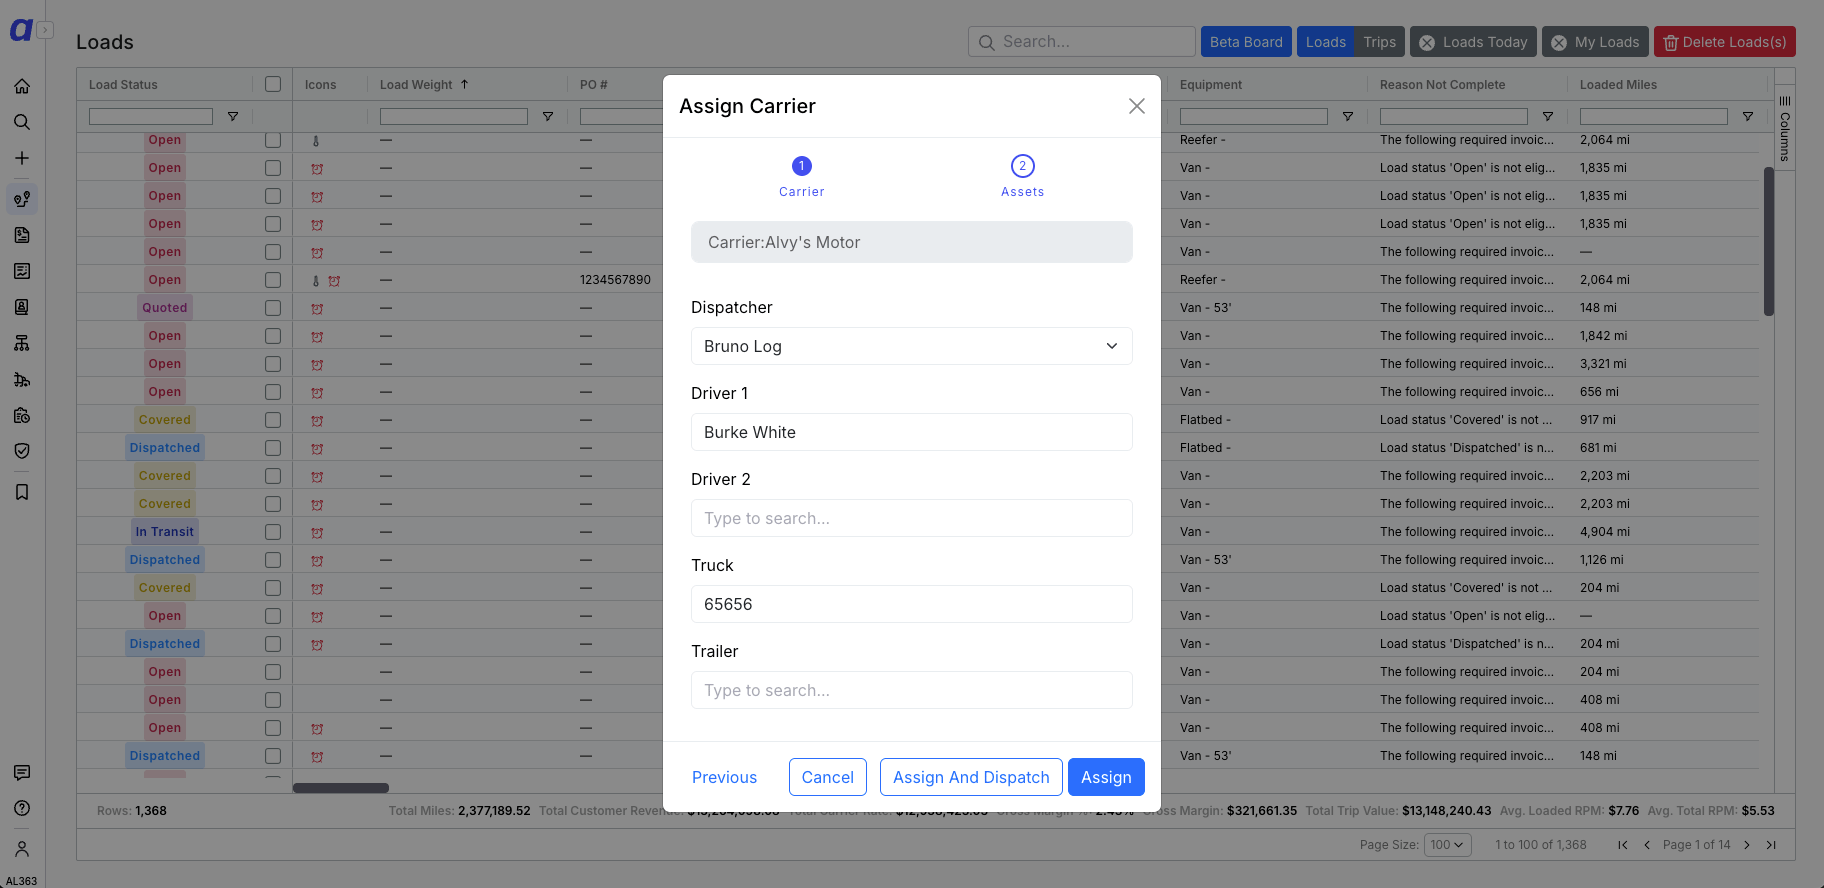
Set Priority
Right click row. Select Set Priority. Select Caution, Important or Critical. The row in the table will change color to correspond with the priority selection.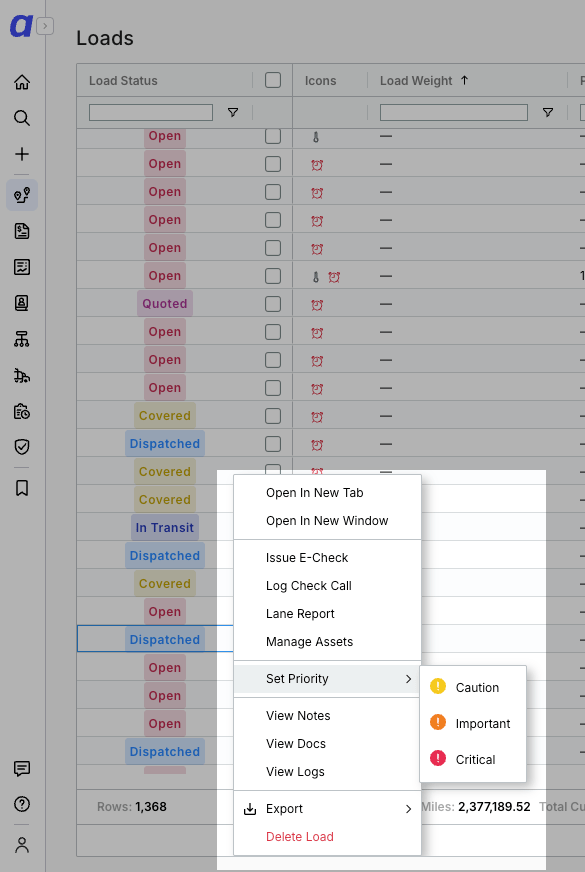
Post Shipment
Right click row. Select Post Load. Posts the load to DAT or TruckStop, depending on which integration your company has connected. For DAT, the load must be a brokerage load in Open, Quoted, or Reserved status with a total weight greater than zero (from the pickup stop’s commodities). You also need the Post Loads to Marketplace permission. Posted loads show a “Posted To: DAT” label on the Load Board. Auto-posting: If Auto Sync is on, eligible loads post automatically. To turn it off: person icon (bottom left) → Integrations → your subsidiary → Loadboard → DAT or TruckStop card → clear Auto Sync. You can still post loads manually with Post Load. For setup, see Post Loads to DAT Load Board and TruckStop Load Board Integration.Update Rate
Right click row. Select Update Rate. A modal will appear allowing you to change the Rate directly from the Load Board.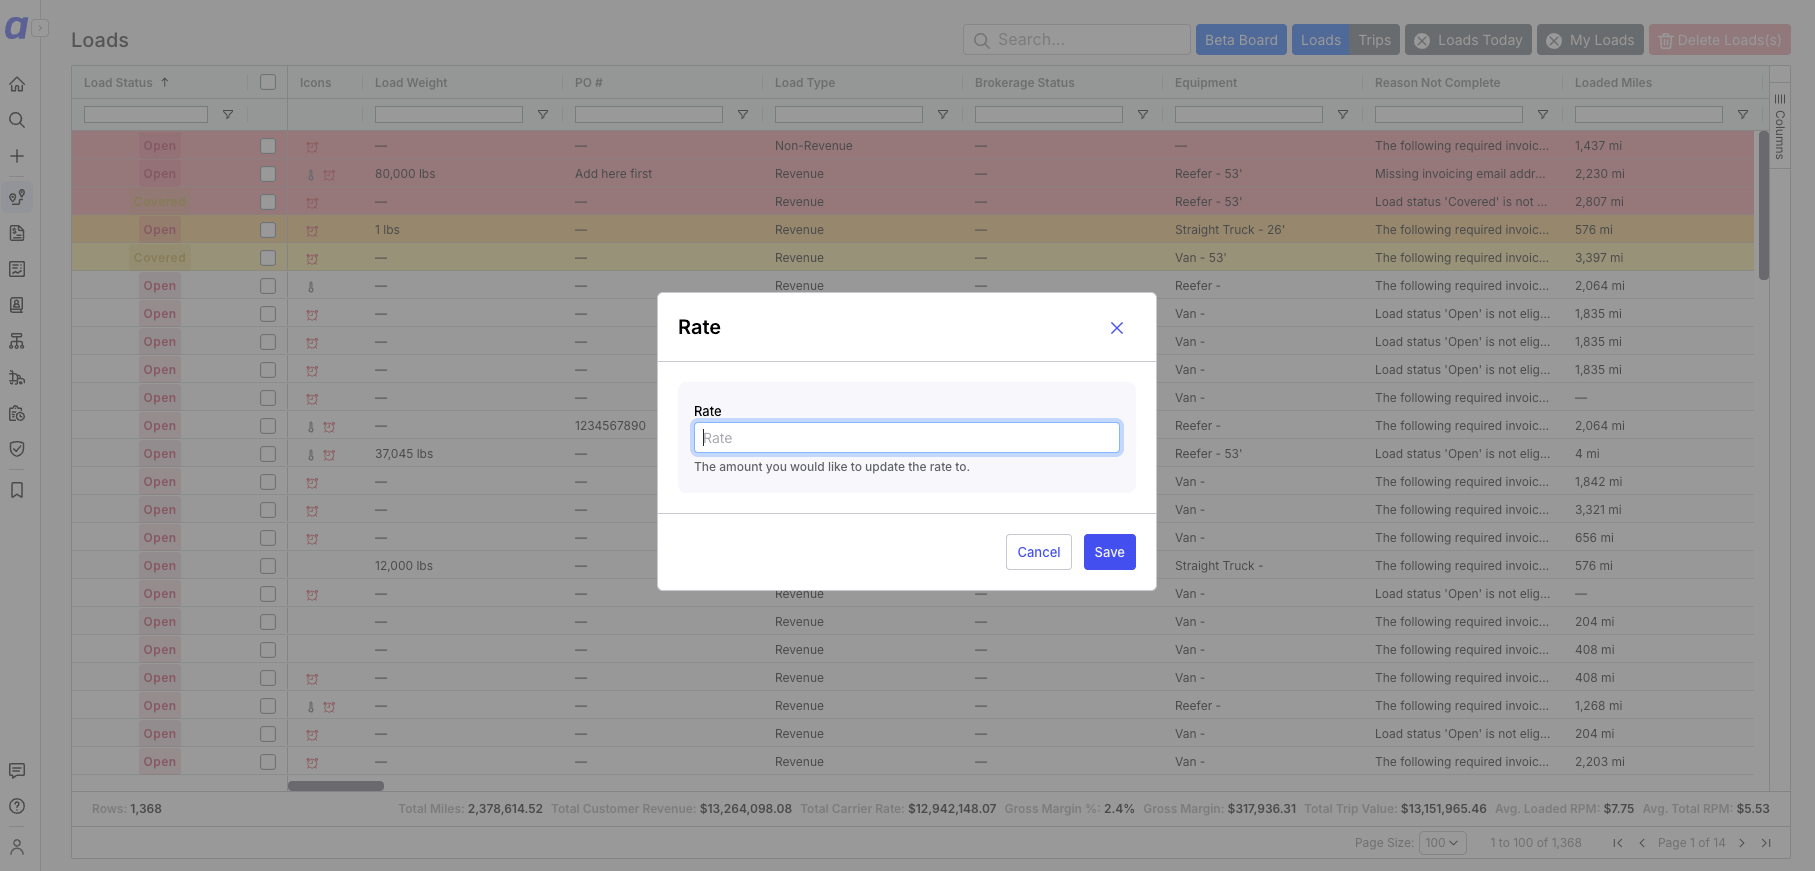
A load posted at call rather than at a set rate is not re-listed each time the board refreshes.
View Notes
Right click row. Select View Notes. A side panel will appear allowing you to manage Notes directly from the Load Board.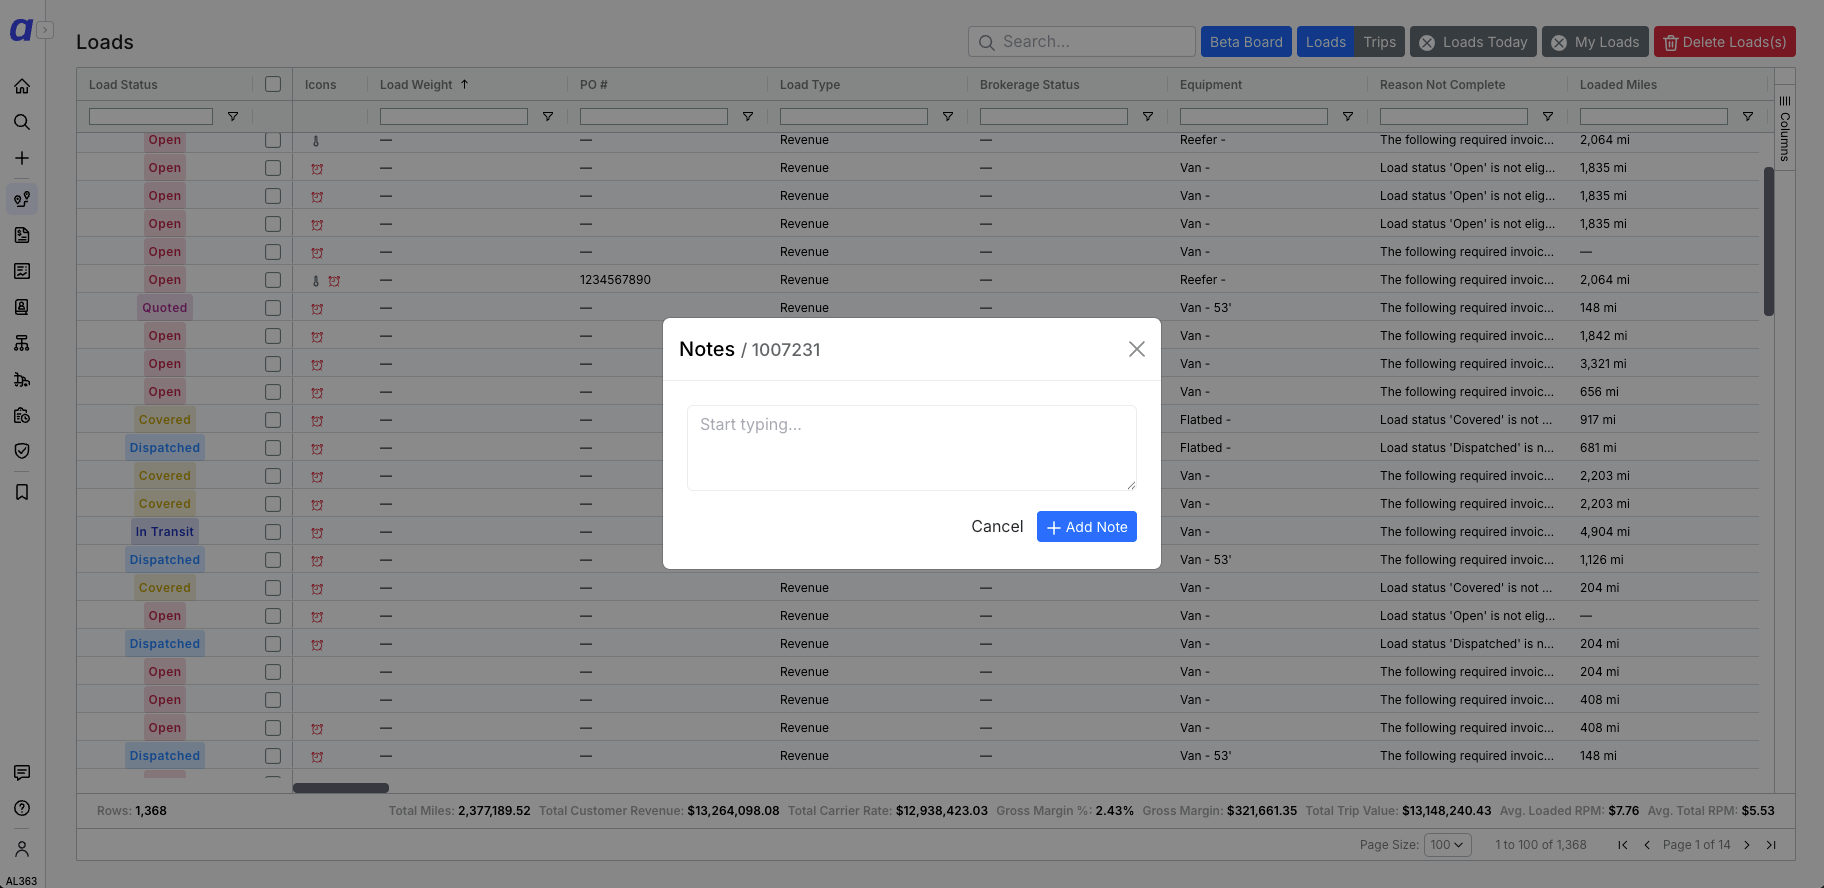
View Docs
Right click row. Select View Docs. A side panel will appear allowing you to manage Documents directly from the Load Board.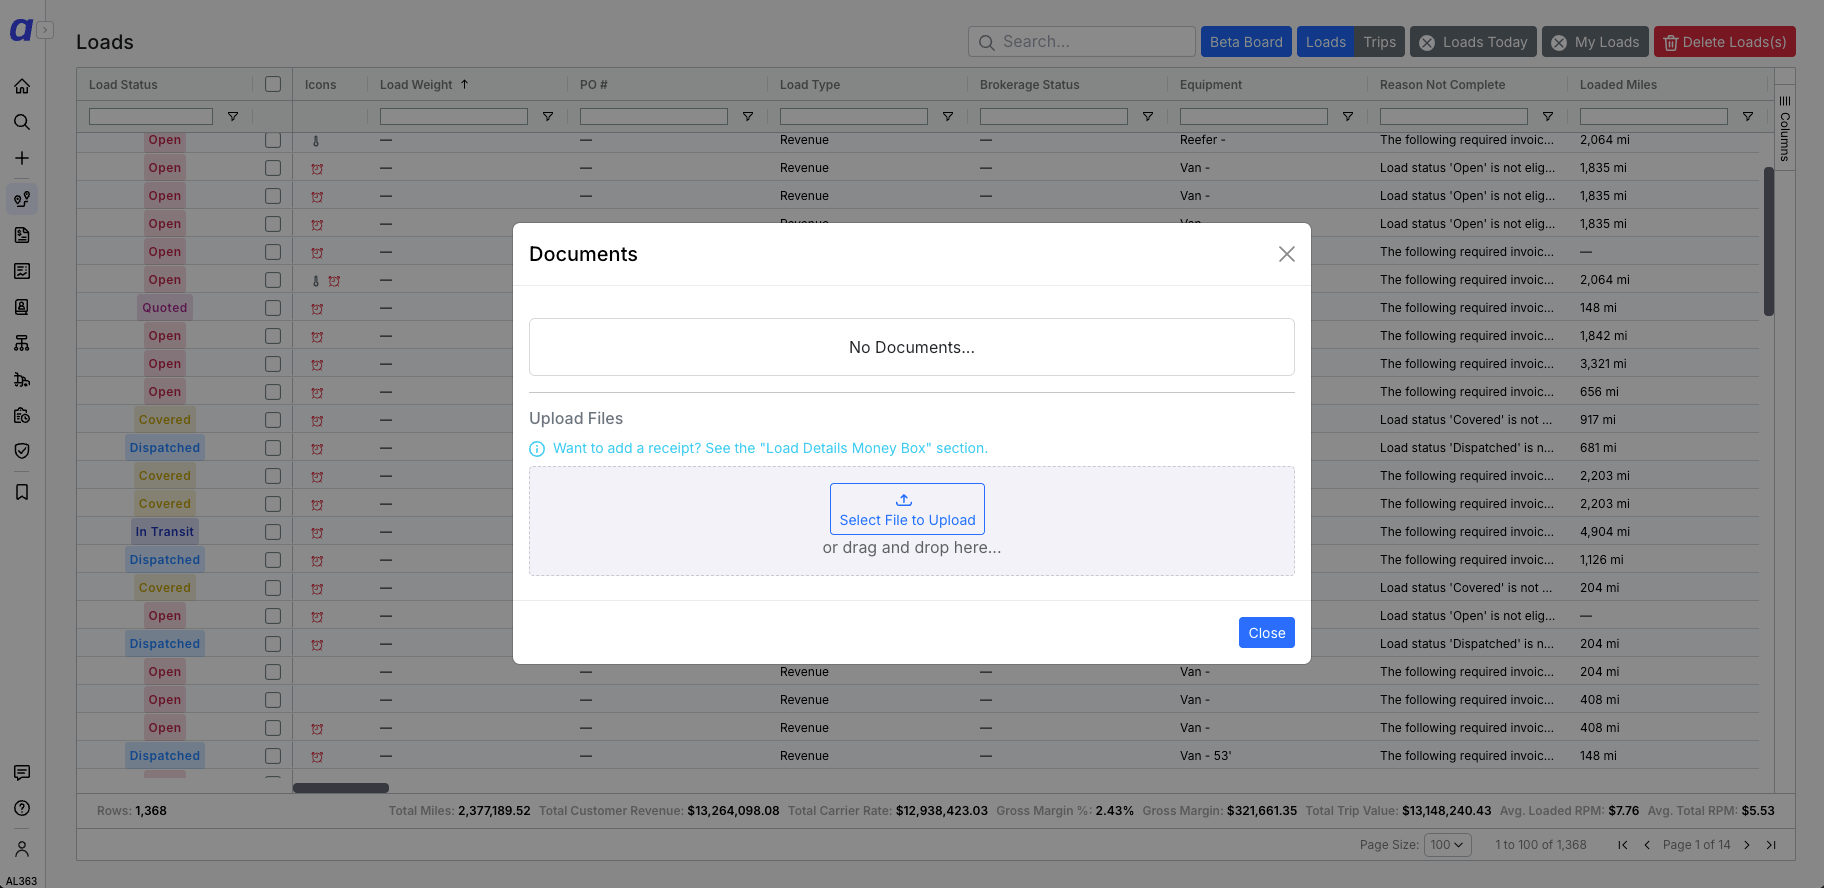
View Logs
Right click row. Select View Logs. A side panel will appear allowing you to view Logs directly from the Load Board.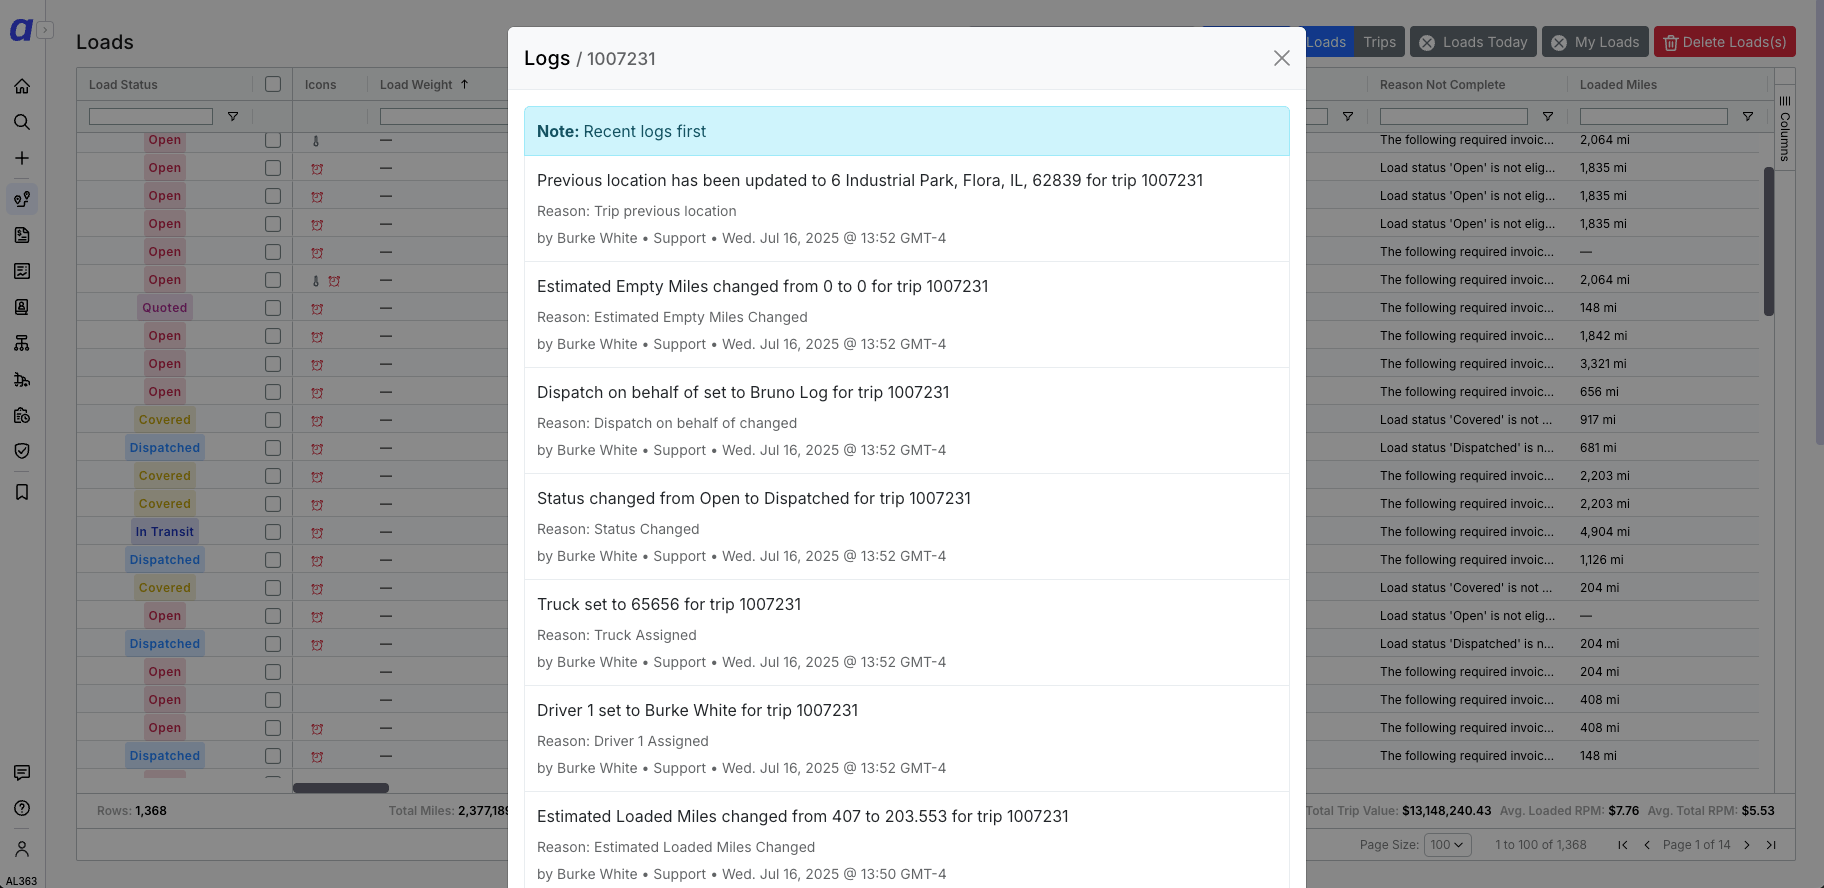
Export
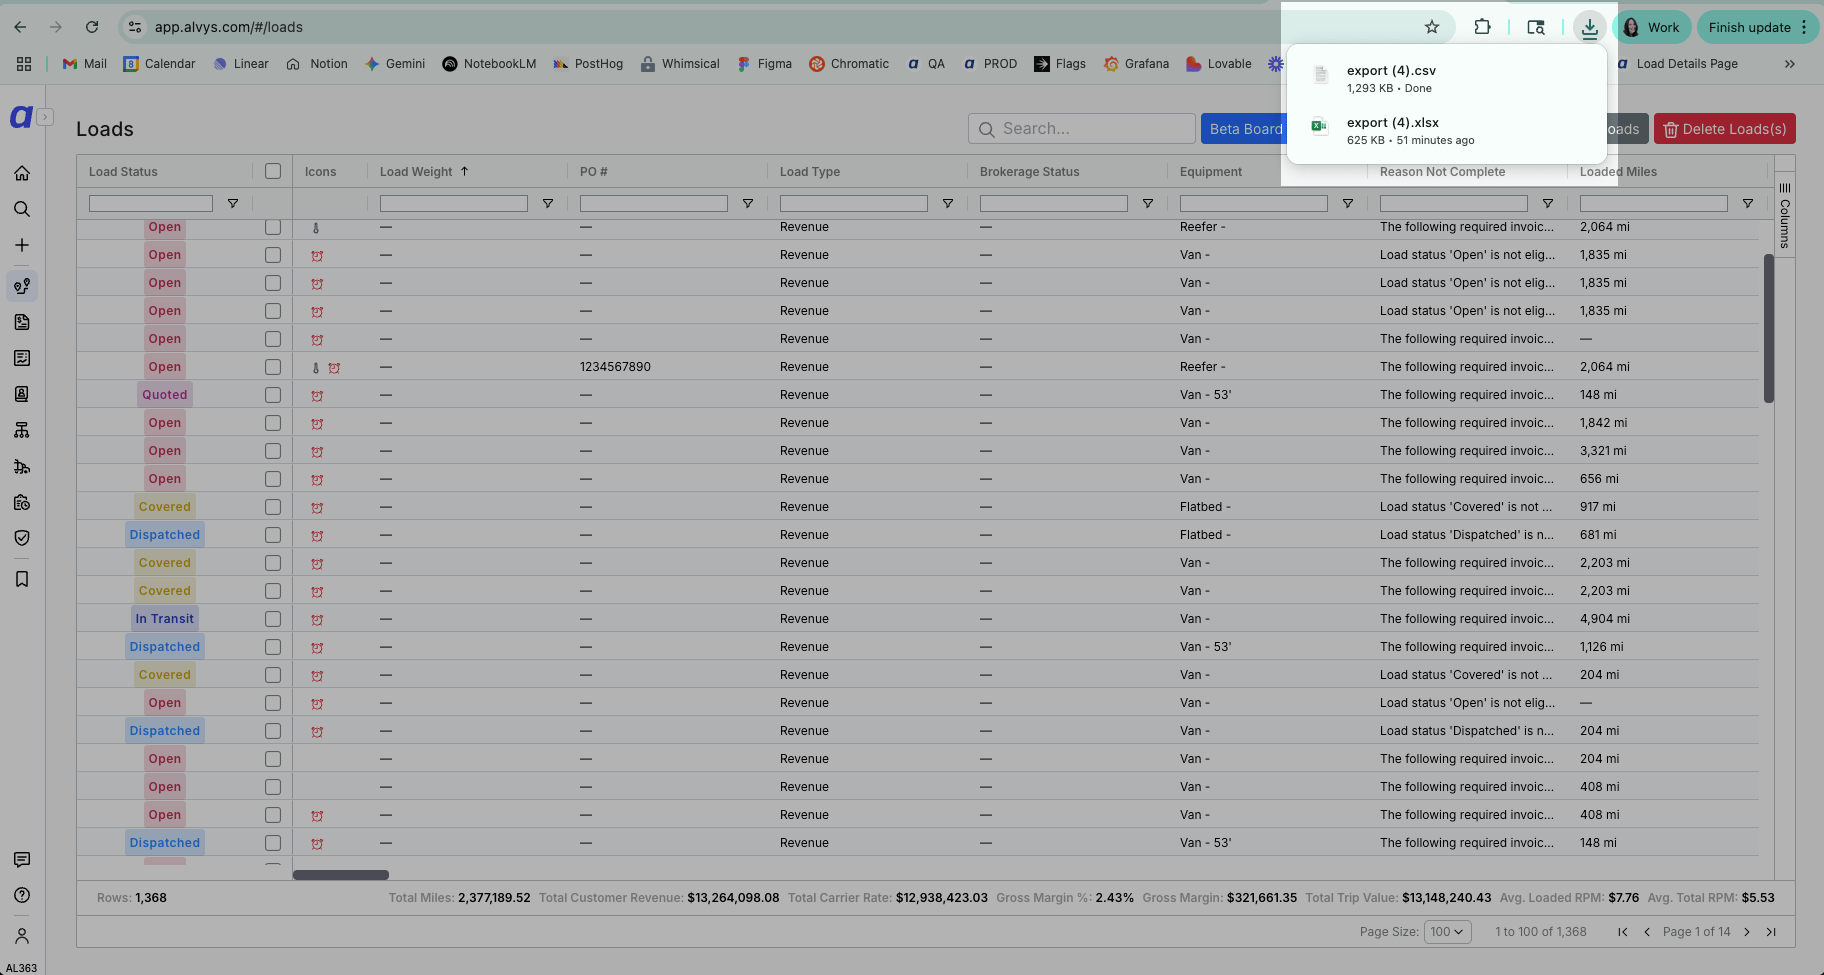
Right-click anywhere in the table and select Export, then choose CSV or Excel. The export downloads the entire table: each load is a row and each column is a field.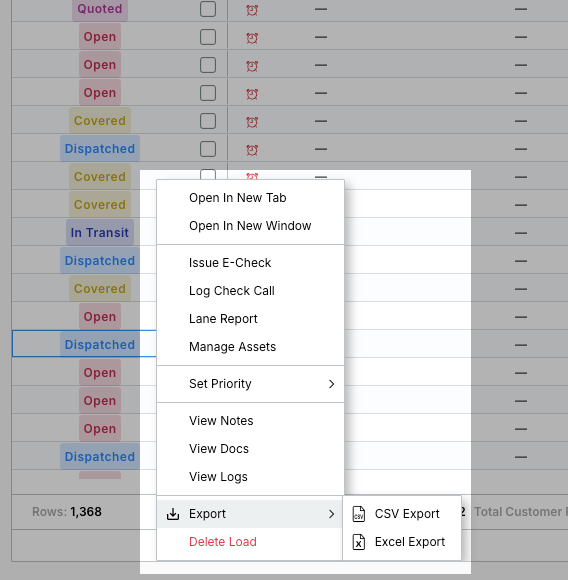
Delete Load
Right click row. Select Delete Load. A modal will appear allowing you to delete the load directly from the Load Board.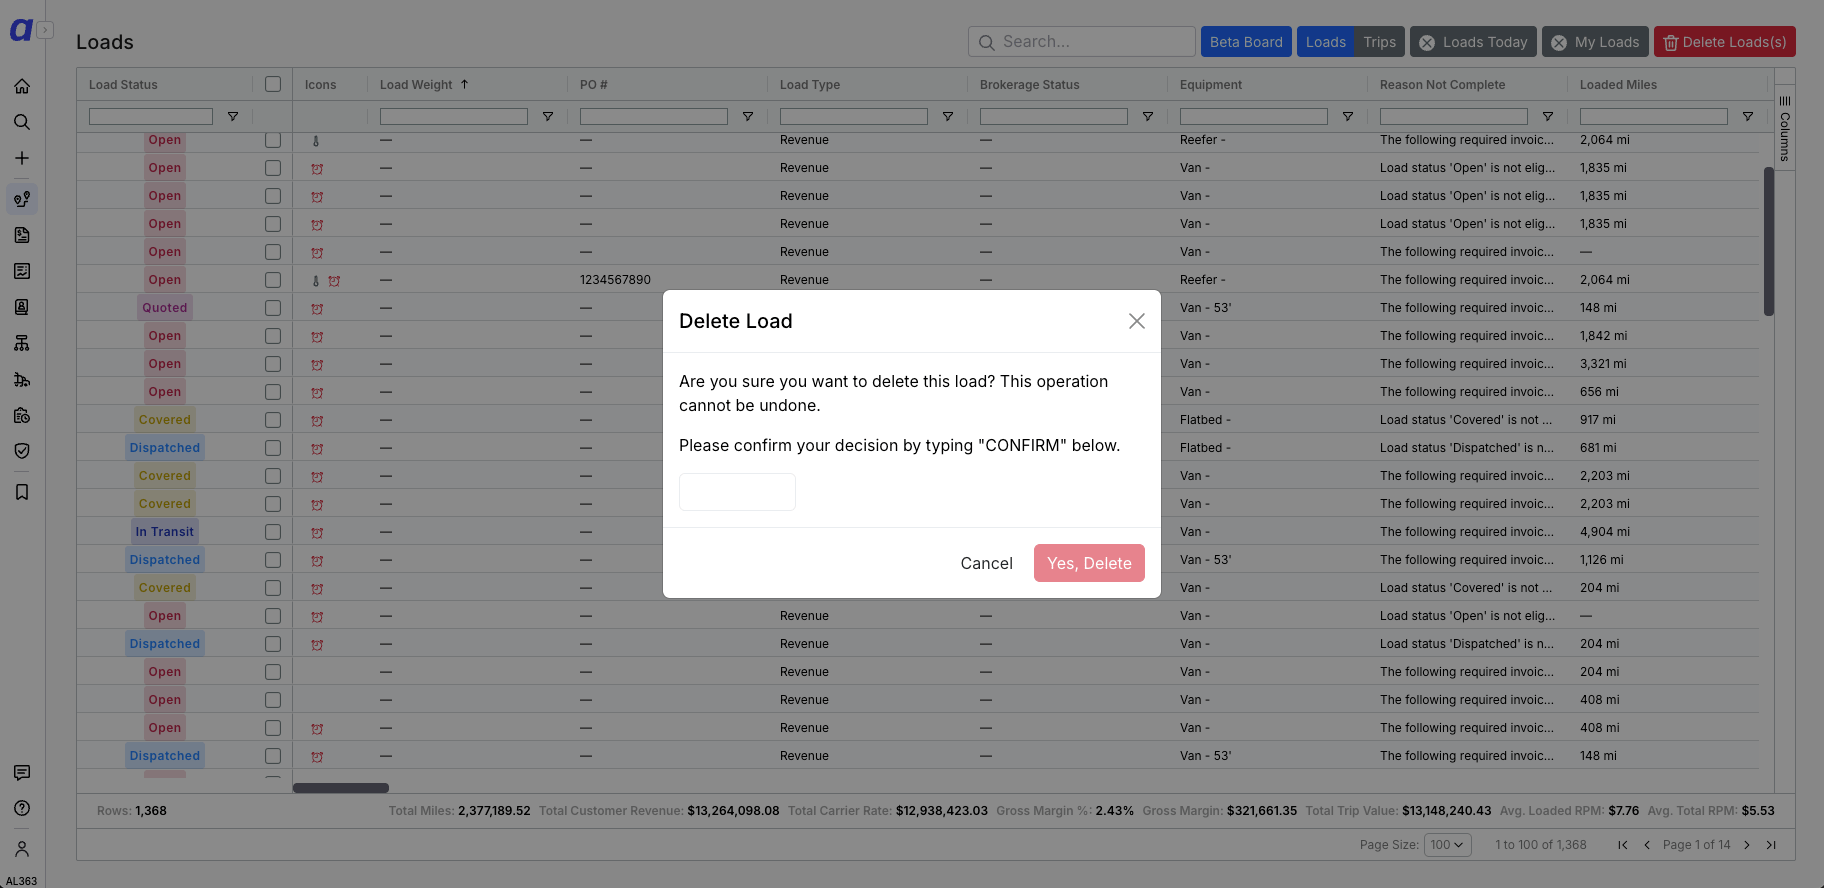
Frequently Asked Questions (FAQ)
Q: Why can’t I see a specific load, or only today’s loads? A: Work through this checklist in order:- Office assignment: You only see loads assigned to the same office as your user. If a load belongs to a different office, it won’t appear on your board. Ask your Alvys admin to confirm your office or the load’s office.
- Active column filters: If a column has a filter applied, it shows a filter icon on the header. Click the menu icon on that column and clear the filter. Scroll horizontally to check all columns — a filter you have forgotten can hide loads that otherwise match.
- My Loads or Loads Today: If either quick filter is active at the top of the board, only matching loads appear. Deselect the filter to view all loads.
- Loads vs. Trips tab: Confirm the Loads tab is selected at the top — if Trips is selected, loads will not appear in the rows.
- Pagination: The board is paginated. If your page size is small (for example, 20 rows), the load may be on a later page. Increase rows-per-page at the bottom right or use the page navigation arrows.
- Stale data: Do a hard refresh (
Ctrl + Shift + Ron Windows,Cmd + Shift + Ron Mac) to force the board to reload with the latest data.
TONU. See Find loads by status in the Filtering section.
Q: How is Sales Margin calculated?
A: Sales Margin is the Sales Difference (customer revenue minus carrier rate) as a percentage of customer revenue. On loads hauled by your own company, it shows 0. See the Side Panel section.
Q: Is the load number the same as the trip number?
A: Not always. A load can have more than one trip if it’s split between drivers or carriers. See Loads vs. Trips.
Q: How do I stop loads from auto-posting to DAT?
A: Turn off Auto Sync on your DAT integration: person icon (bottom left) → Integrations → your subsidiary → Loadboard → DAT card → clear Auto Sync.
Q: Can I view Trip data on the Load Board?
A: Yes, the Load Board has tabs that allow you to switch between “Loads” (the Load Board) and “Trips” (the Trips Board). You can switch to the “Trips” tab to view trip-specific data.
Q: What happens if I delete a load from the Load Board?
A: You can click a load and select the option to delete it. Please note that load deletion typically requires specific user permissions, and it is often a support function to ensure data integrity.
Q: I changed the rate on a load I had already posted. Why did the bids disappear?
A: Changing the rate on a load posted to the Alvys marketplace removes the existing listing and creates a new one at the new rate. Bids placed against the old rate are rejected, and carriers bid again on the new listing. Postings on the other load boards are updated in place instead, so those keep the posting they already had.
Q: Does the side panel update in real-time as a load’s status changes?
A: No, if a load’s status changes while its row is selected and the side panel is open, the information displayed in the side panel will not dynamically update to reflect the new status and its associated details. However, it will update after you refresh the page.
Q: Why does a split load’s row show “Multiple Trips” instead of a truck or driver?
A: The row shows Multiple Trips when two active trips on that load carry different assets, because there is no single value that is true for the whole load. Open the load to see which trip has which. If the trips all carry the same asset, the row shows it instead.
Q: Which trailer does the side panel show on a split load?
A: The panel shows the trailer assigned to the trip you have selected. Each trip on a split load keeps its own trailer, so select a different trip in the Trip Breakdown section to see that trip’s trailer. When a trip has no trailer assigned, no trailer number is shown for it.
Q: Can I edit information directly from the Right Side Panel?
A: The Right Side Panel is primarily designed for quick viewing and navigation (via deep links). While some elements may have inline editing capabilities, most major edits typically require you to open the full Load Details Page by double-clicking the row.
Q: How do I save my customized column layout on the Load Board?
A: Your customized column layouts (which columns are visible, their order, and whether they are pinned) are automatically saved to your user profile. The next time you log in or navigate to the Load Board, your preferred view should be retained. Note: only column visibility and order are saved — active column filters (applied via the column menu icon) do not persist between sessions and must be re-applied each time.
Q: What’s the difference between “Page-Wide Search” and filtering a column individually?
A: Page-Wide Search (via the button in the header) searches for your entered term across all displayed columns in the entire visible table. Filtering a column individually (via the menu icon in a column header) applies a specific filter method (e.g., “contains,” “equals,” “begins with”) to only that single column. Use page-wide search for a broad lookup, and individual column filters for precise data segmentation.
Q: Why does the information in the right side panel change when I click on different loads?
A: The Right Side Panel is designed to be contextual. Its content dynamically changes to display the most relevant information and actions based on the selected load’s current operational status (e.g., “Open,” “Dispatched,” “Delivered”). This helps you quickly access the information critical for that load’s stage.
Q: How often does the data on the Load Board, including the summary bar, update?
A: The Load Board’s data and the summary bar are designed to update frequently, often in near real-time, as loads progress through their lifecycle or as new data comes into the system. For the absolute latest information, a full page refresh (F5 or browser reload) can be performed.
Q: Do custom references show on the Load Board?
A: Yes, the Load view shows Load Custom References and the Trip view shows Stop Custom References.
Q: My columns appear very wide and I cannot shrink or resize them.
A: This was a resolved platform-wide issue (July 6, 2026). Refresh the page; if it persists, clear your browser cache — see Clear cache, cookies, and troubleshoot common issues. If still stuck, contact Alvys Support.
Q: Is the load number the same as the trip number?
A: Not always. A load can have more than one trip if it’s split between drivers or carriers. See Loads vs. Trips.
Q: Are there any special permissions that I should know about?
A: Yes. Some columns require a specific permission before they are visible to you.
Trips Board
- Requires View Customer Rate, a Billing permission, or the Biller role:
- Customer Revenue
- Customer Freight Charge
- Carrier Rate
- Requires OOP Rate, a Billing permission, or the Biller role:
- Trip Value
- Dispatch Commissionable Amount
- Requires a Billing permission or the Biller role:
- Factoring Payments
- Factoring Fee
- Factoring Escrow
- Gross Margin
- Carrier Advances
- Carrier Detention
- Carrier Lumper
- Carrier Late Fee Reimbursement
- Carrier Other Accessorials
- Customer Detention
- Customer Lumpers
- Customer Late Fees
- Customer Other Accessorials
- Customer Linehaul
- Customer Fuel Surcharge
- Requires View Customer Rate, a Billing permission, or the Biller role:
- Customer Revenue
- Customer Freight Charge
- Commissionable Amount
- Carrier Rate
- Carrier All-in Rate
- Requires a Billing permission or the Biller role:
- Factoring Payments
- Factoring Fee
- Factoring Escrow
- Customer Payments
- Gross Margin
- Carrier Advances
- Carrier Detention
- Carrier Lumper
- Carrier Late Fee Reimbursement
- Carrier Other Accessorials
- Customer Detention
- Customer Lumpers
- Customer Late Fees
- Customer Other Accessorials
- Customer Linehaul
- Customer Fuel Surcharge