
👤 User roles with access: Dispatchers, Load Planners, and Admins
Summary
A trip sometimes has to change hands partway through: a relay, a driver swap, or a trailer dropped at a yard for someone else to pick up. Split cuts one trip into two at a location you choose. The first trip ends there and the second one starts there, so each leg can be dispatched and tracked on its own. Rearrange changes the order of a trip’s stops. Do it before you split: a split follows the stop order, so a stop that is out of place ends up on the wrong leg. You’ll find both buttons in two places:- Load Details page — in the trip’s toolbar, next to Map, Notes, and Docs.
- Dispatch Planner — at the bottom of the trip sidebar.

Rearrange a trip’s stops
Rearrange only appears on trips with three or more stops. A pickup-then-delivery trip has only one valid order.1
Open Rearrange
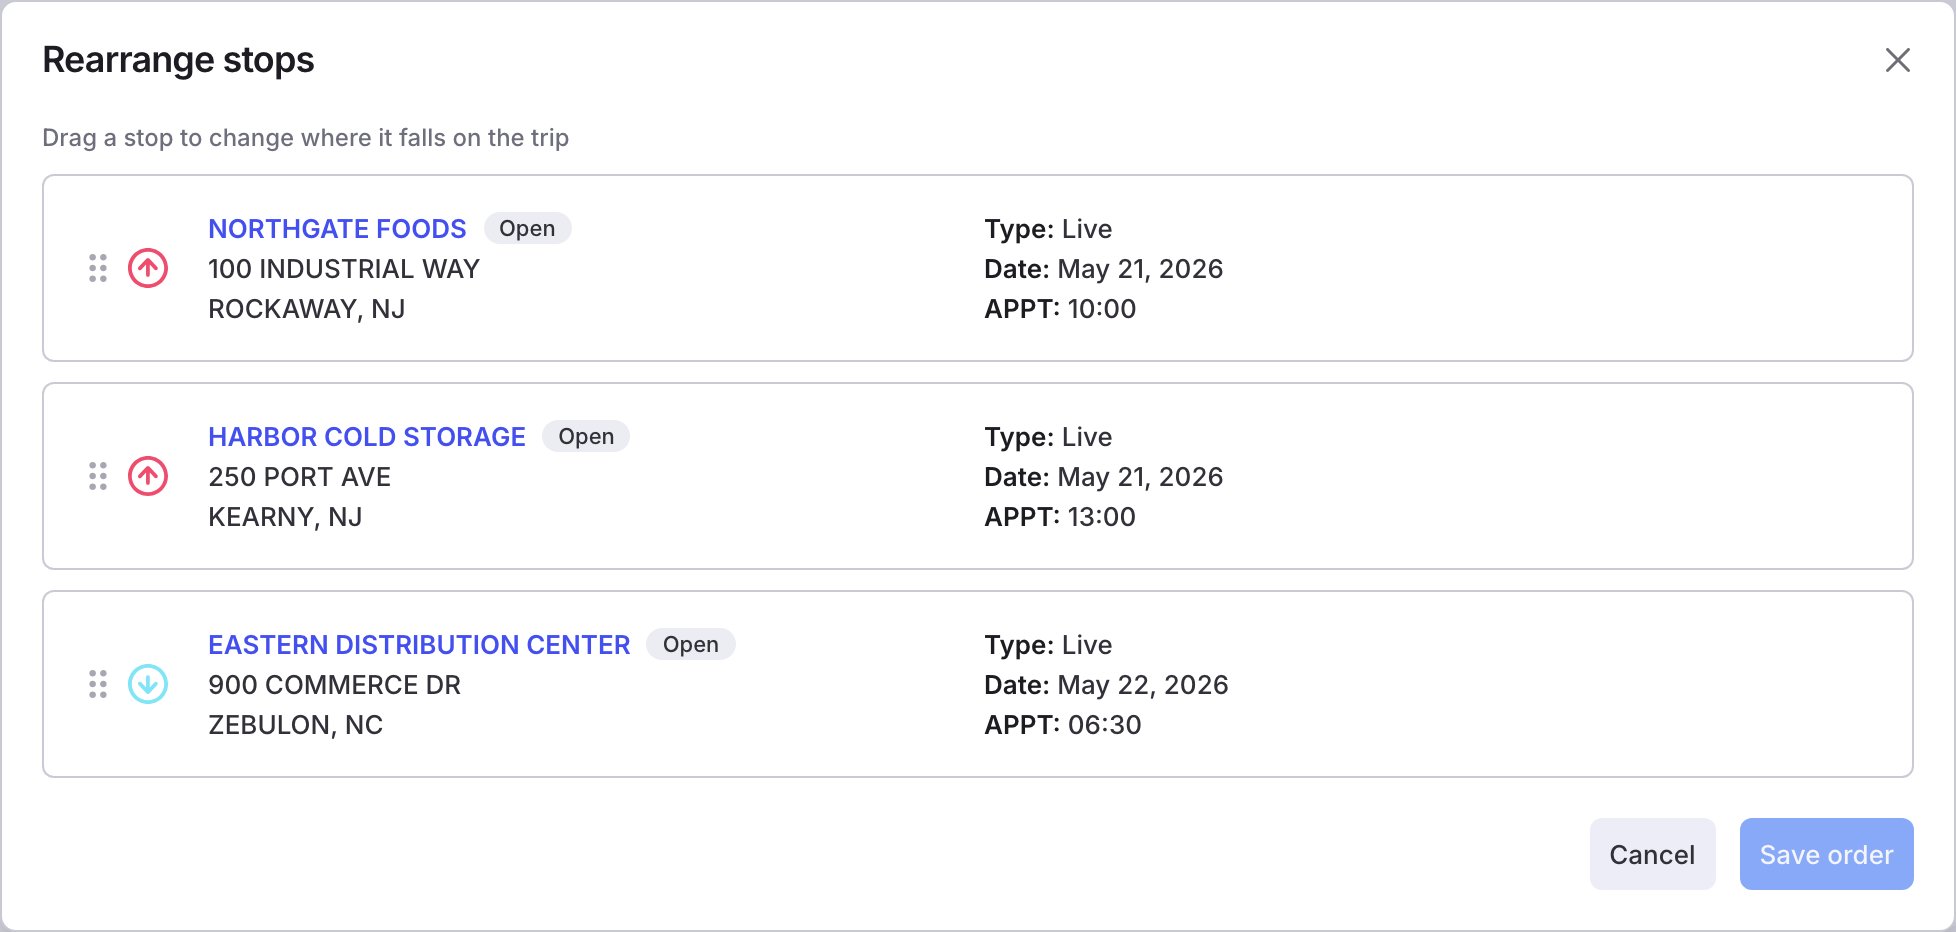
Click Rearrange. The Rearrange stops window lists the trip’s stops in their current order.
2
Move the stops into order
Drag a stop by its handle to where it belongs. With the keyboard: tab to a stop, press Space to pick it up, use the arrow keys to move it, and press Space again to drop it. Esc cancels the move.
3
Save the new order
Click Save order. The button stays greyed out until a stop has actually moved.
Split a trip
1
Open Split
Click Split. The Split trip window shows the trip’s stops with a dashed split row between them. That row is the point where the trip will be cut.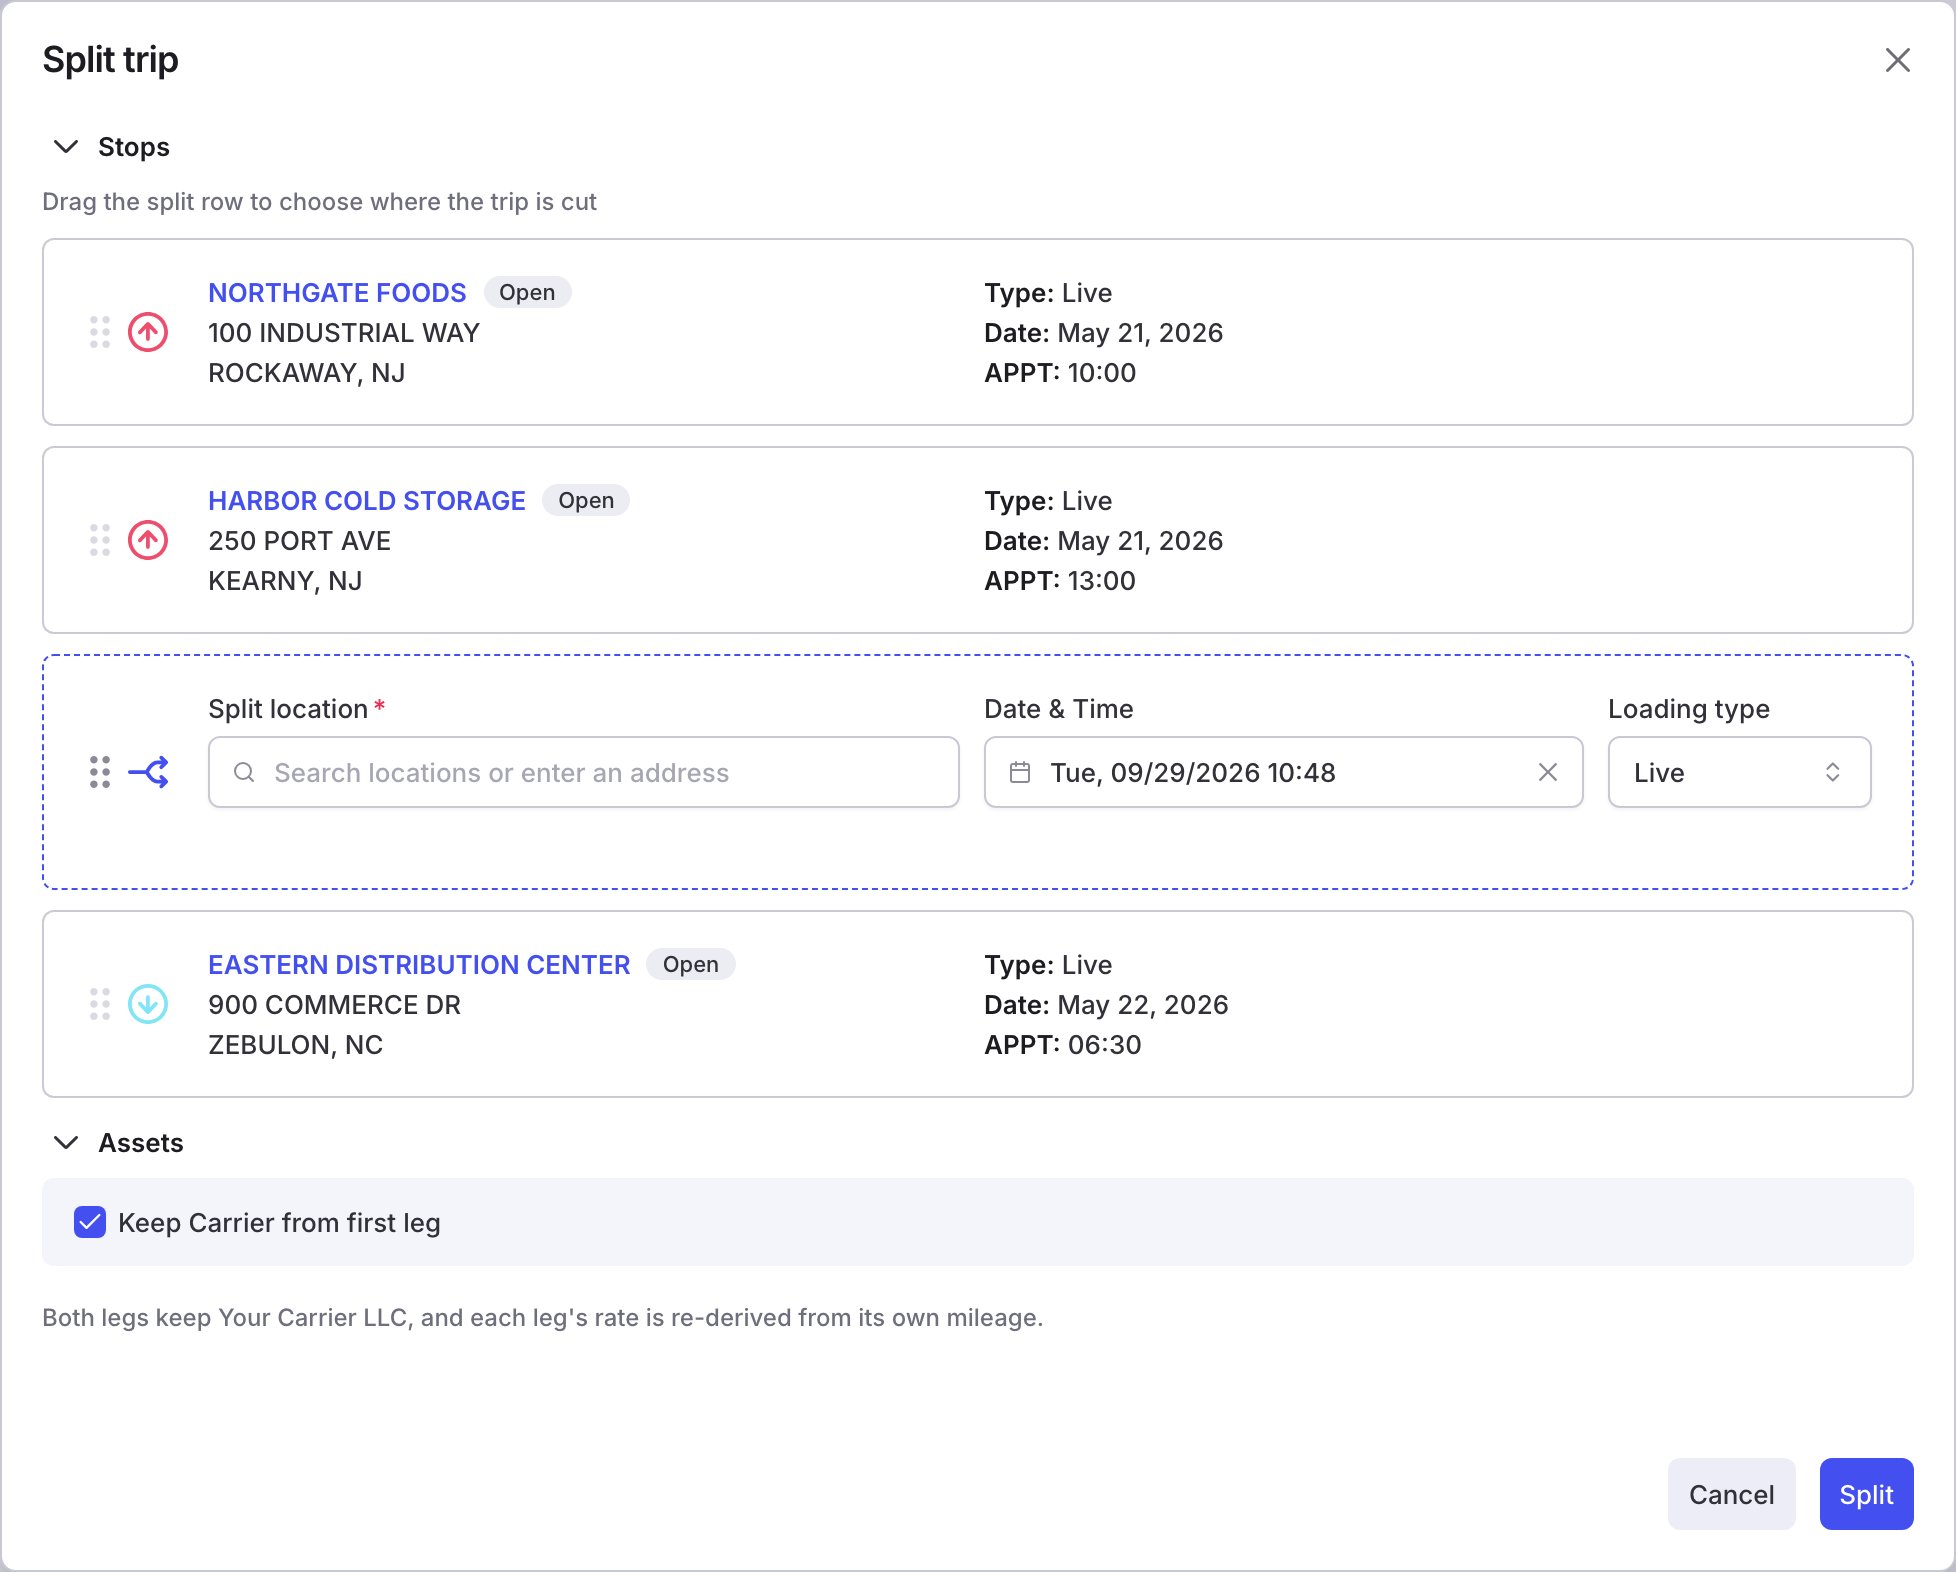
2
Choose the split location
In Split location, start typing a name or an address. Your company’s saved locations are listed first, with matching addresses underneath. Pick the one where the handoff happens.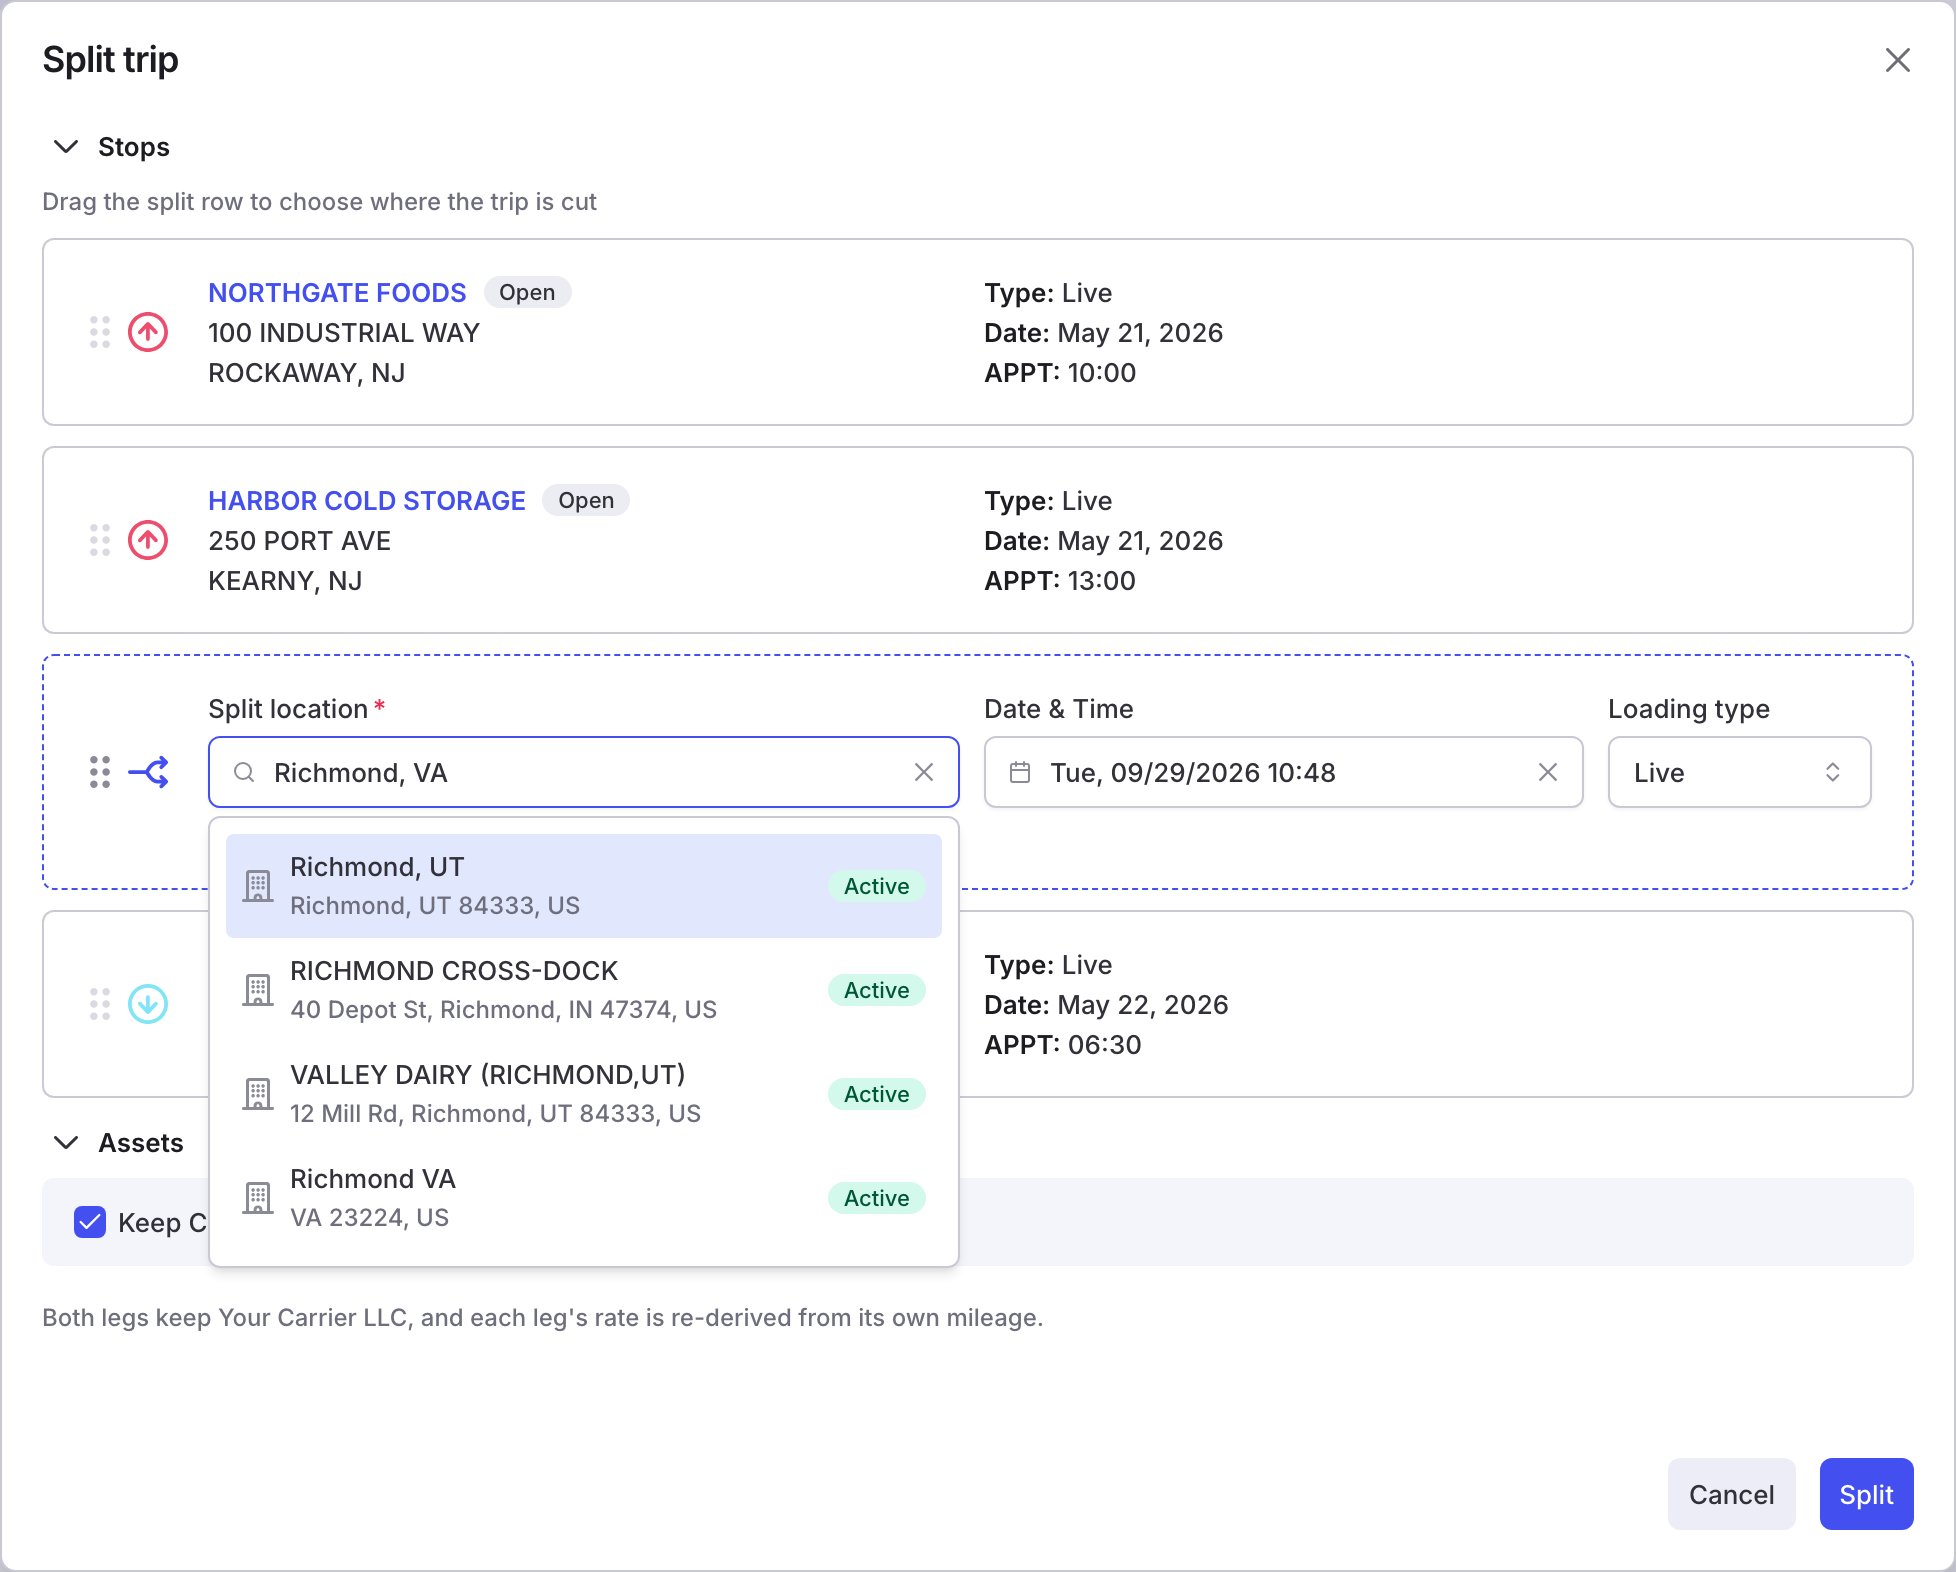
3
Drag the split row between the right stops
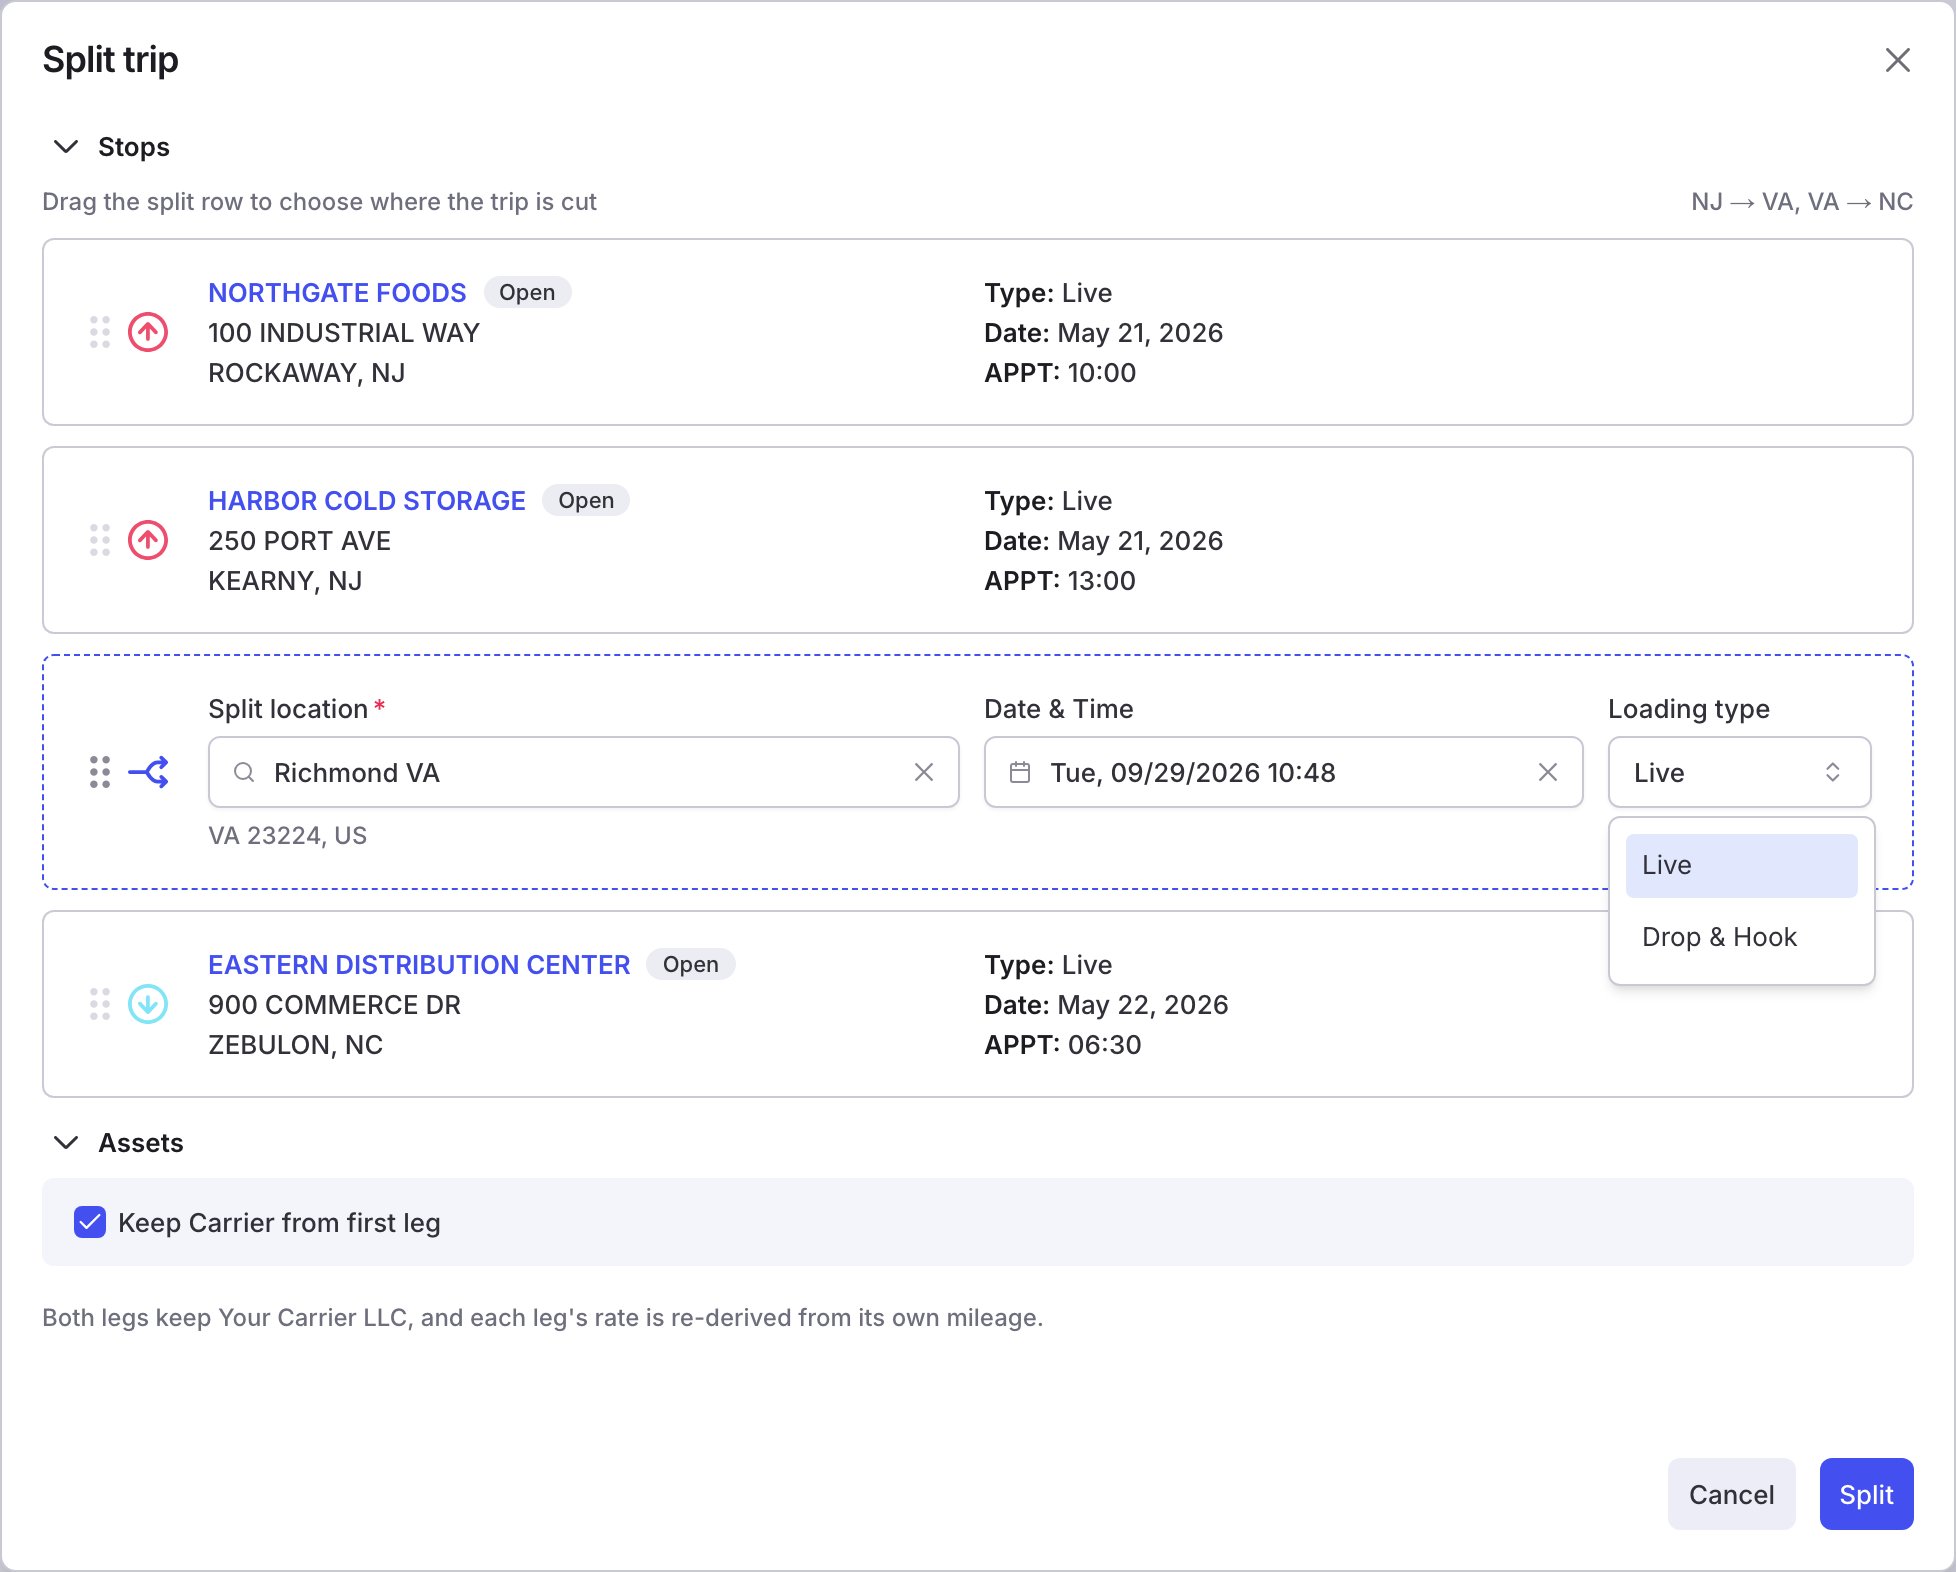
Drag the split row up or down by its handle until it sits between the last stop of the first leg and the first stop of the second. With the keyboard, tab to the split row’s handle, press Space, move it with the arrow keys, and press Space again. The line above the stops shows the two lanes you’ll end up with, for example NJ → VA, VA → NC.
4
Set the date and time
Date & Time starts at the current date and time. Change it to when the handoff will happen. This is the time of the split stop on both legs.
5
Choose the loading type
Loading type records how the freight changes hands at the split point:
- Live (the default) — the freight is unloaded and loaded while the truck waits. Both new stops are saved as Live.
-
Drop & Hook — the first driver drops the trailer and the next one hooks it. The delivery that ends the first leg is saved as Drop, and the pickup that starts the second leg is saved as Hook.
6
Check the carrier and trailer
The Assets section appears when the trip has a carrier or a trailer:
- Keep Carrier from first leg — keeps the same carrier on the second trip. The line under it explains how each leg’s rate is worked out.
- Carry trailer [number] to the second trip — starts unchecked. Leave it unchecked and the trailer stays on the first trip only. Tick it to put the same trailer on the second trip.
7
Split
Click Split. Alvys confirms with Trip split, and the load now shows two trips: the first ends at the split location and the second starts there.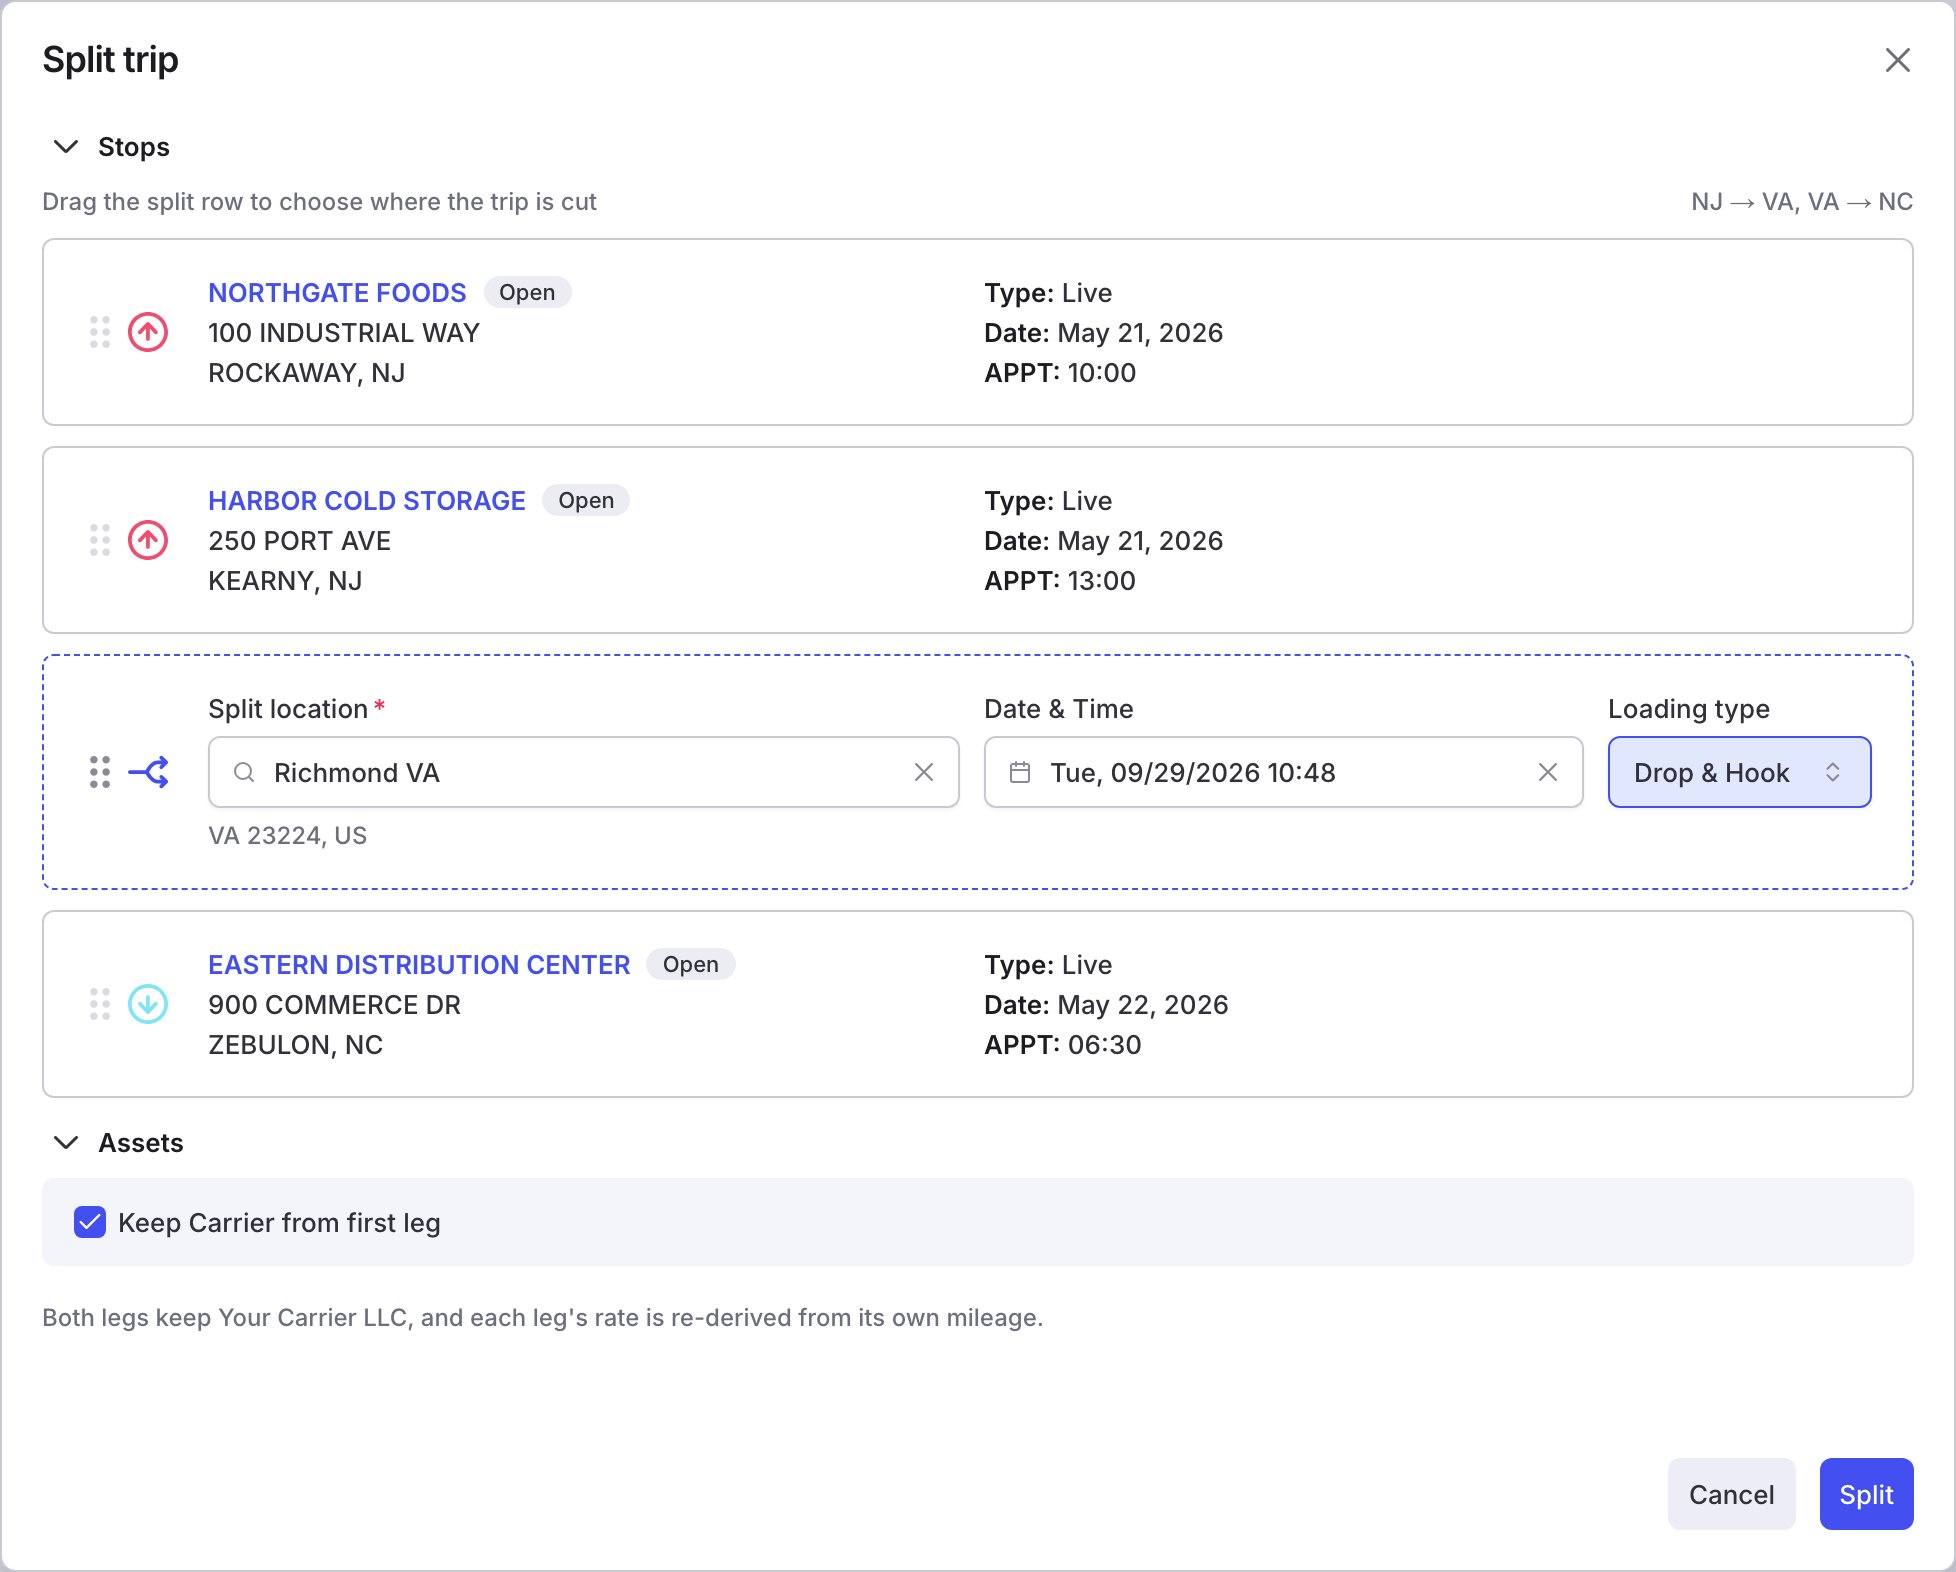
Loading type and the trailer checkbox are separate choices. Picking Drop & Hook does not tick or untick Carry trailer to the second trip. You’ll need to set both.
Splitting into more than two trips
Each split cuts one trip in two. To turn a trip into three or more legs, split it, then split the leg that still needs cutting.When a trip can’t be split
The Split trip window tells you why when a split isn’t allowed. The most common reasons:- A driver or owner operator has already been paid for the trip, or it is already on a pay stub.
- The trip is cancelled or marked TONU.
- The trip has already been delivered or moved further along. At that point only an Admin can split it; otherwise ask Support.
What happens to the trailer
If you set a trailer on one leg after the split, Alvys offers to apply it to the other legs of the same split. Legs with no trailer yet are filled in, and any leg that already has a different trailer is left as it is. Removing a driver or a truck from a leg doesn’t remove the trailer along with them. When you do want the trailer removed too, use the separate Also remove trailer checkbox.Assigning a trailer that is already committed to another trip over the same period raises a warning naming the other trip. It does not stop you from continuing. See Equipment conflict warnings.